Installation based on Rancher
Installation prerequisite:
- Recommendedhelm version:3.0+
- Recommendedk8s version:1.19+
- Root partition disk guarantee 50G+
- Make sure that server
80, 443, 6060, 6443, 7070, 8443ports can be accessed and not occupied - Server has NFS client installed
caution
Note:When installing Rainbond based on Rancher, be sure to close the Nginx Ingress of the currently installed cluster, because the Rainbond gateway node will use its port

start install:
Install NFS client
No need to repeat the installation if there is an NFS client on the server
yum -y install nfs-utils # Cenots system
apt-get install nfs-common # ubuntu system
Add Rainbond to the app store
- First, switch to the cluster example:cluster test where Rainbond is installed
- Click Apps & Marketplace > Repositories > Create
- Edit the name of the current application, fill in the URL
of the store's GIT address https://github.com/goodrain/rainbond-chart.git, fill in master by default for the branch, and then click Create

- After the addition is complete, click Repositories to return to the home page, and check that the store status is Active, which means success
Add Rainbond application to the cluster
- Click Apps & Marketplace > Charts
- Select only the added store name, select the Rainbond application, and click install
- Select the rbd-system namespace (which needs to be created in advance), then click next


- Entering the stage of customizing Values.yaml, the details of the file can be edited by referring to values.yaml document After modifying the configuration, click install
danger
Warning:If there is a public IP, you must modify the gatewayIngressIPs item in the Values.yaml file to ensure that the deployed application can be accessed normally.

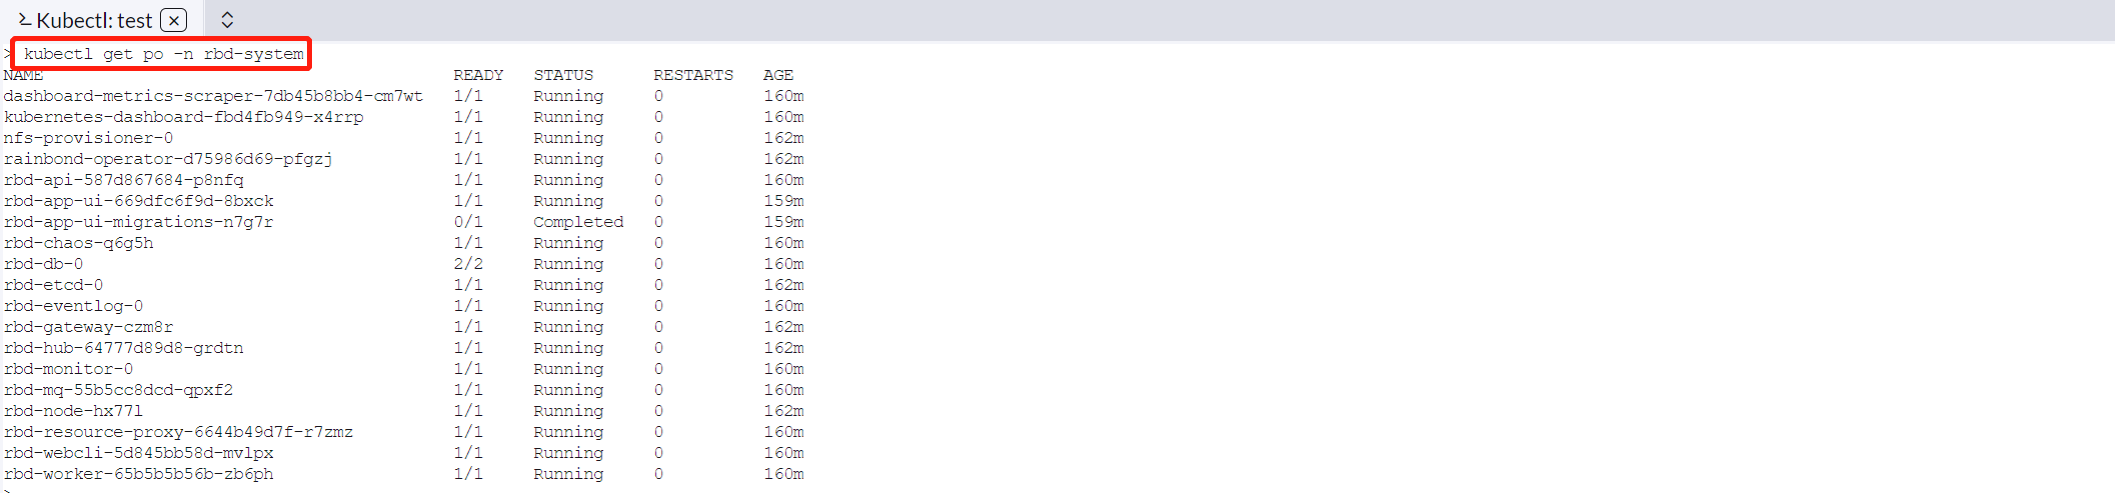
Verify installation
- Press the kubectl shell button on the Rancher ui interface to enter the terminal command line to view the status of the pod. The successful status is as follows
- After the installation is successful, you can access the Rainbond console through
$gatewayIngressIPs:7070If there is no public IP, it will be the intranet IP :7070.
Installation Troubleshooting
- If the installation process does not complete for a long time, please refer to document Helm Installation Troubleshooting Guidefor troubleshooting.
Next step
Refer toQuick Startto deploy your first application.