yaml file identification and creation
This document describes how to create k8s resources by uploading yaml files, and convert specific resources into the Rainbond abstraction layer. The following is a detailed list of supported resources by:
- Component type resource:This type of resource will be converted into a component in Rainbond after the import is complete.
| k8s resources | Rainbond model |
|---|---|
| Deployment | stateless components |
| StatefulSet | stateful components |
| CronJob | Scheduled task component |
| Job | task component |
- Component attribute resource:Some attribute values carried by the component type resource itself, such as Port, ConfigMap, volume, etc.
| component properties | Rainbond model |
|---|---|
| nodeSelector | Component special properties |
| labels | Component special properties |
| tolerations | Component special properties |
| volumes | Component special properties |
| serviceAccountName | Component special properties |
| affinity | Component special properties |
| volumeMount | Component special properties/configuration files |
| privileged | Component special properties |
| port | component port |
| HorizontalPodAutoscalers | Component scaling strategy |
| env | Environment variables/component special properties |
| HealthyCheckManagement | Component Health Check |
If the volumeMount of the component is mounted with a volume of type ConfigMap, it will be converted into the configuration file of the component.
If env is a reference type, Rainbond's environment variables will not be recognized.
- All other resources are placed in the k8s resources under the application view.
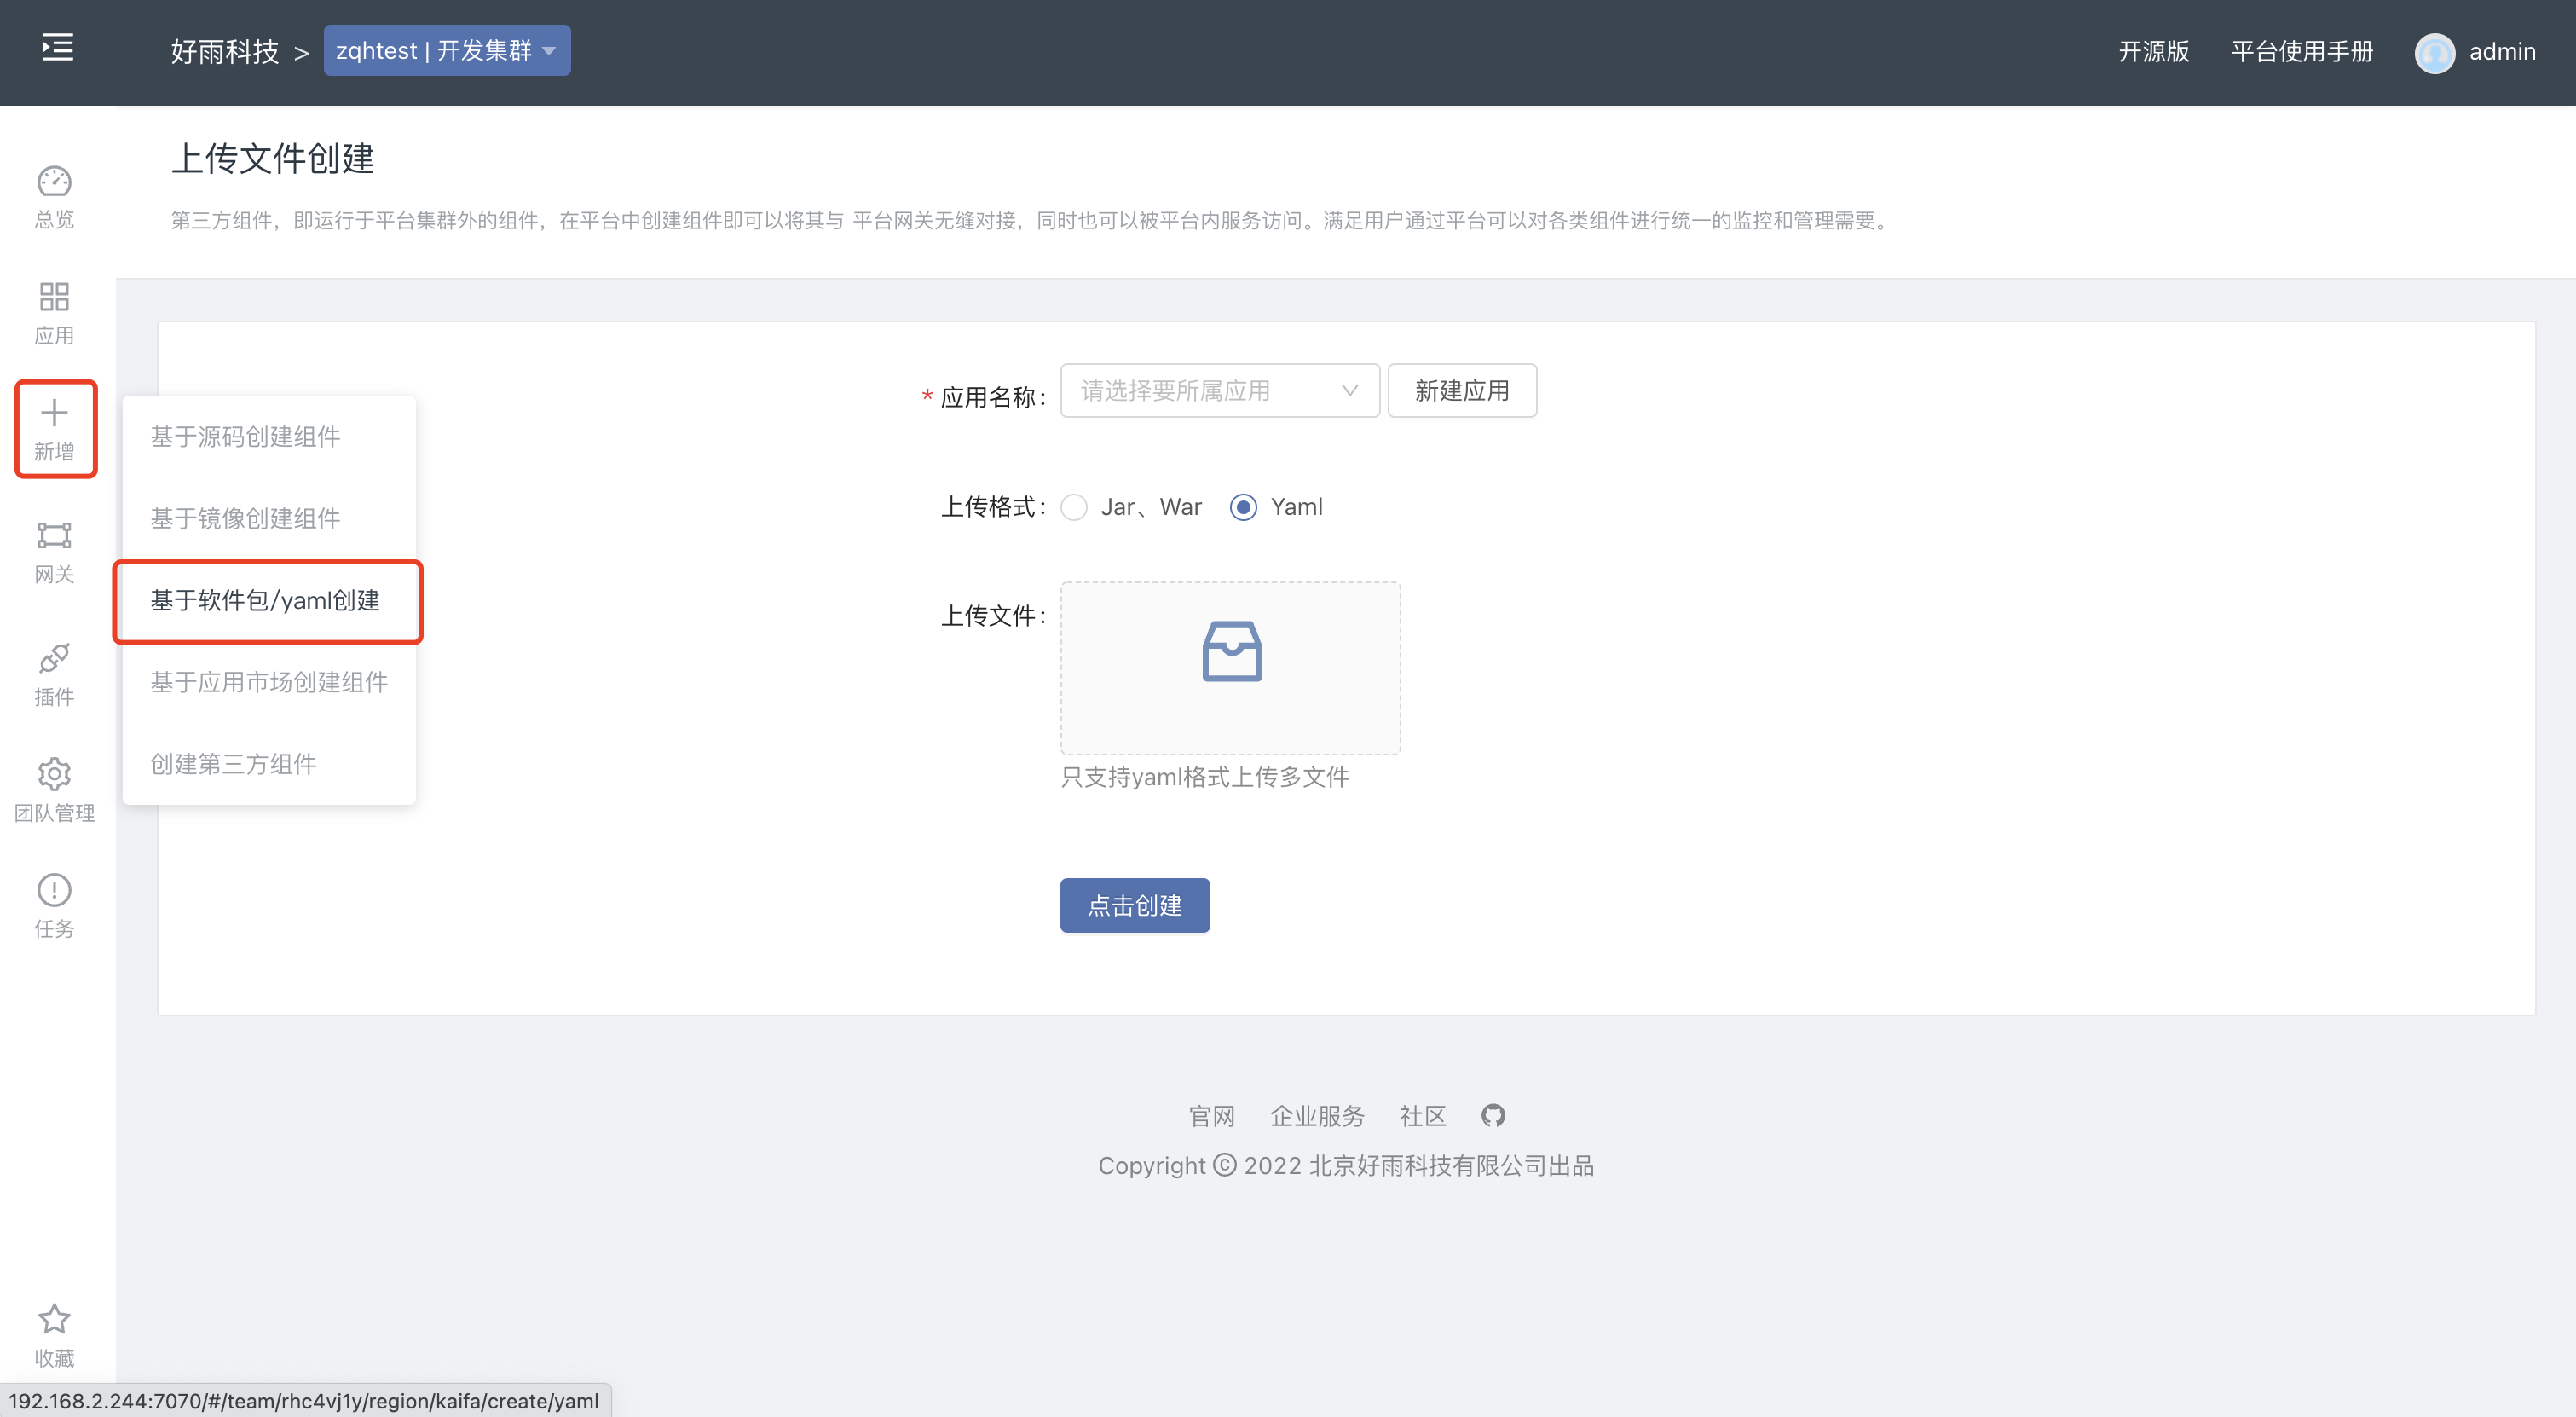
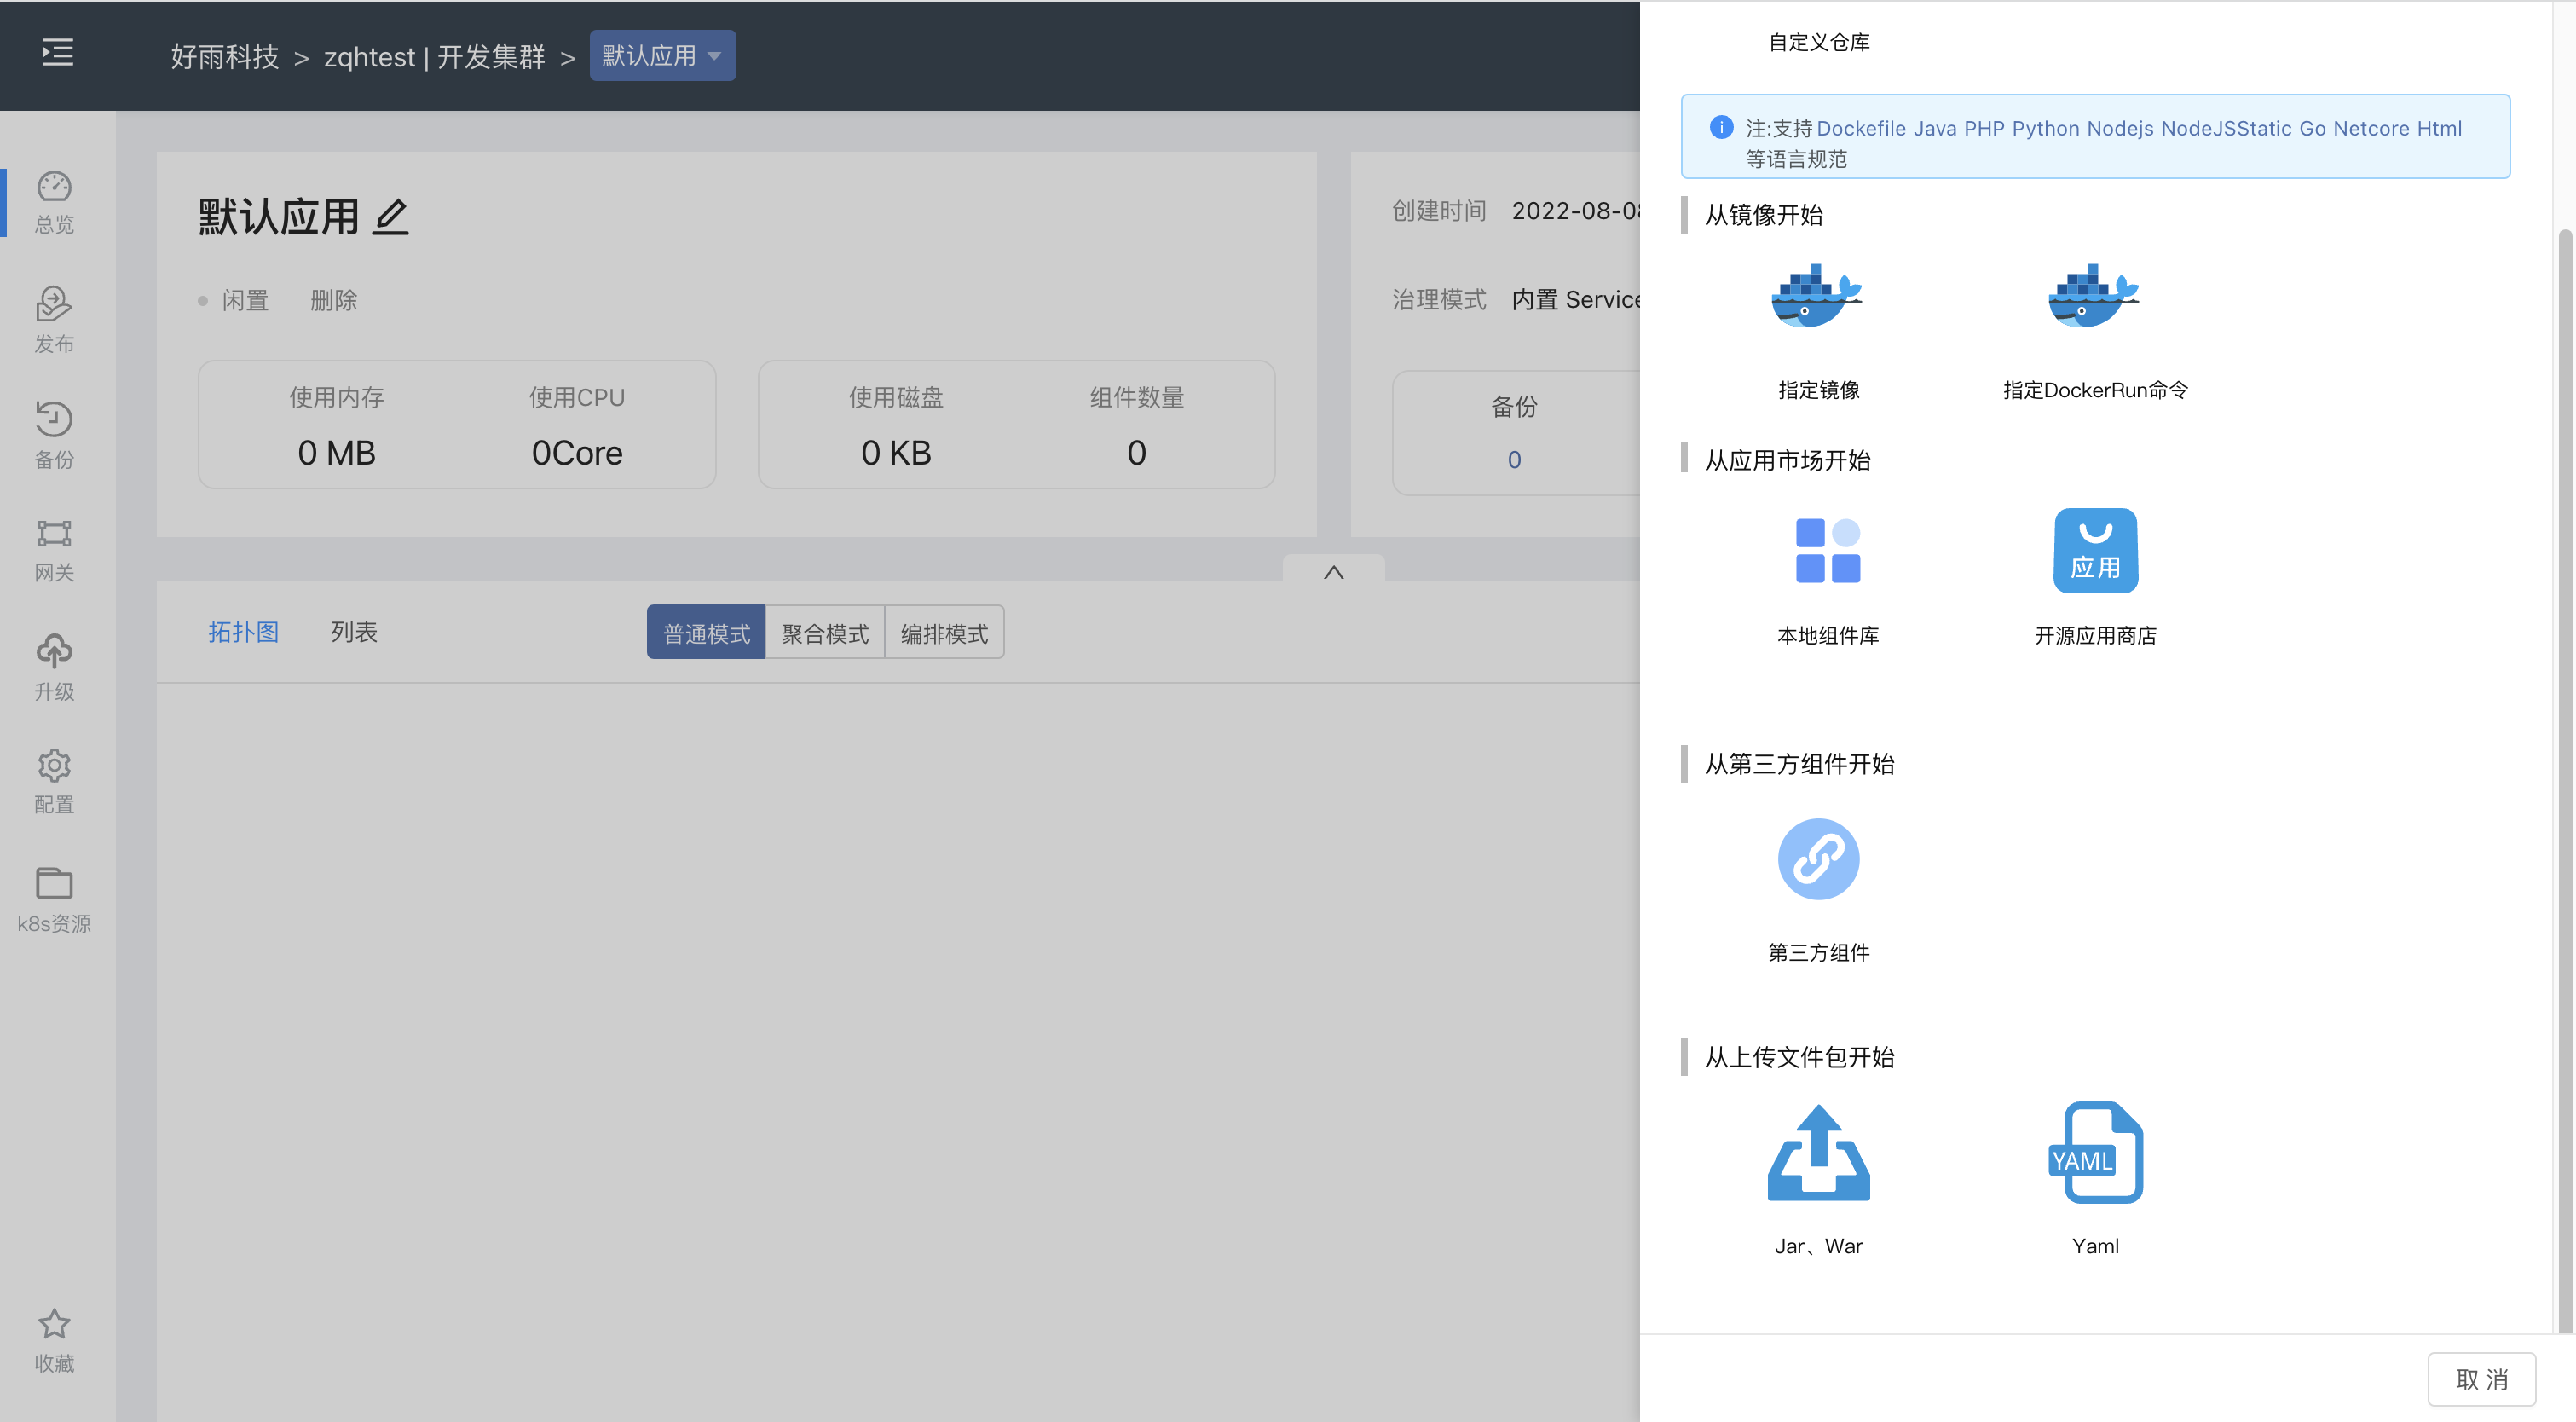
There are two entries for yaml file resource identification and creation, which are newly added in the team view and added components in the application view.
- team view
- application view
Preconditions
Familiar with the yaml file of k8s resources, prepare one or more yaml files of k8s resources.
Check that the current team and app are where you want to be created.
The operation in the application view is the same as that in the team view. Here, the team view is used as an example for demonstration.
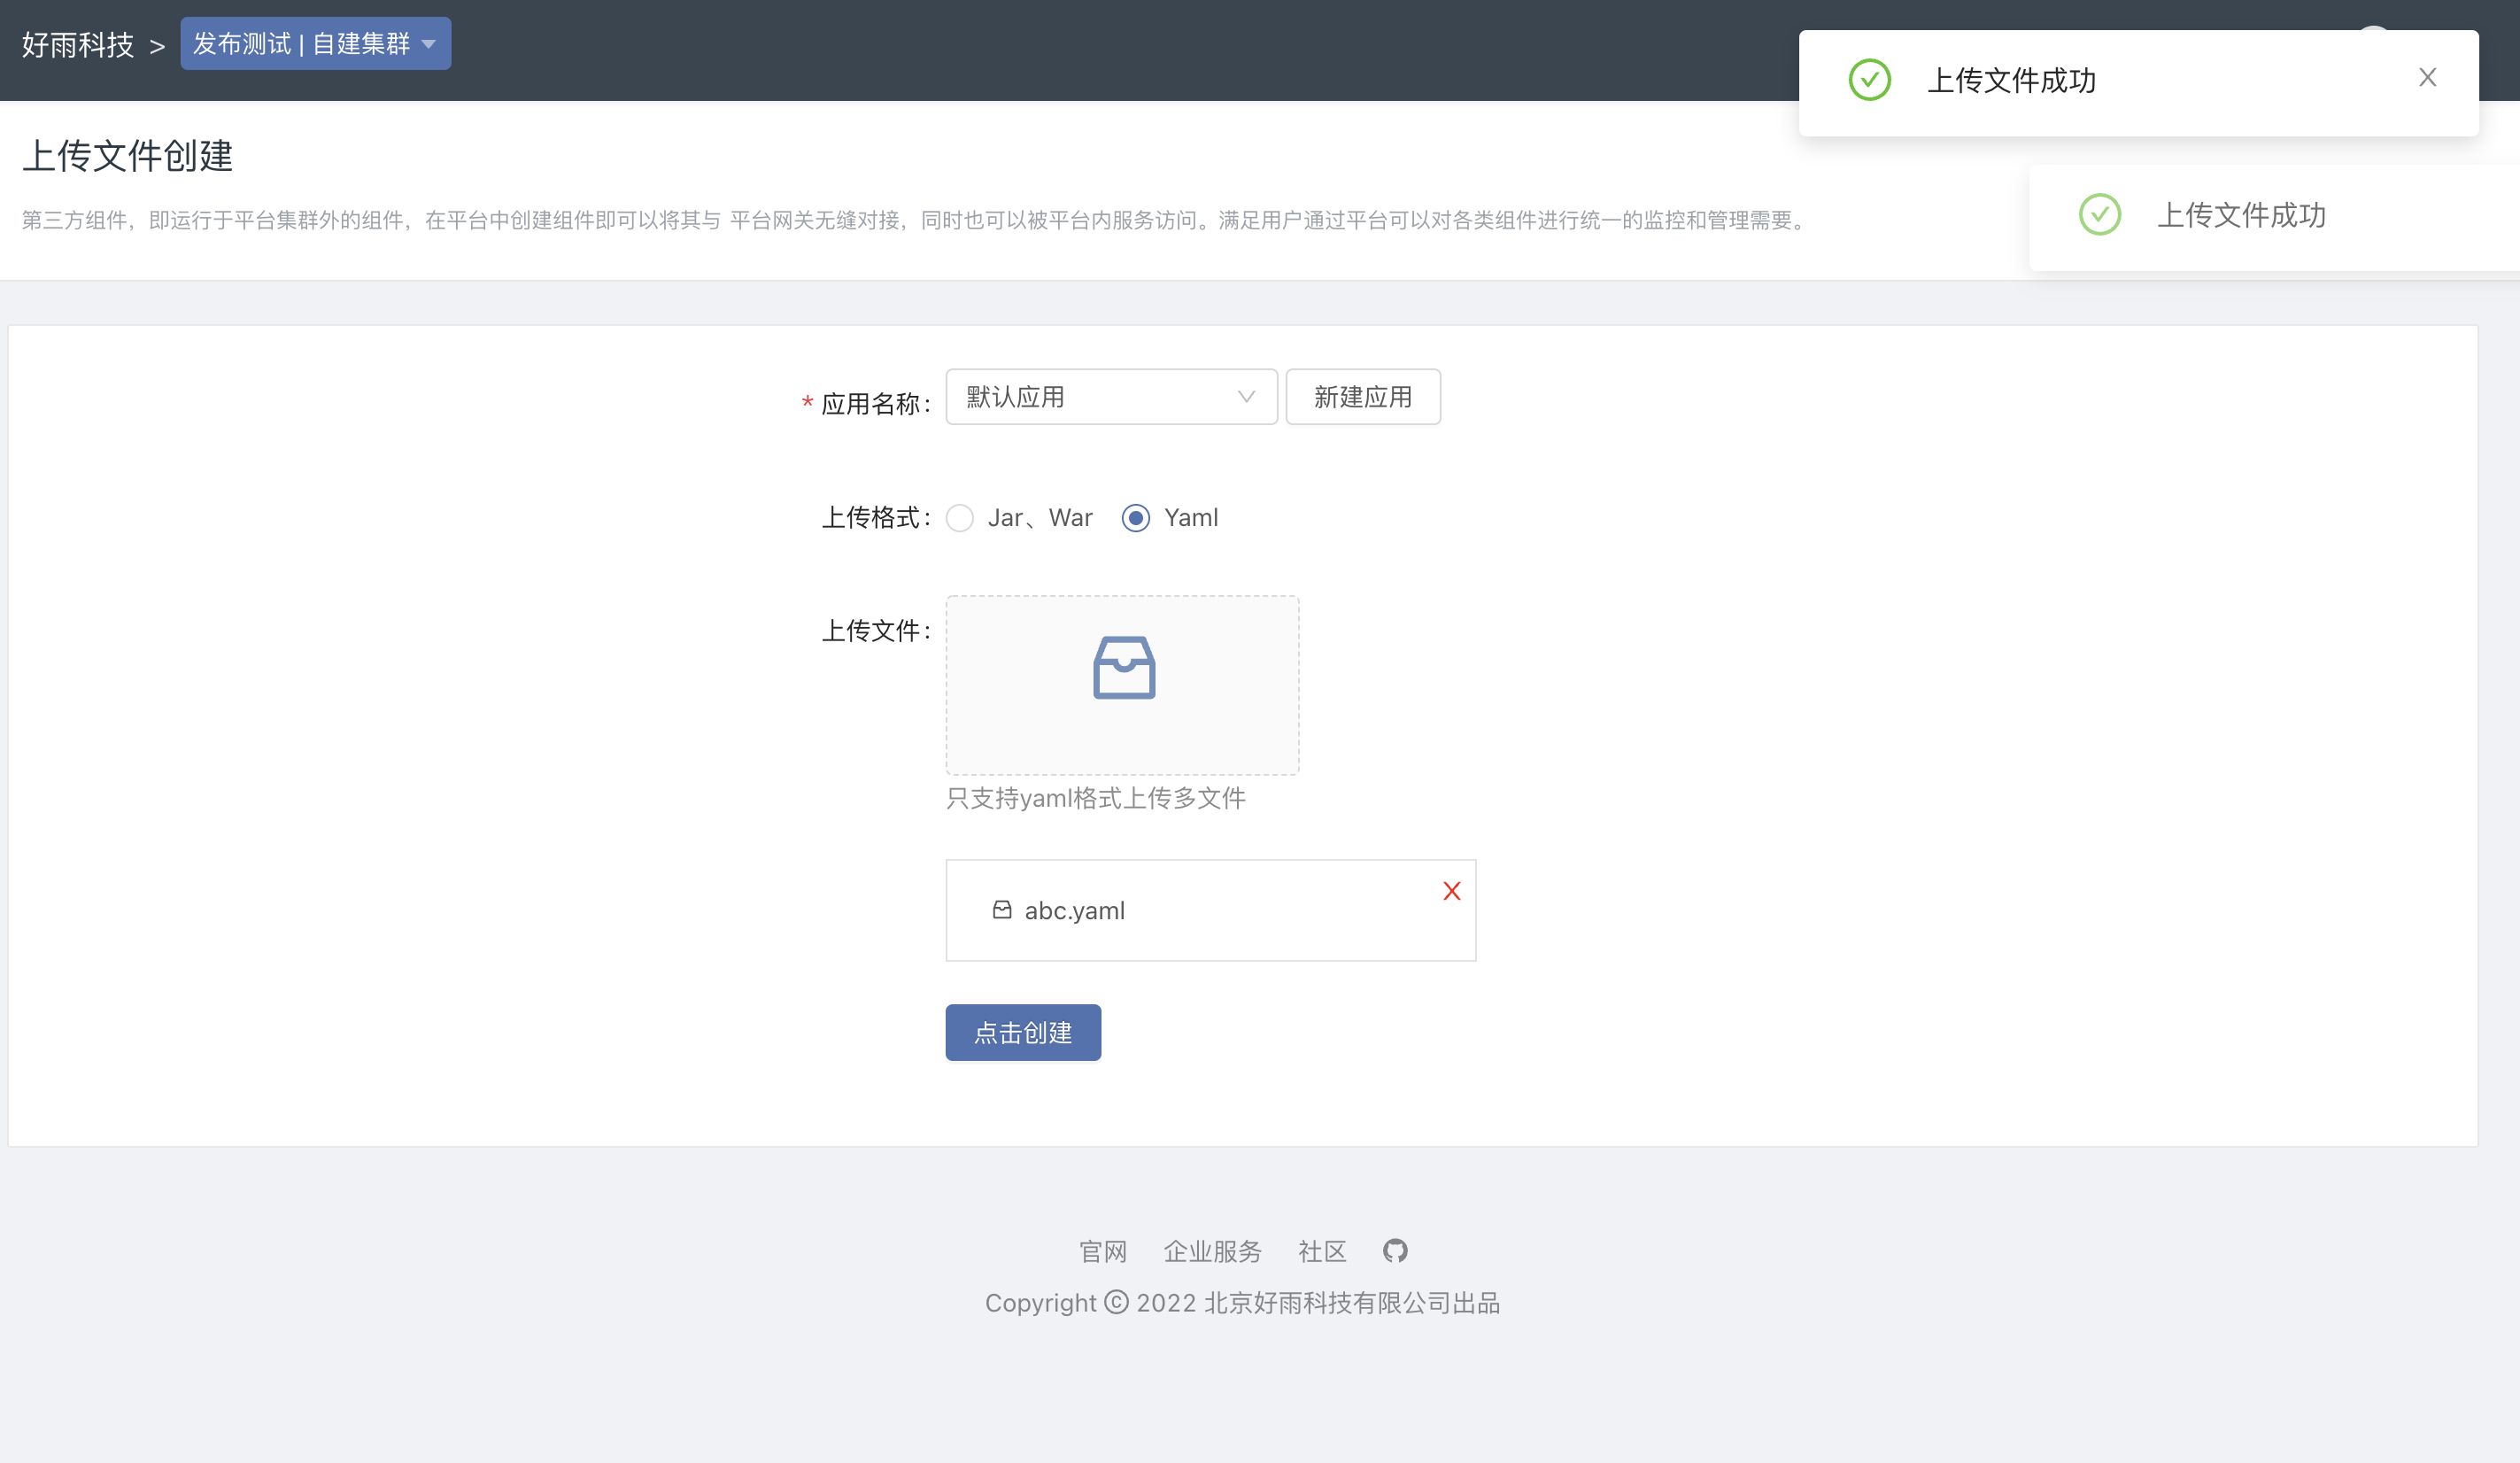
upload yaml
Select Apply.
upload yaml file
After confirming that it is correct, click Create.
k8s resource name
This part can identify all k8s resources, some resources can be converted into Rainbond resources, and other resources are all stored in the k8s resources under the application.
After checking, click Next
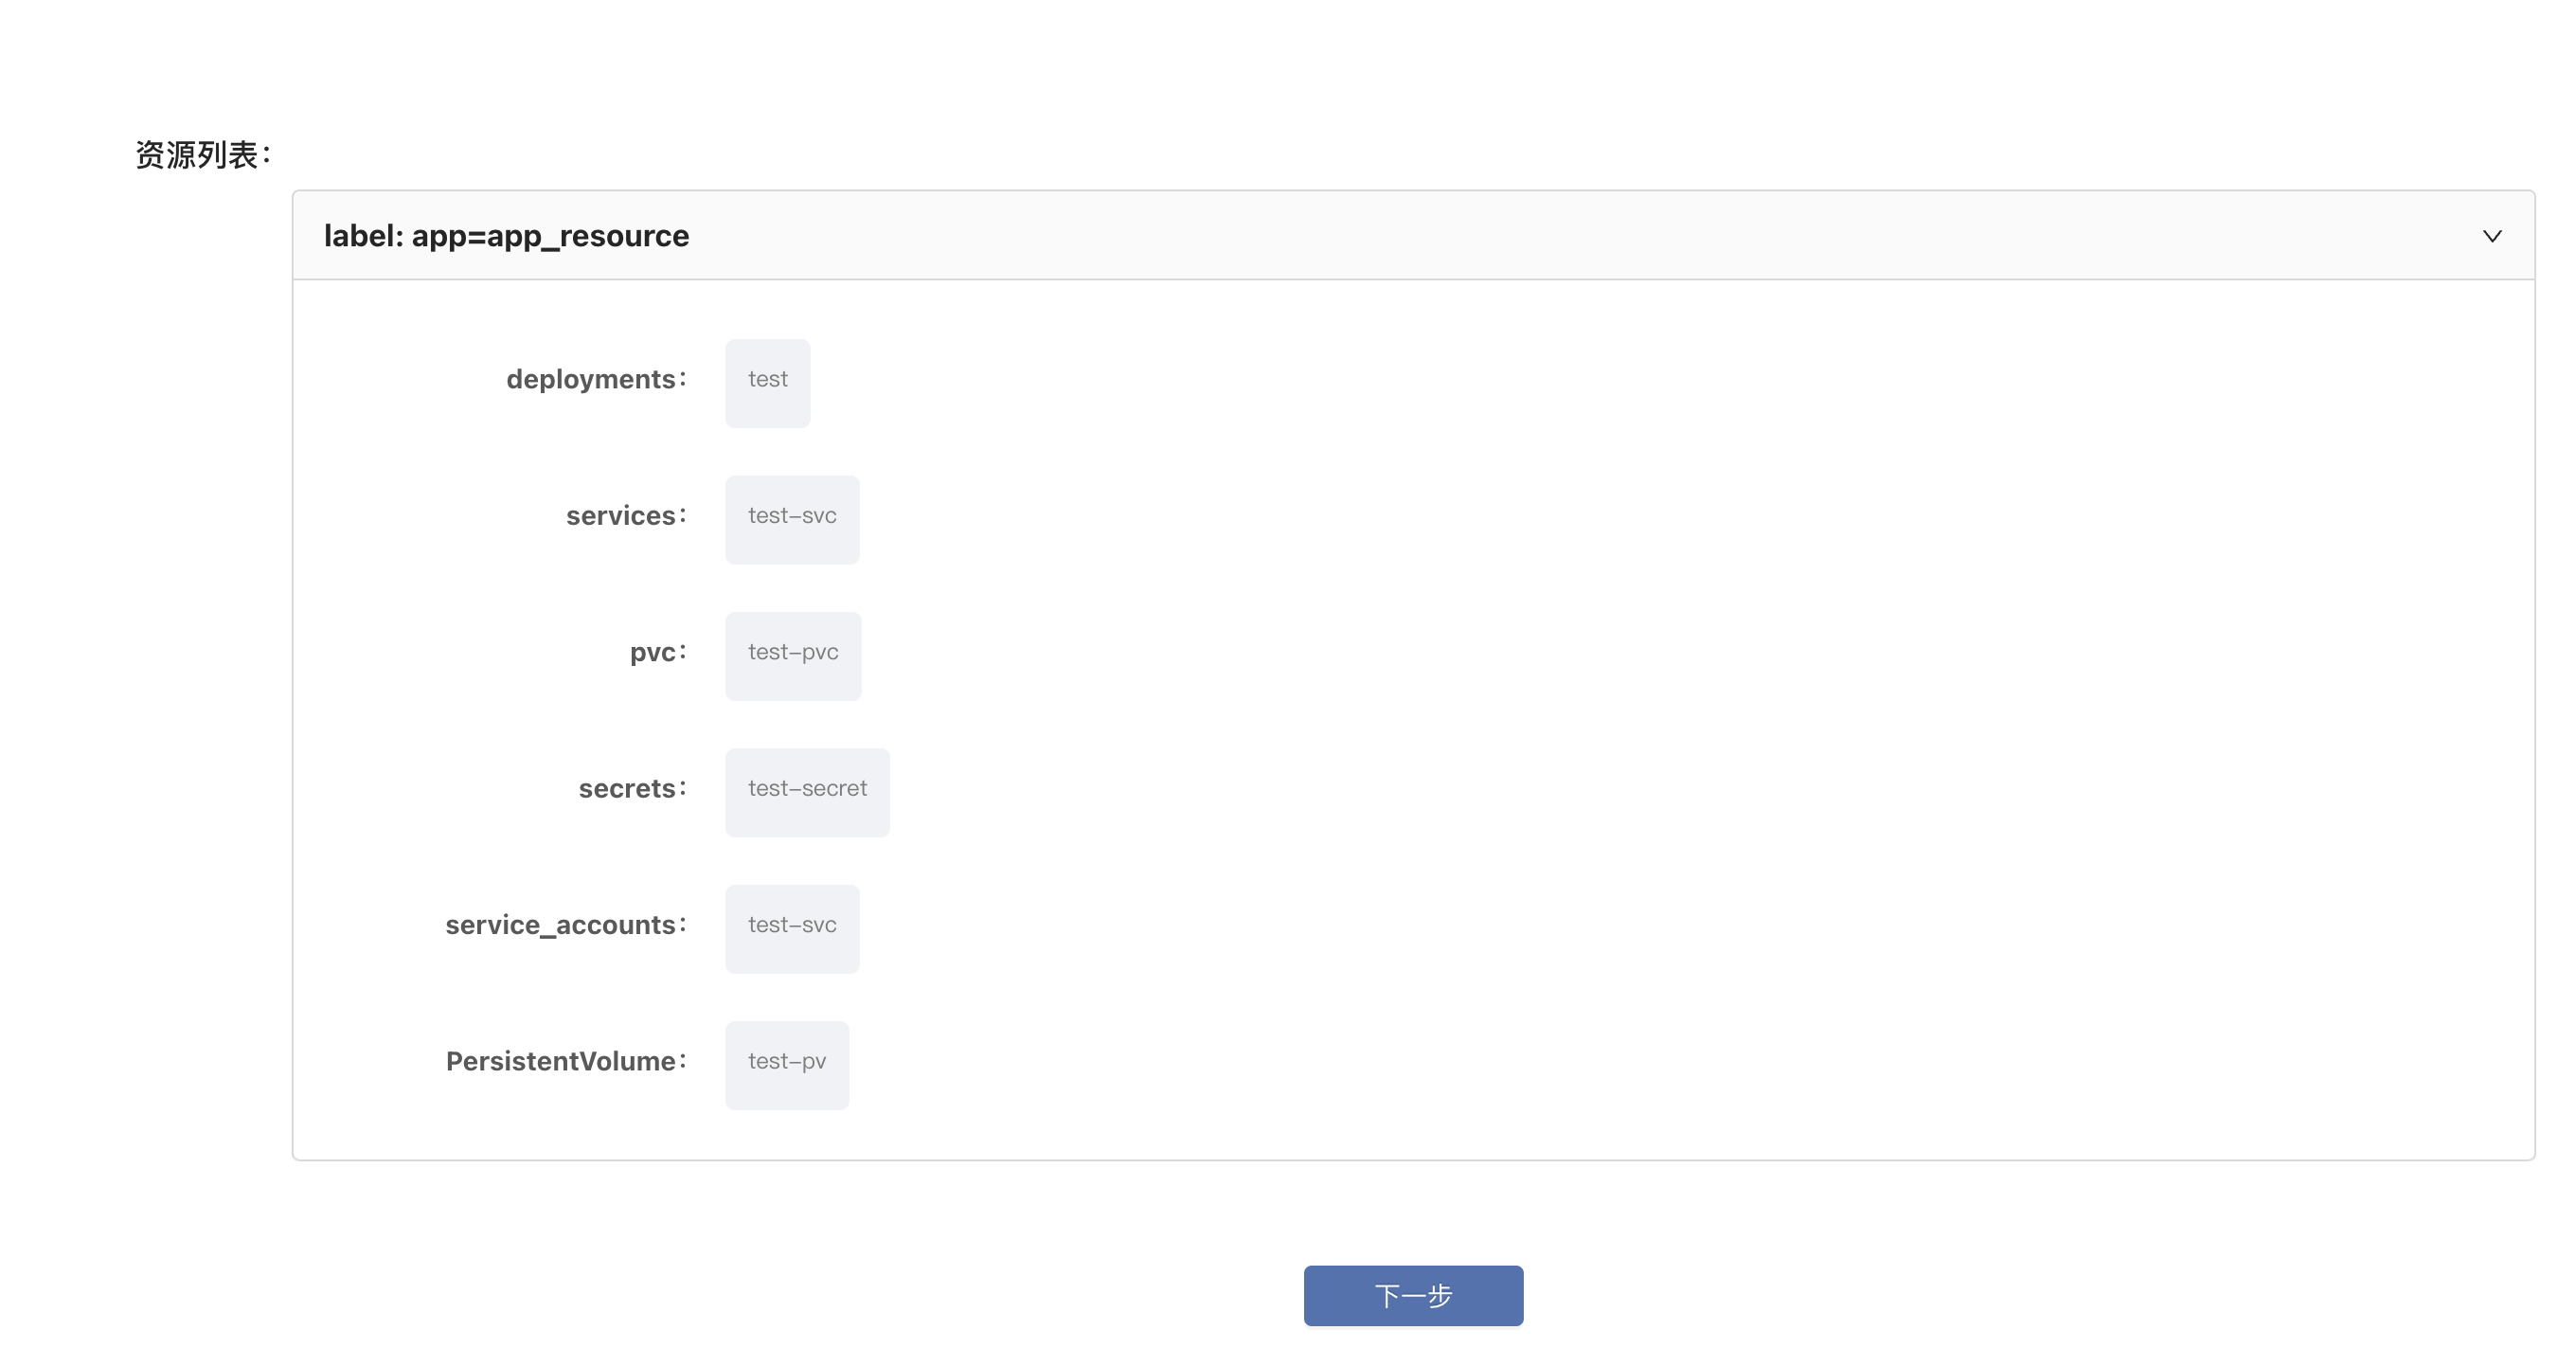
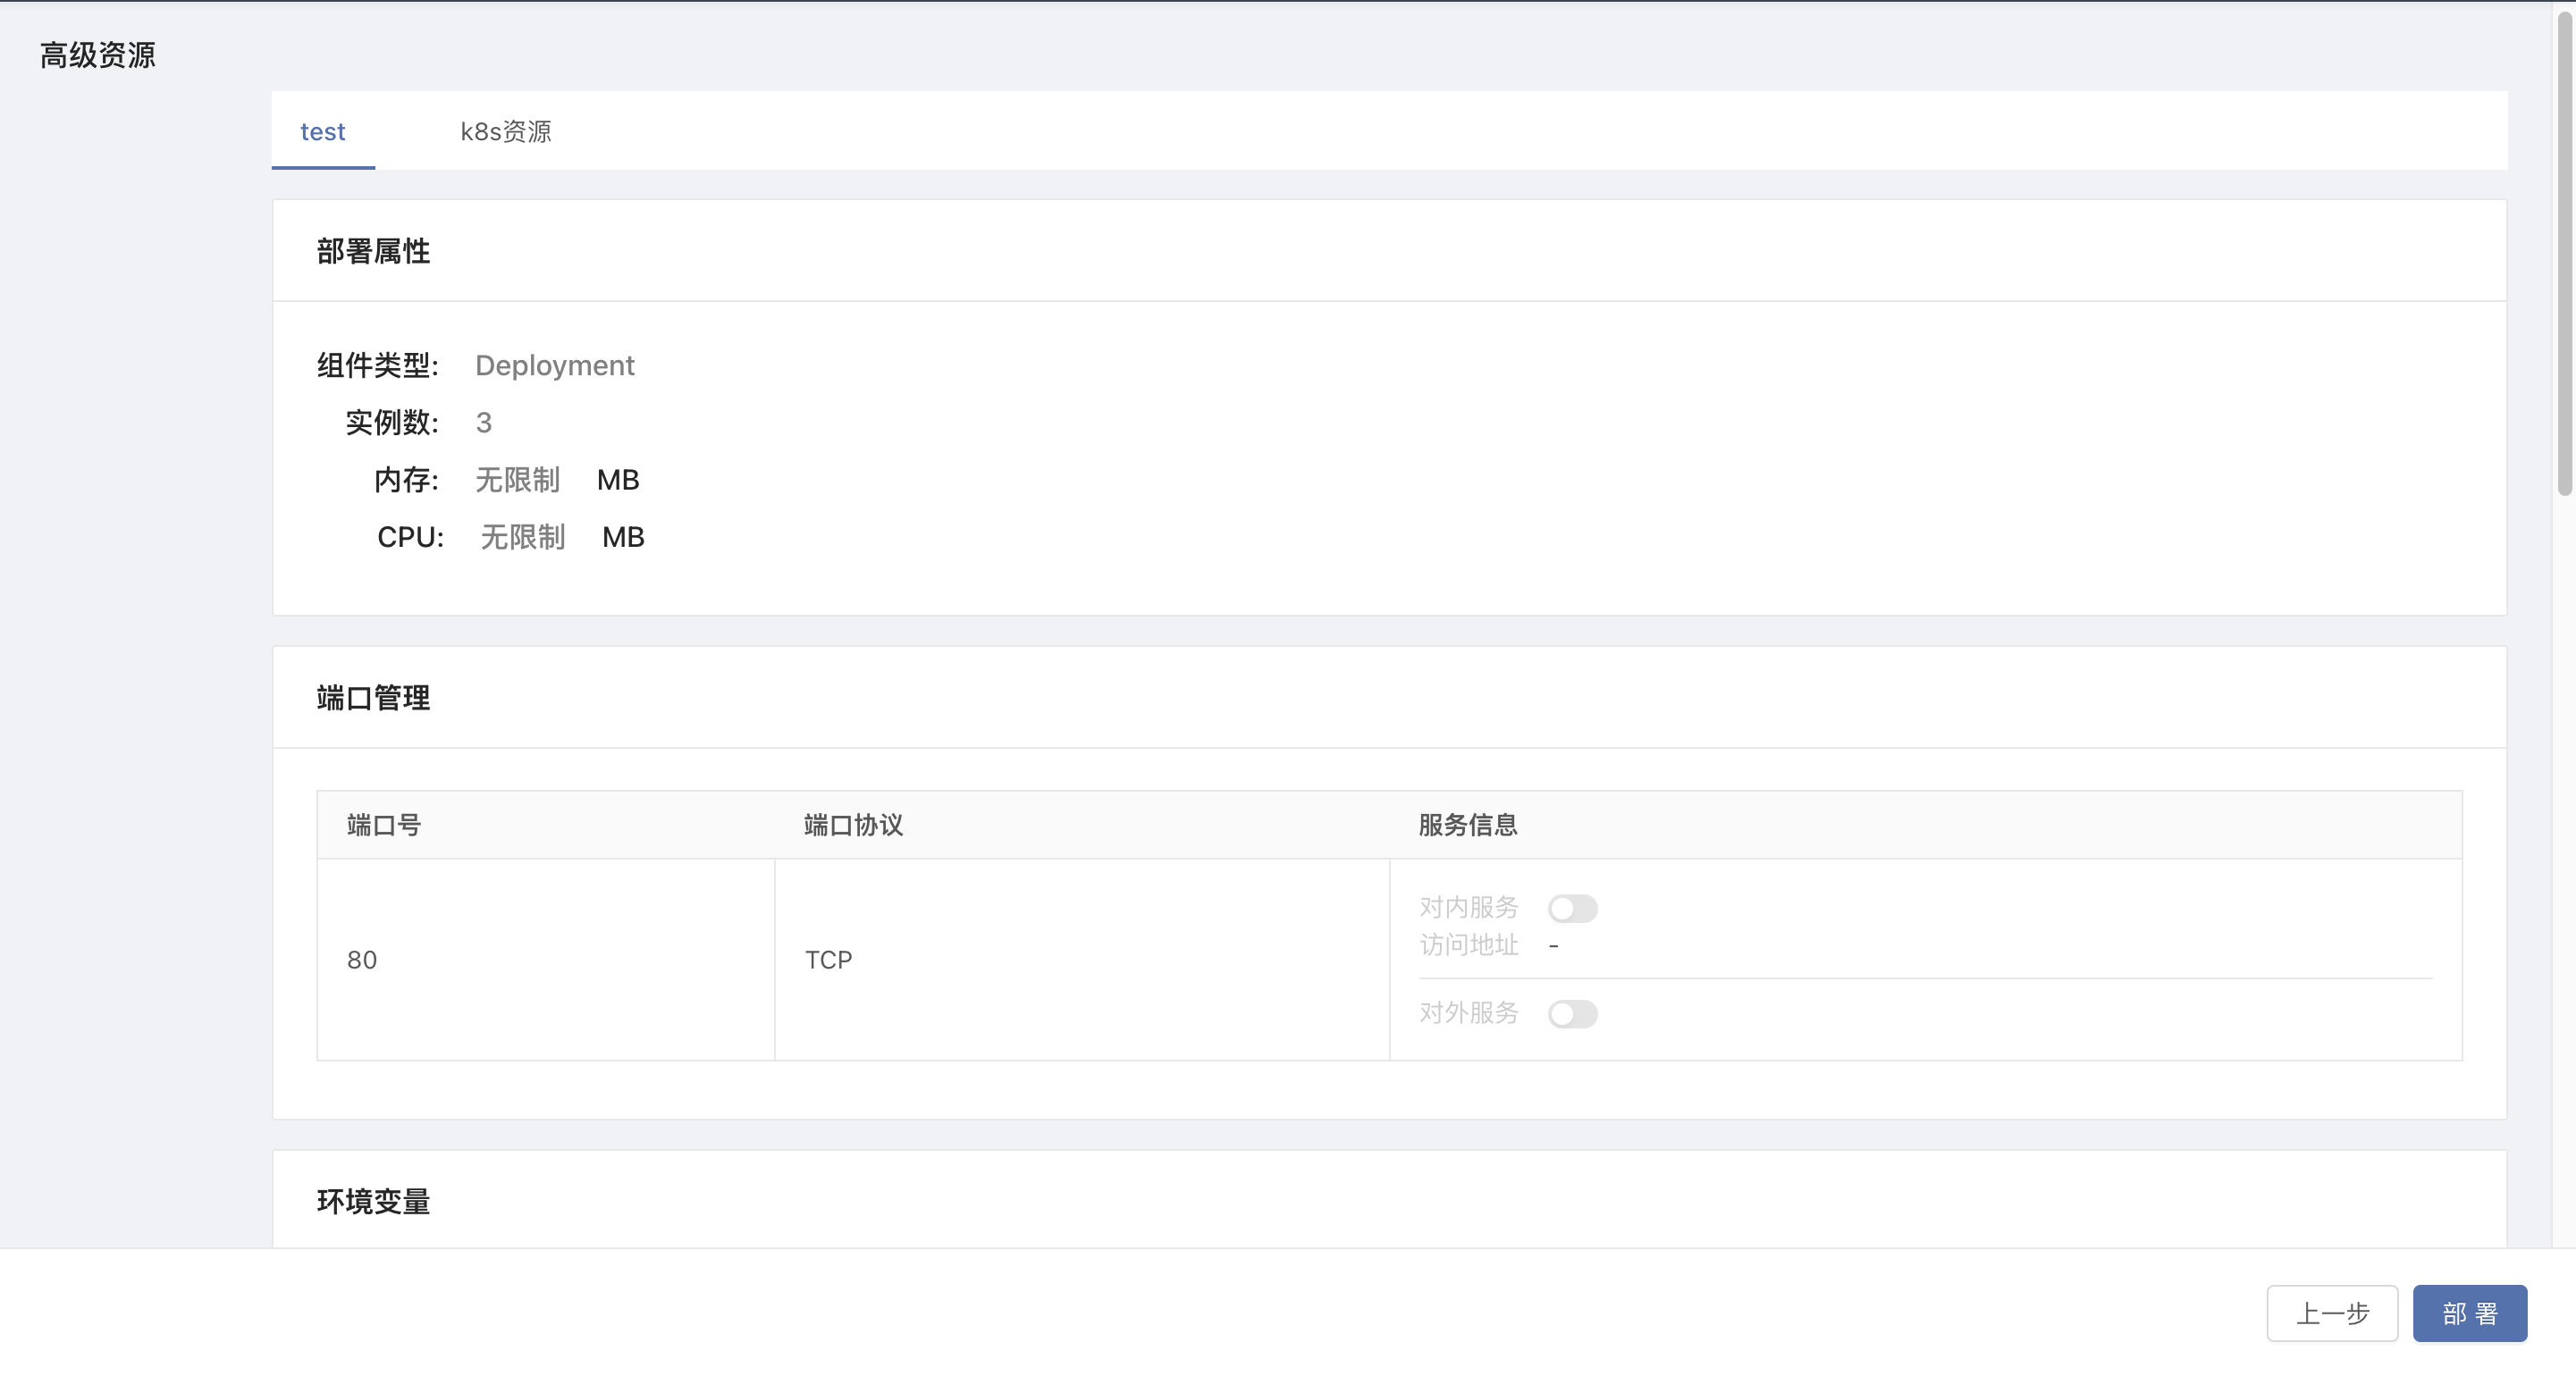
Advanced Resource Identification
On this page, you can see how the resources you deploy in the cluster correspond to each Rainbond module.Among them, Deployment, Job, Cronjob, and StatefulSet will be identified as components, and other resources such as Service and HPA will be correspondingly resolved into k8s resources in the application view.
After confirmation, click Deploy.
Deployment requires operations such as data storage, pulling images, etc., so it will take a long time. After a little wait, it will jump to the application view.
