Kubernetes 初始化集群配置
默认情况下的 RKE 集群参数配置都是默认生成的,用户只需填写 IP 端口 节点类型。但在一些高级场景中,用户需要自定义集群参数,比如修改 网络插件 Kubelet参数 等等,自定义RKE 集群参数配置将对您有用。
为了以最佳实践的参数自动化配置,减小用户门槛。在您未完全掌握 RKE 配置参数配置之前,请谨慎配置。
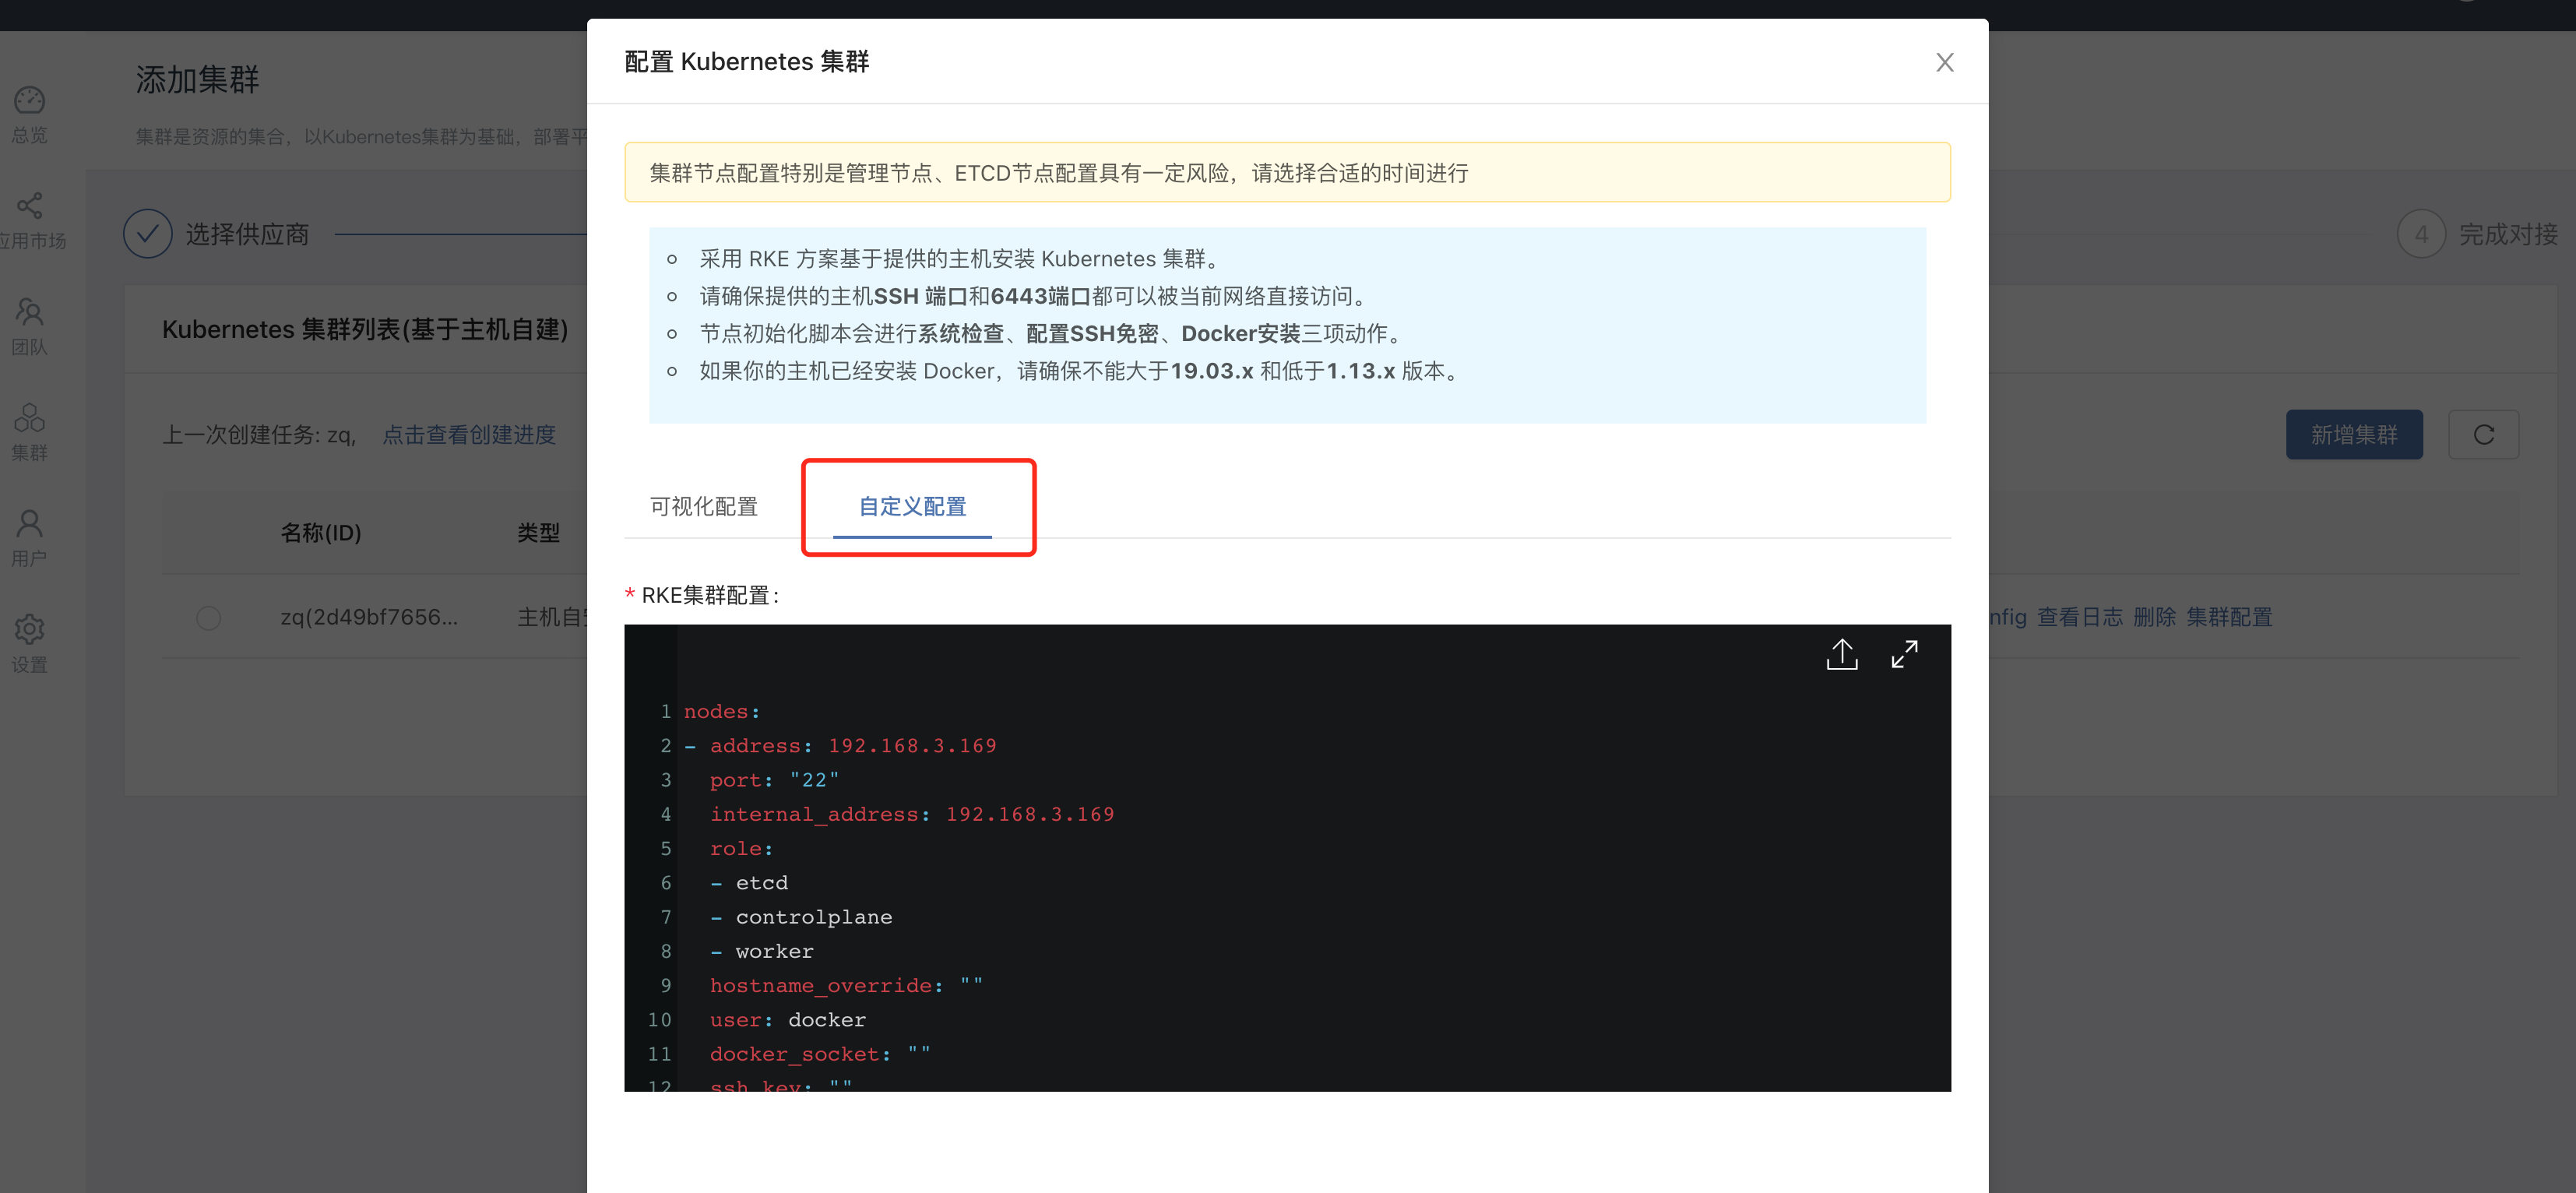
如上图所示,当进入 Kubernetes 集群配置页面时,点击红框处进行 Kubernetes 集群参数配置。
配置示例如下:
nodes:
- address: 192.168.3.169
  port: "22"
  internal_address: 192.168.3.169
  role:
  - etcd
  - controlplane
  - worker
  hostname_override: ""
  user: docker
  docker_socket: ""
  ssh_key: ""
  ssh_key_path: ~/.ssh/id_rsa
  ssh_cert: ""
  ssh_cert_path: ""
  labels: {}
   # app: ingress
  taints: []
   # - key: test-key
   #   value: test-value
   #   effect: NoSchedule


# 检测docker版本,为false时如果docker版本RKE不支持则安装失败
ignore_docker_version: false
# 集群级密钥证书路径
ssh_key_path: ""
ssh_cert_path: ""
# Enable use of SSH agent to use SSH private keys with passphrase
# This requires the environment `SSH_AUTH_SOCK` configured pointing
# to your SSH agent which has the private key added
ssh_agent_auth: false
# 私有镜像仓库
private_registries:
- url: registry.com
  user: Username
  password: password
  is_default: true
# 堡垒机/跳板机 配置
bastion_host:
  address: x.x.x.x
  user: docker
  port: 22
  ssh_key_path: /home/user/.ssh/bastion_rsa
# or
#   ssh_key: |-
#     -----BEGIN RSA PRIVATE KEY-----
#
#     -----END RSA PRIVATE KEY-----

# 设置 Kubernetes 集群名称
cluster_name: mycluster

# Kubernetes 版本
kubernetes_version: ""

# 系统镜像
system_images:
  etcd: ""
  alpine: ""
  nginx_proxy: ""
  cert_downloader: ""
  kubernetes_services_sidecar: ""
  kubedns: ""
  dnsmasq: ""
  kubedns_sidecar: ""
  kubedns_autoscaler: ""
  coredns: ""
  coredns_autoscaler: ""
  nodelocal: ""
  kubernetes: ""
  flannel: ""
  flannel_cni: ""
  calico_node: ""
  calico_cni: ""
  calico_controllers: ""
  calico_ctl: ""
  calico_flexvol: ""
  canal_node: ""
  canal_cni: ""
  canal_controllers: ""
  canal_flannel: ""
  canal_flexvol: ""
  weave_node: ""
  weave_cni: ""
  pod_infra_container: ""
  ingress: ""
  ingress_backend: ""
  metrics_server: ""
  windows_pod_infra_container: ""
  aci_cni_deploy_container: ""
  aci_host_container: ""
  aci_opflex_container: ""
  aci_mcast_container: ""
  aci_ovs_container: ""
  aci_controller_container: ""
  aci_gbp_server_container: ""
  aci_opflex_server_container: ""
services:
  etcd:
    # etcd目录和文件 自定义uid/gid
    uid: 52034
    gid: 52034
    # 如果使用外部etcd则填写以下内容
    # path: /etcdcluster
    # external_urls:
    #   - https://etcd-example.com:2379
    # ca_cert: |-
    #   -----BEGIN CERTIFICATE-----
    #   xxxxxxxxxx
    #   -----END CERTIFICATE-----
    # cert: |-
    #   -----BEGIN CERTIFICATE-----
    #   xxxxxxxxxx
    #   -----END CERTIFICATE-----
    # key: |-
    #   -----BEGIN PRIVATE KEY-----
    #   xxxxxxxxxx
    #   -----END PRIVATE KEY-----

  kube-api:
    # 在Kubernetes上创建的IP范围必须与 kube-controller 中的 service_cluster_ip_range 匹配
    service_cluster_ip_range: 10.43.0.0/16
    # 为NodePort服务公开不同的端口范围
    service_node_port_range: 30000-32767
    pod_security_policy: false
    image: ""
    extra_args: {}
    extra_binds: []
    extra_env: []
    win_extra_args: {}
    win_extra_binds: []
    win_extra_env: []
    pod_security_policy: false
    always_pull_images: false
    secrets_encryption_config: null
    audit_log: null
    admission_configuration: null
    event_rate_limit: null
  kube-controller:
    # CIDR池用于为集群中的pod分配IP地址
    cluster_cidr: 10.42.0.0/16
    # 在Kubernetes上创建的服务的IP范围必须与kube-api中的service_cluster_ip_range匹配
    service_cluster_ip_range: 10.43.0.0/16
    # 添加一些额外的参数
    extra_args:
    # 例如:设置日志输出的级别为调试级别
    v: 4
  kubelet:
    # 集群域
    cluster_domain: cluster.local
    # DNS服务IP地址
    cluster_dns_server: 10.43.0.10
    # 如果交换处于开启状态,则失败
    fail_swap_on: false
    # 配置 pod-infra-container-image
    pod-infra-container-image: "k8s.gcr.io/pause:3.2"
        # 生成kubelet服务证书
    generate_serving_certificate: true
    # 添加一些额外的参数
    extra_args:
      # 设置pod最大250,而不是默认的110
      max-pods: 250
    # 存储卷绑定
    extra_binds:
    - /grlocaldata:/grlocaldata:rw,z
  scheduler:
    image: ""
    extra_args: {}
    extra_binds: []
    extra_env: []
    win_extra_args: {}
    win_extra_binds: []
    win_extra_env: []
  kubeproxy:
    image: ""
    extra_args: {}
    extra_binds: []
    extra_env: []
    win_extra_args: {}
    win_extra_binds: []
    win_extra_env: []
# x509认证策略
authentication:
  strategy: x509
  sans: []
  webhook: null
# Kubernetes 授权模式
# 使用 `mode: rbac` 开启 RBAC
# 使用 `mode: none` 关闭 授权
authorization:
  mode: rbac

# job 超时时间 30s
addon_job_timeout: 30

# 可选网络插件 (canal, calico, flannel, weave, or none)
network:
  plugin: flannel
  options: {}
  mtu: 0
  node_selector: {}
  update_strategy: null
  tolerations: []

# 可选DNS (coredns or kube-dns or null)
dns: null
# 指定监控供应商 (metrics-server)
monitoring:
  provider: none
以上配置基本上无需修改,大部分用户通过可视化配置即可满足需求。
如需修改,按照所需修改配置文件,例如:
修改网络插件为 calico,修改
network.plugin为calico默认会从dockerhub拉取 calico镜像,如需自定义镜像地址请在 system_images 指定镜像地址
network:
  plugin: calico
- 修改配置后,点击更新集群,等待集群更新完成即可。