host-based installation
The current installation method will guide users to install Rainbond from a server, which can be a physical machine, a virtual machine or various cloud hosts.
During the installation process, the graphical console will be started first through a command, and then based on the graphical interface, the installation of the entire Rainbond cluster can be completed.
- Minimum configuration
| operating system | CPU | Memory | disk | kernel version | OpenSSH version |
|---|---|---|---|---|---|
| Ubuntu16.04/CentOS 7.* | 2 | 8 | 50G+ | 4.0+ | 7.0+ |
- If you use CentOS 7.* operating system, please be sure to upgrade kernel version in advance
- Ensure that the server
80, 443, 6060, 6443, 7070, 8443ports can be accessed; - The server can connect to the Internet normally, and the installation process will download the required resources from the Internet.
- Server has NFS client installed
Deploy the Rainbond Console
The Rainbond console supports running in Linux, Windows (Docker Desktop) or Mac (Docker Desktop).
- Install Docker
curl sh.rainbond.com/install_docker | bash
Remark:
This installation method only supports the Linux x86 operating system.
Install NFS client
No need to repeat the installation if there is an NFS client on the server
yum -y install nfs-utils # Cenots system
apt-get install nfs-common # ubuntu system
Start the All-In-One Console
docker run -d -p 7070:7070 \
--name=rainbond-allinone --restart=always \
-v ~/.ssh:/root/.ssh \
-v ~/rainbonddata:/app/data \
-e INSTALL_IMAGE_REPO=rainbond \
rainbond/rainbond:v5.8.1-release-allinone
Remark:
- The console will generate data that needs to be persisted and stored in the
~/rainbonddatadirectory of your deployment node; - Rainbond 5.3 and above supports console data migration, which is convenient for subsequent data migration to the production environment. Please feel free to experience it.
After the container is successfully started, after a while, you can access the server 7070 port in the browser, and open the Rainbond consoleregistration page.Please follow the prompts to complete the registration.

At this point, congratulations that you have completed the first step, you still need to continue to complete the deployment of the cluster.
Install from the host
After logging in to the console, switch to the cluster page according to the left navigation bar, click to add cluster , and enter the graphical installation page.

Select to start the installation from the host to enter the host-based installation process.
Remark:
- The currently used Alibaba Cloud server has an external network IP. If the server does not have an external network IP during private deployment, the IP address and the internal network IP address can be uniformly filled in with the server IP address.
- The current demonstration cluster consists of 3 nodes, and the Kubernetes attributes such as, management, and computing attributes are reused. When deploying by yourself, you can select the node attributes according to your own planning and.
- Parameters can be customized during the installation of kubernetes cluster, please refer to document RKE cluster configuration.
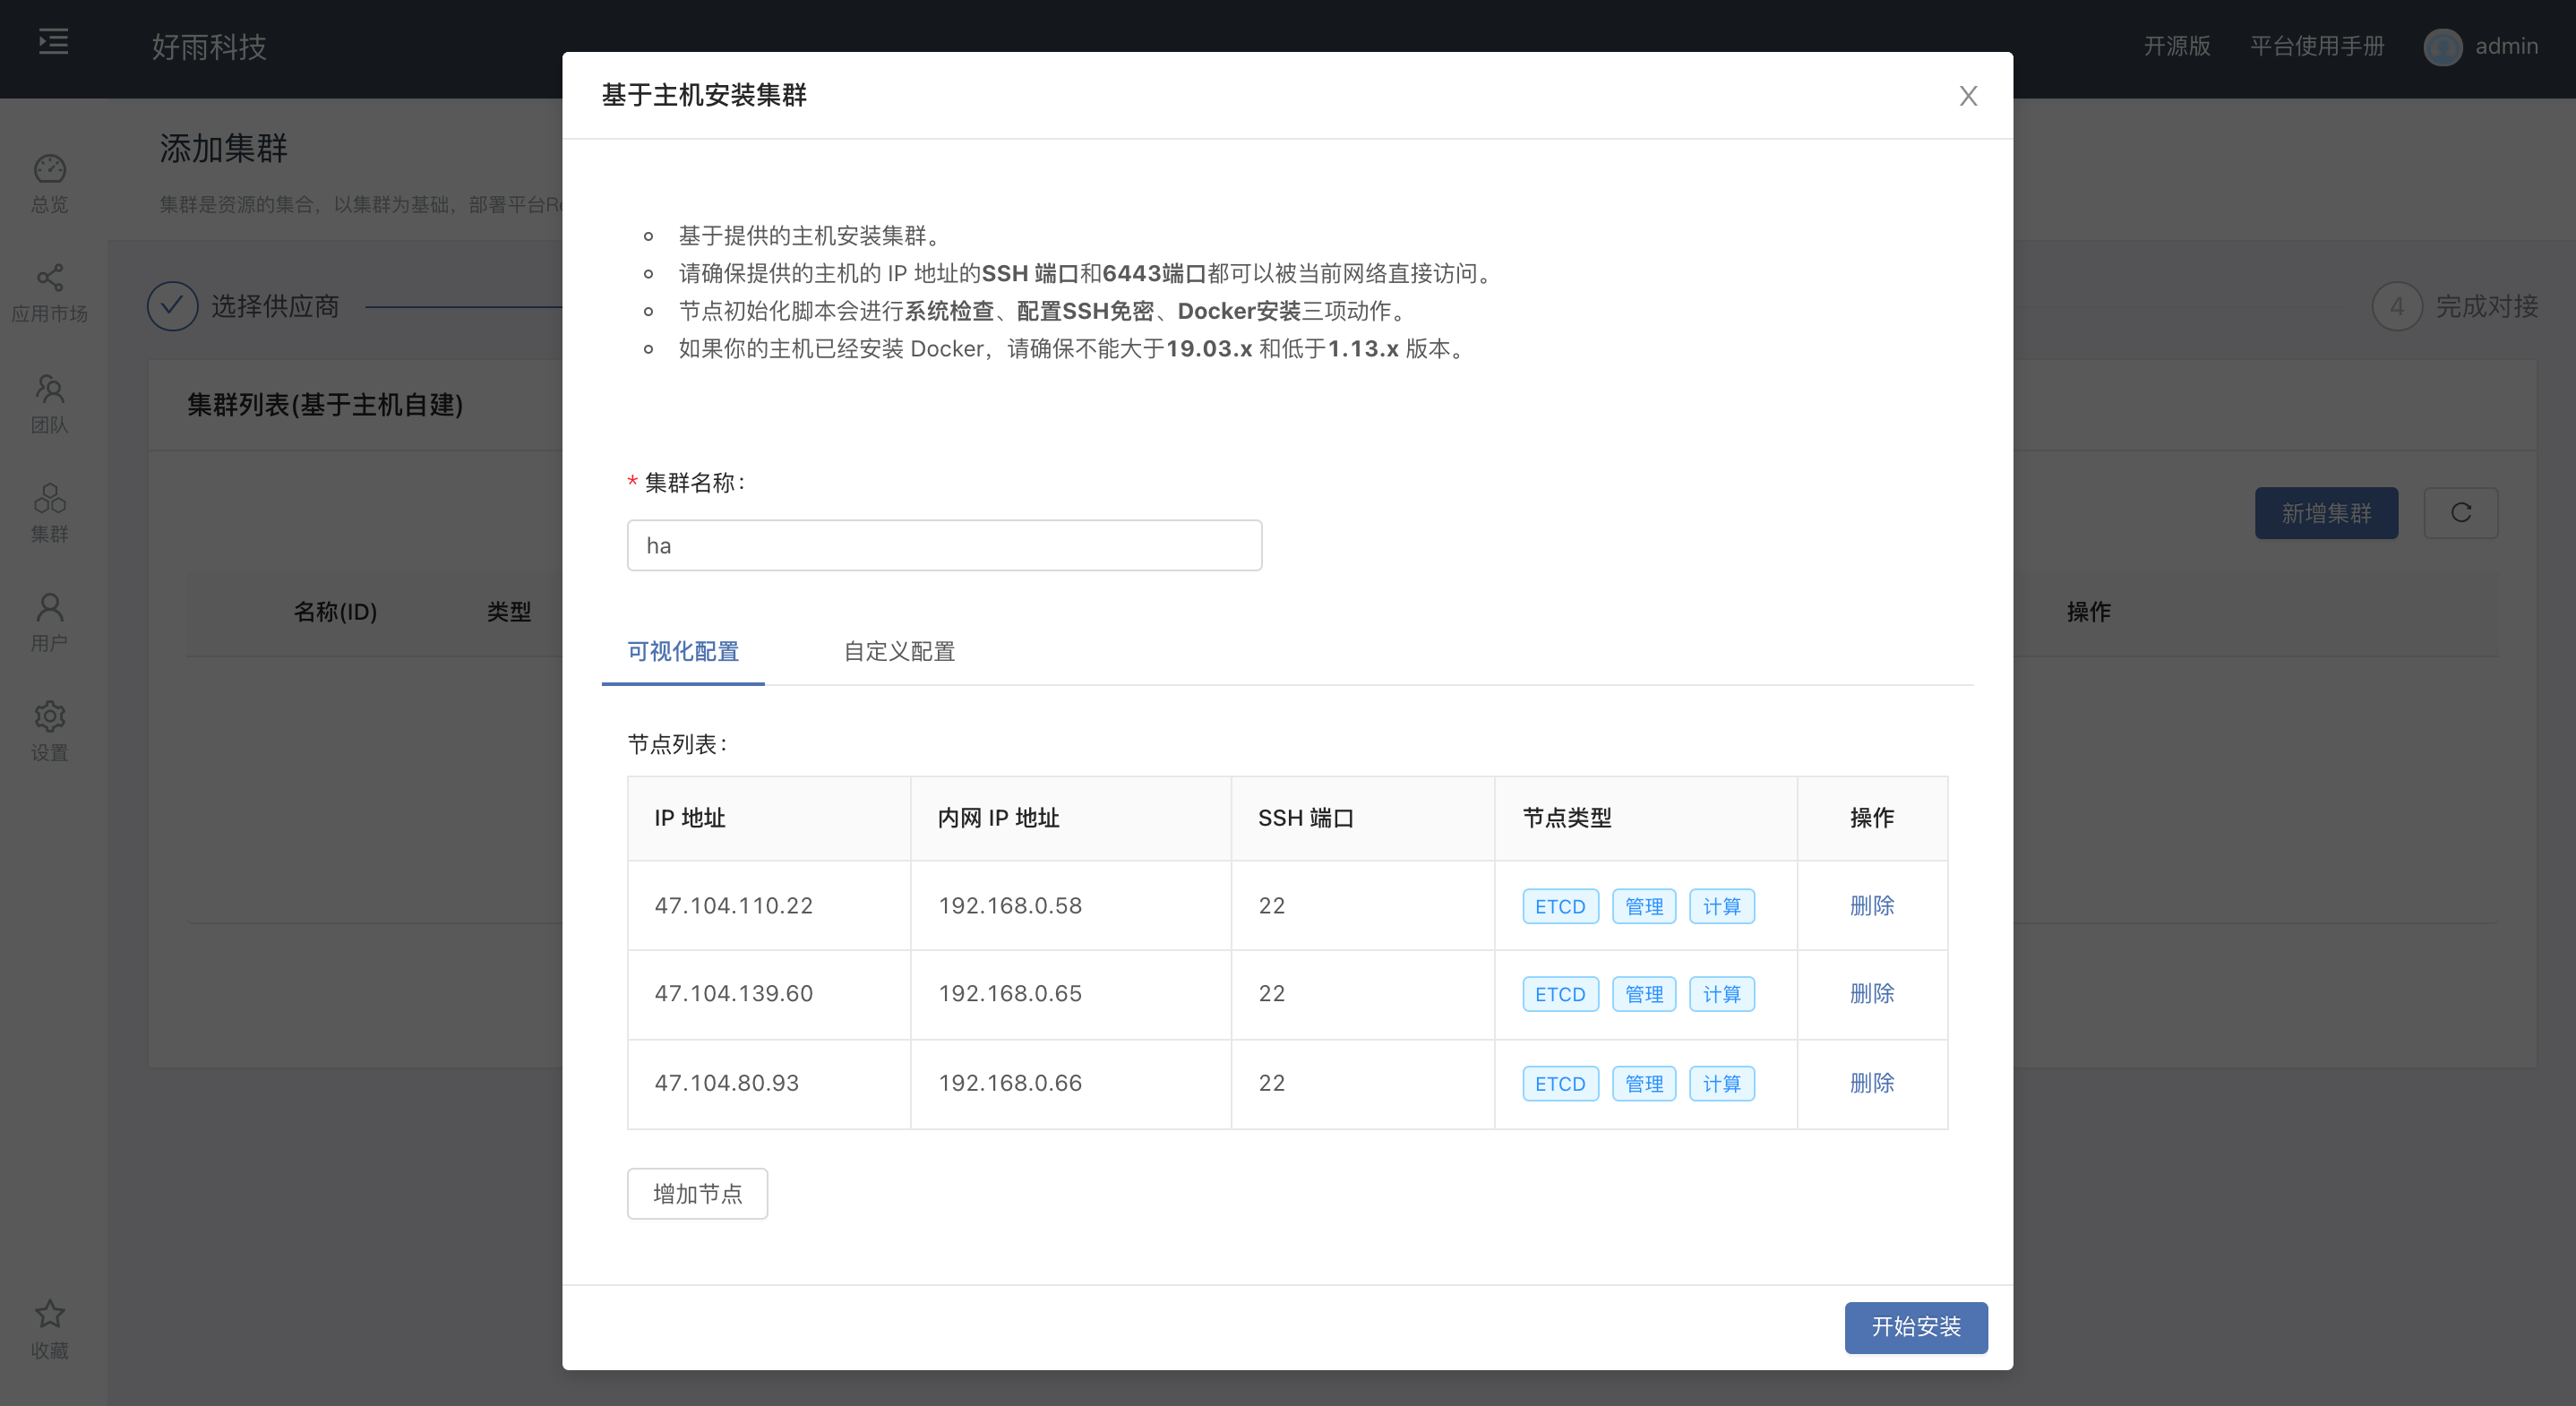
After filling in the node information, follow the prompts on the page to copy the node initialization command and execute it on all servers in the cluster
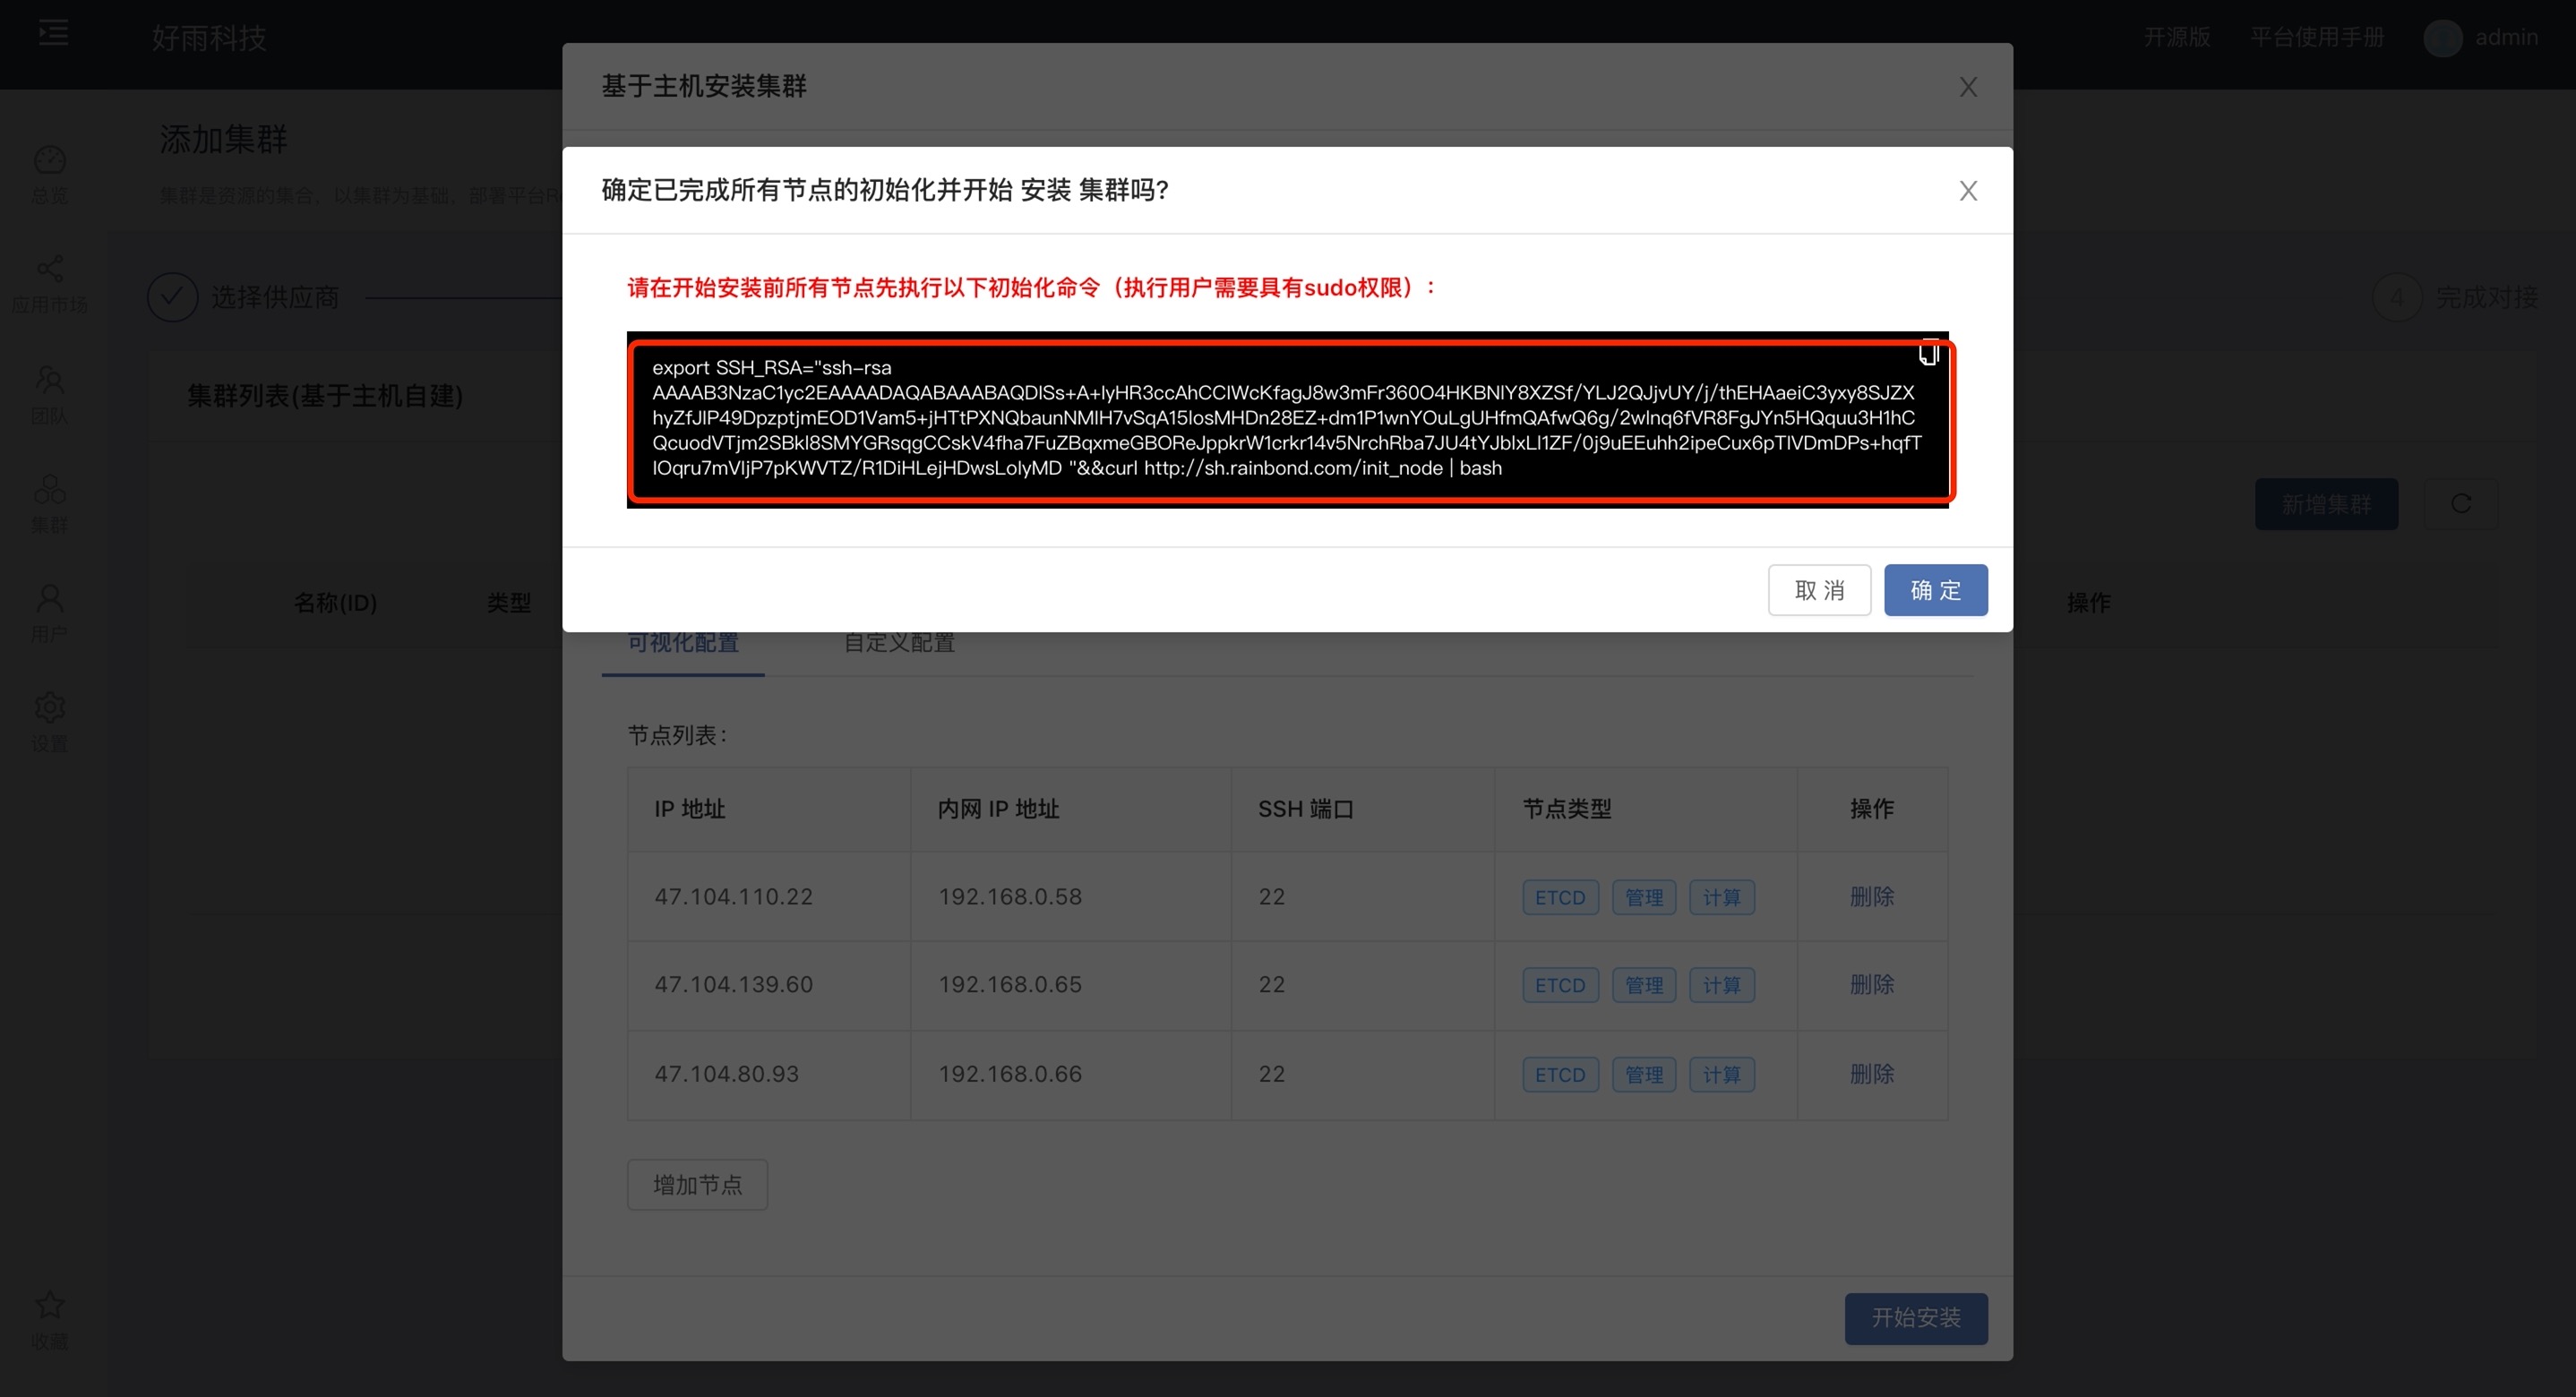
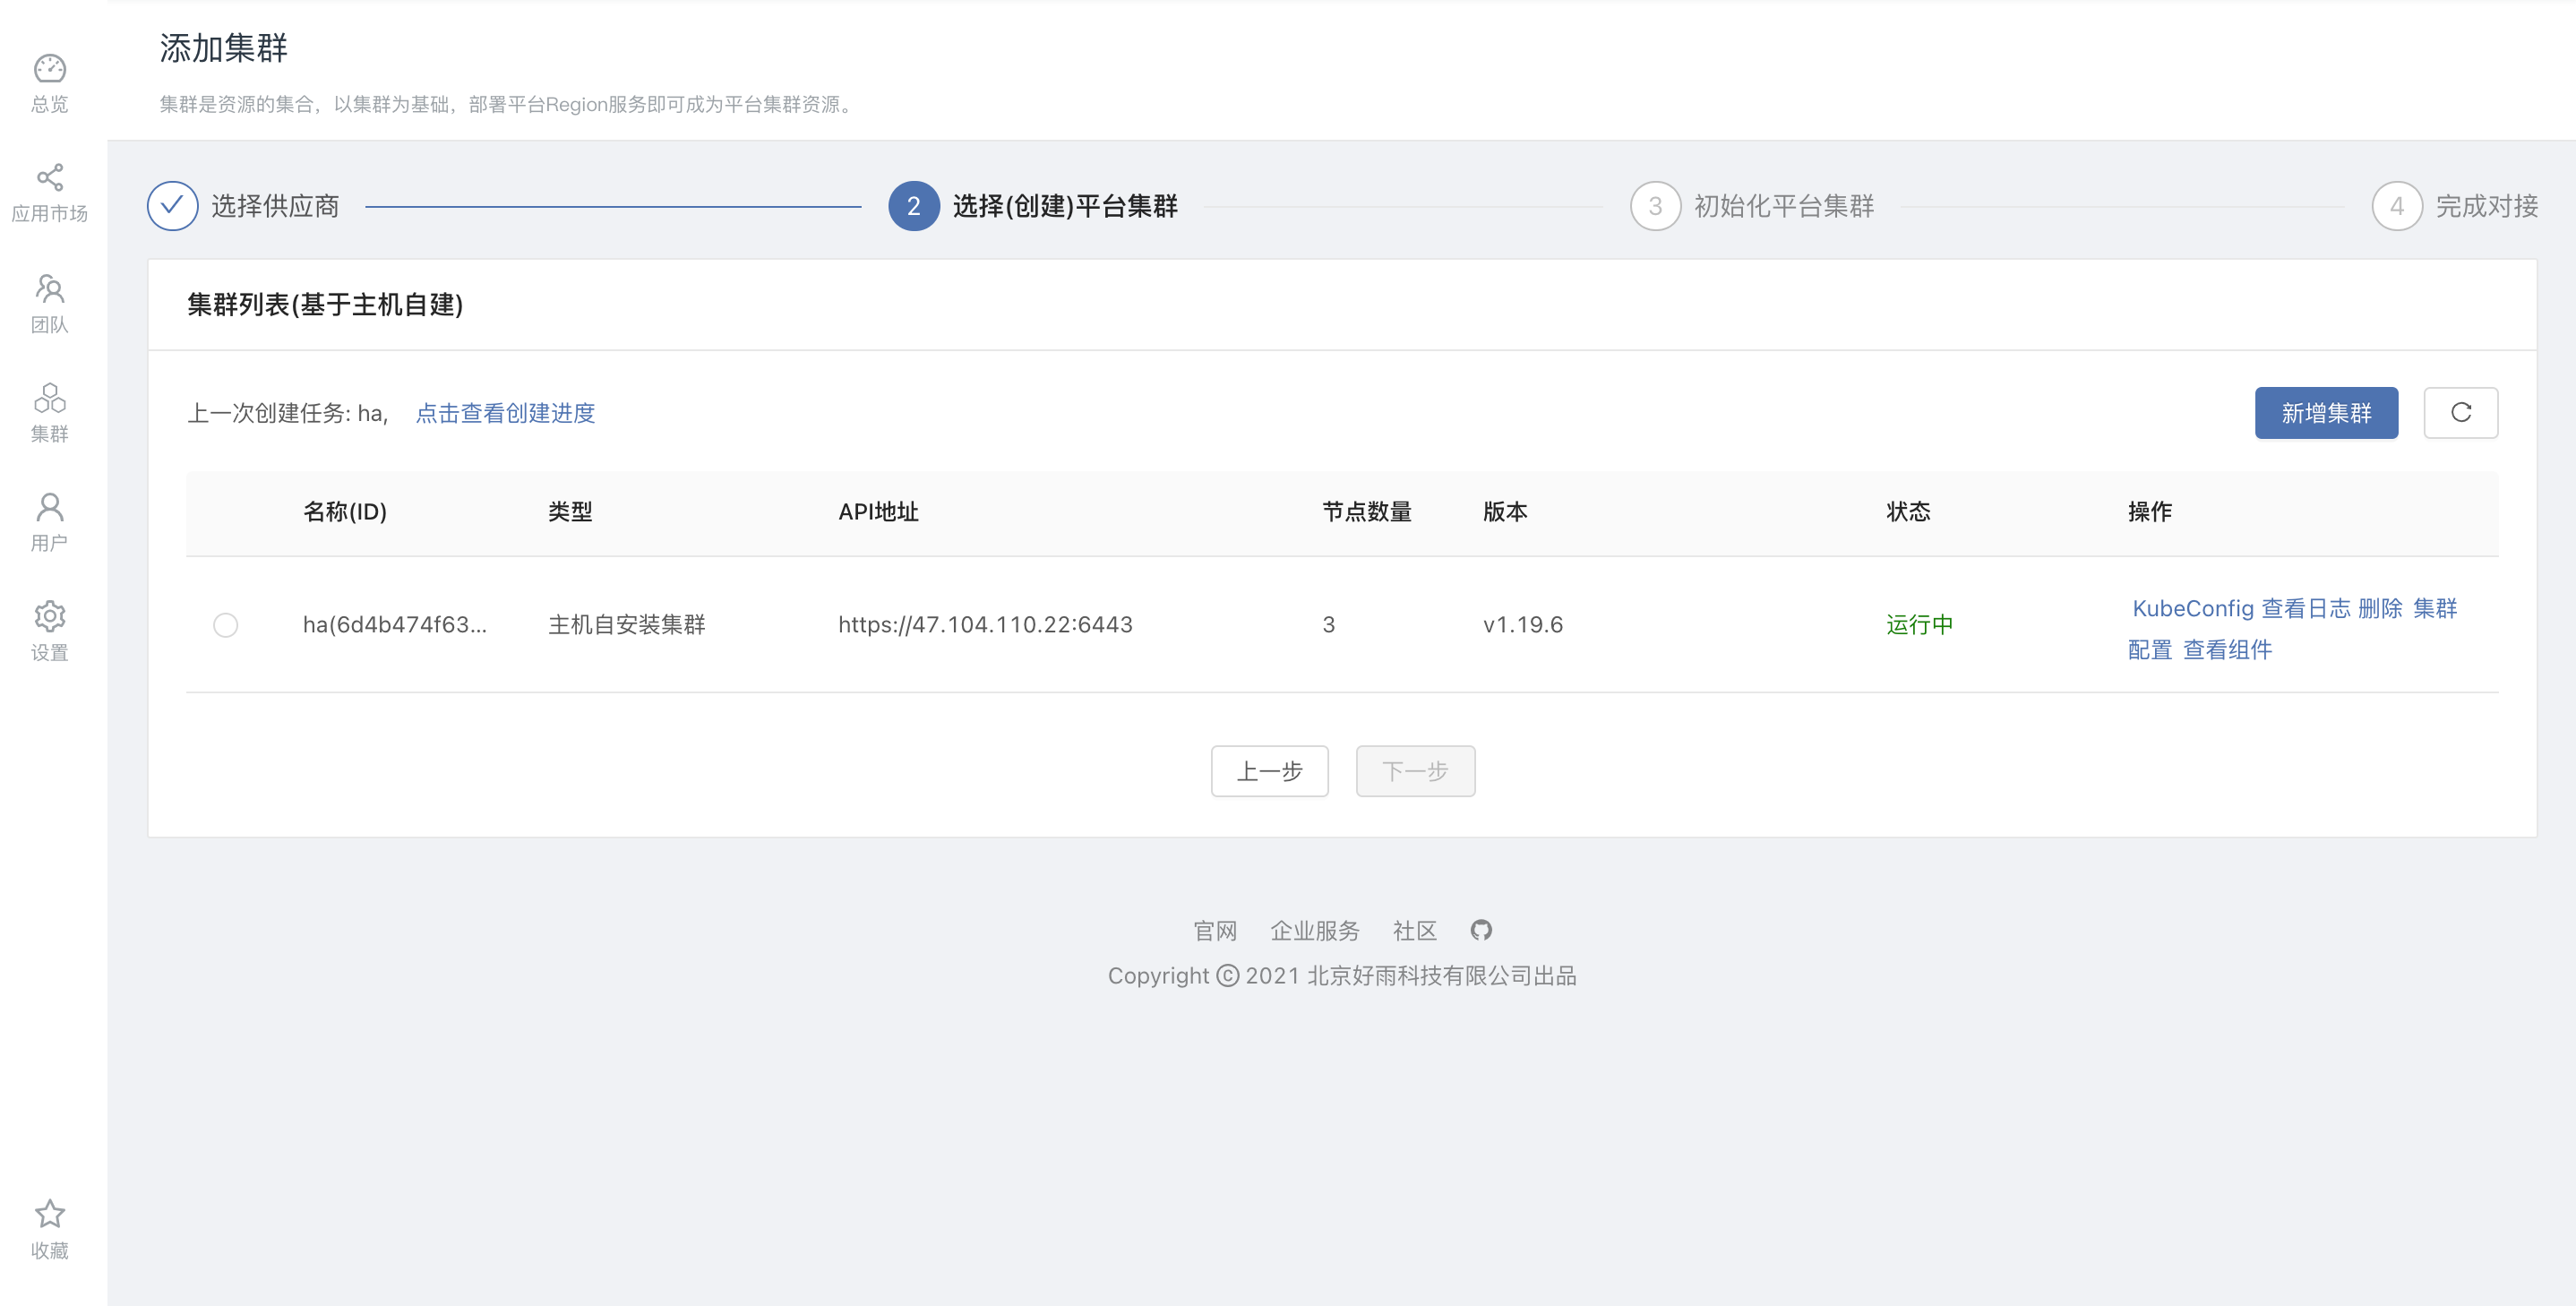
After the initialization is complete, click , next step, wait for the Kubernetes cluster to be installed successfully, and go to the next step when the status is running and
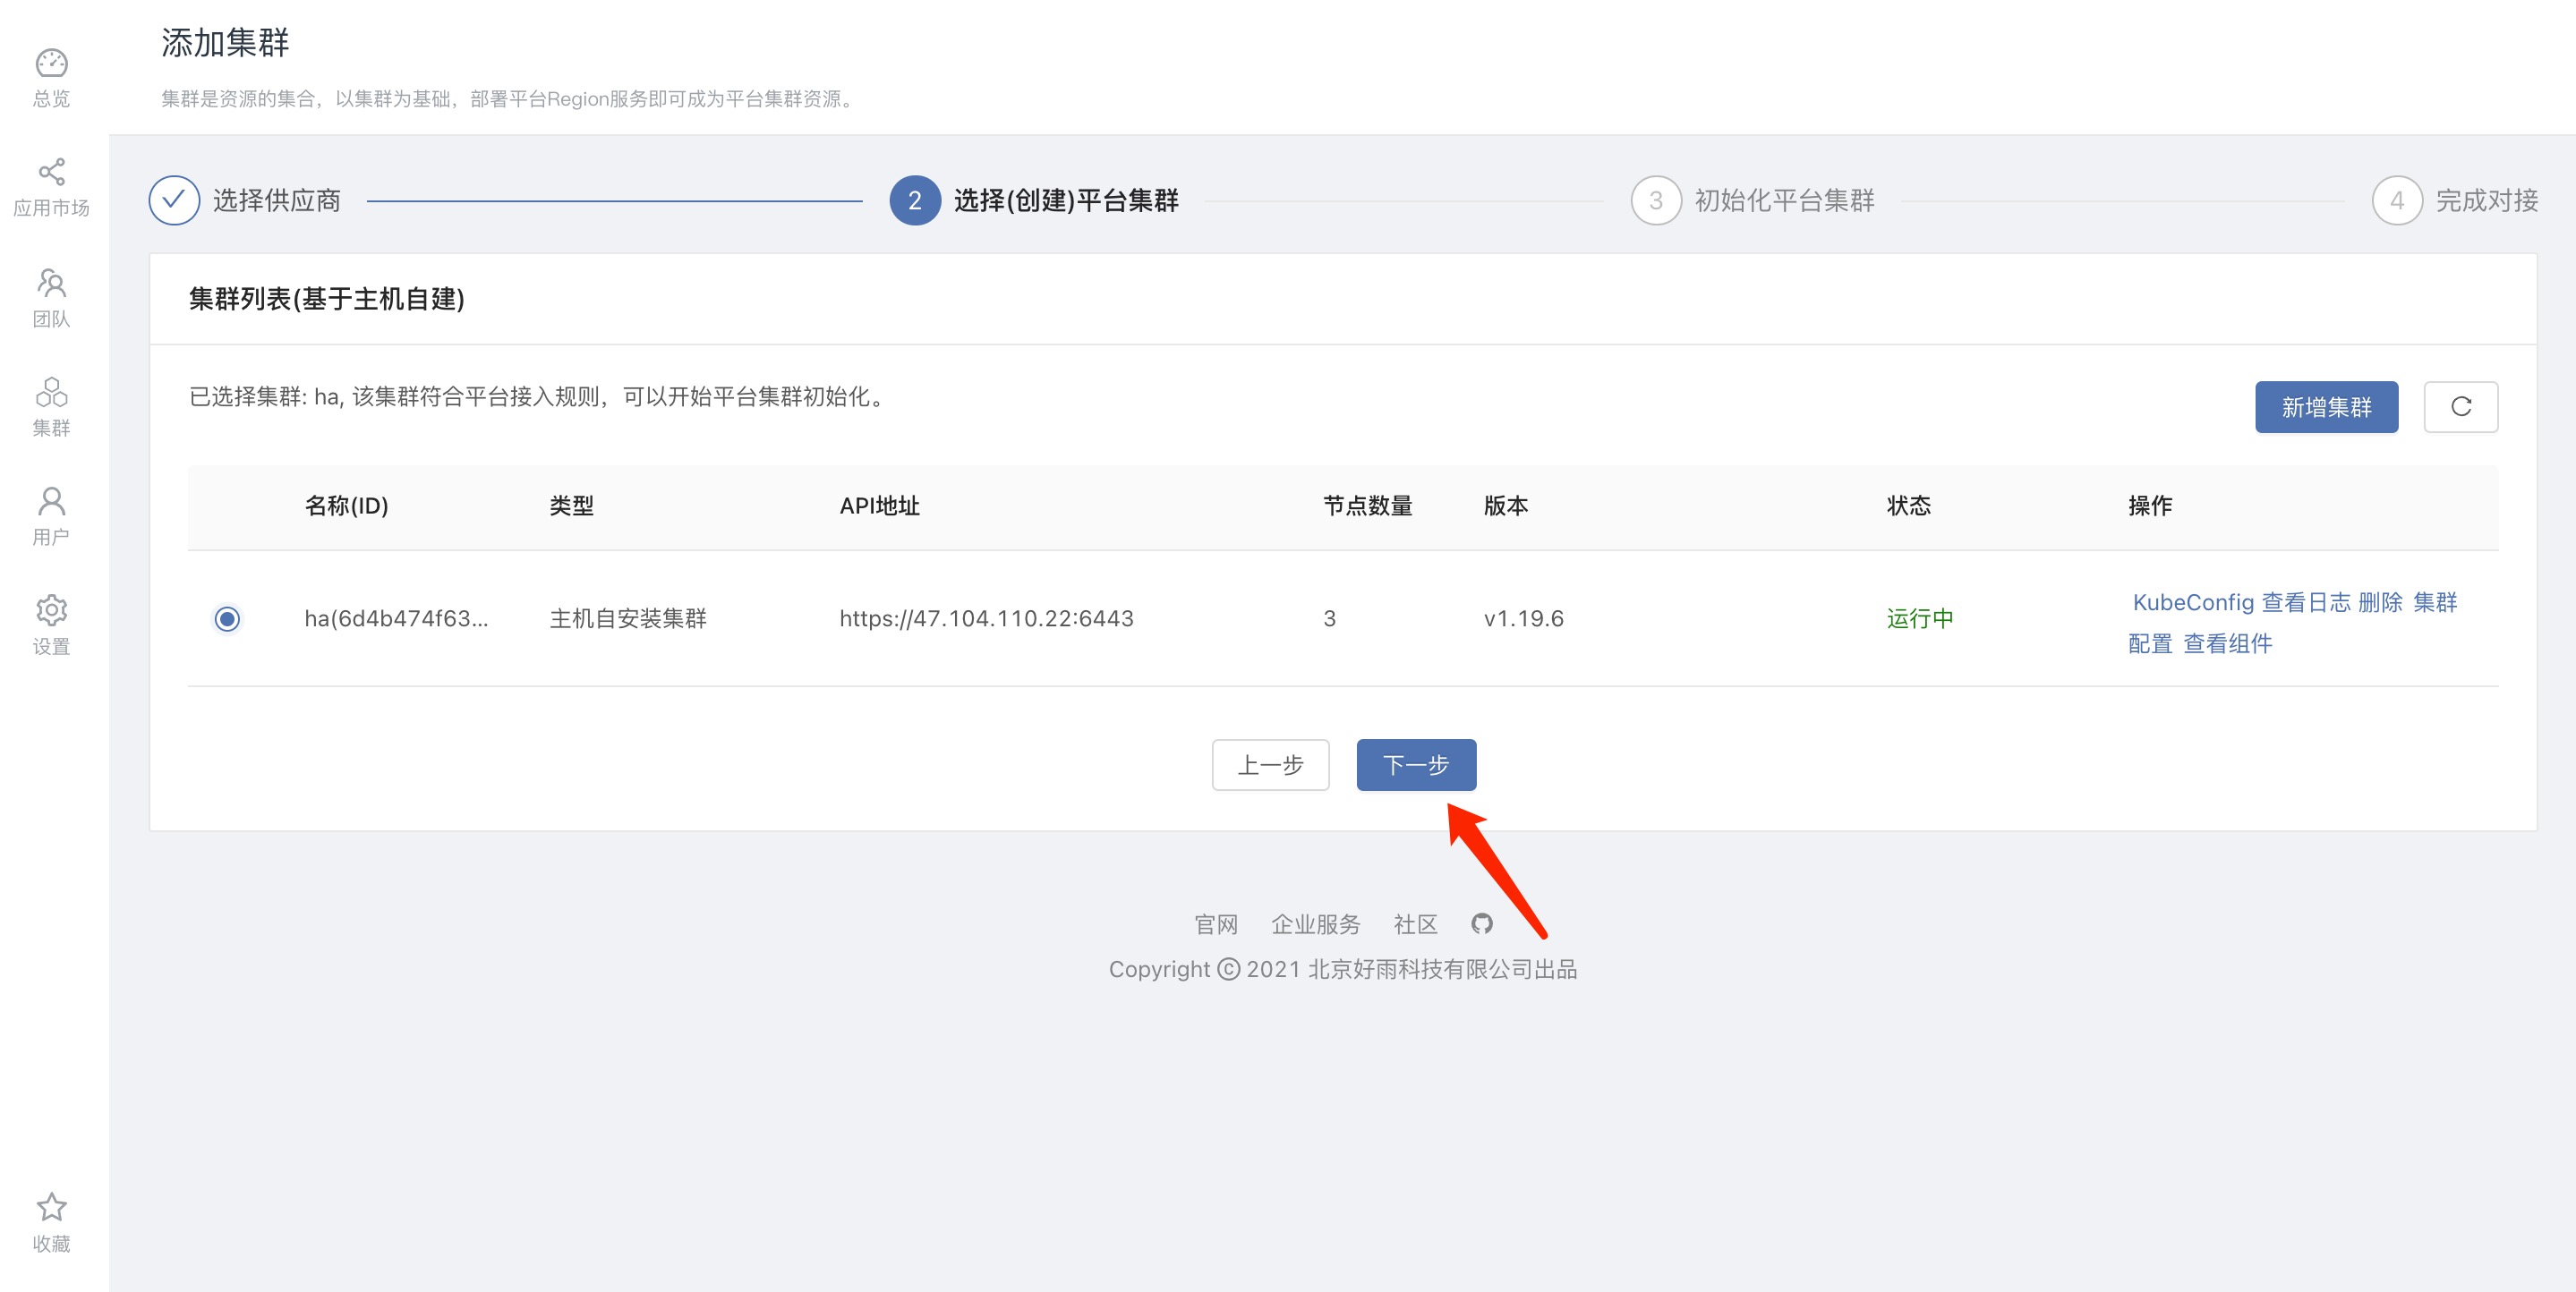
After performing the above operations, select the current cluster on the console page and click Next.
Custom cluster initialization parameters
During the installation and deployment of Rainbond, you can customize the cluster initialization parameters and configure them in the initialization platform cluster interface. For specific parameters, please refer to document Rainbond Cluster Parameters.
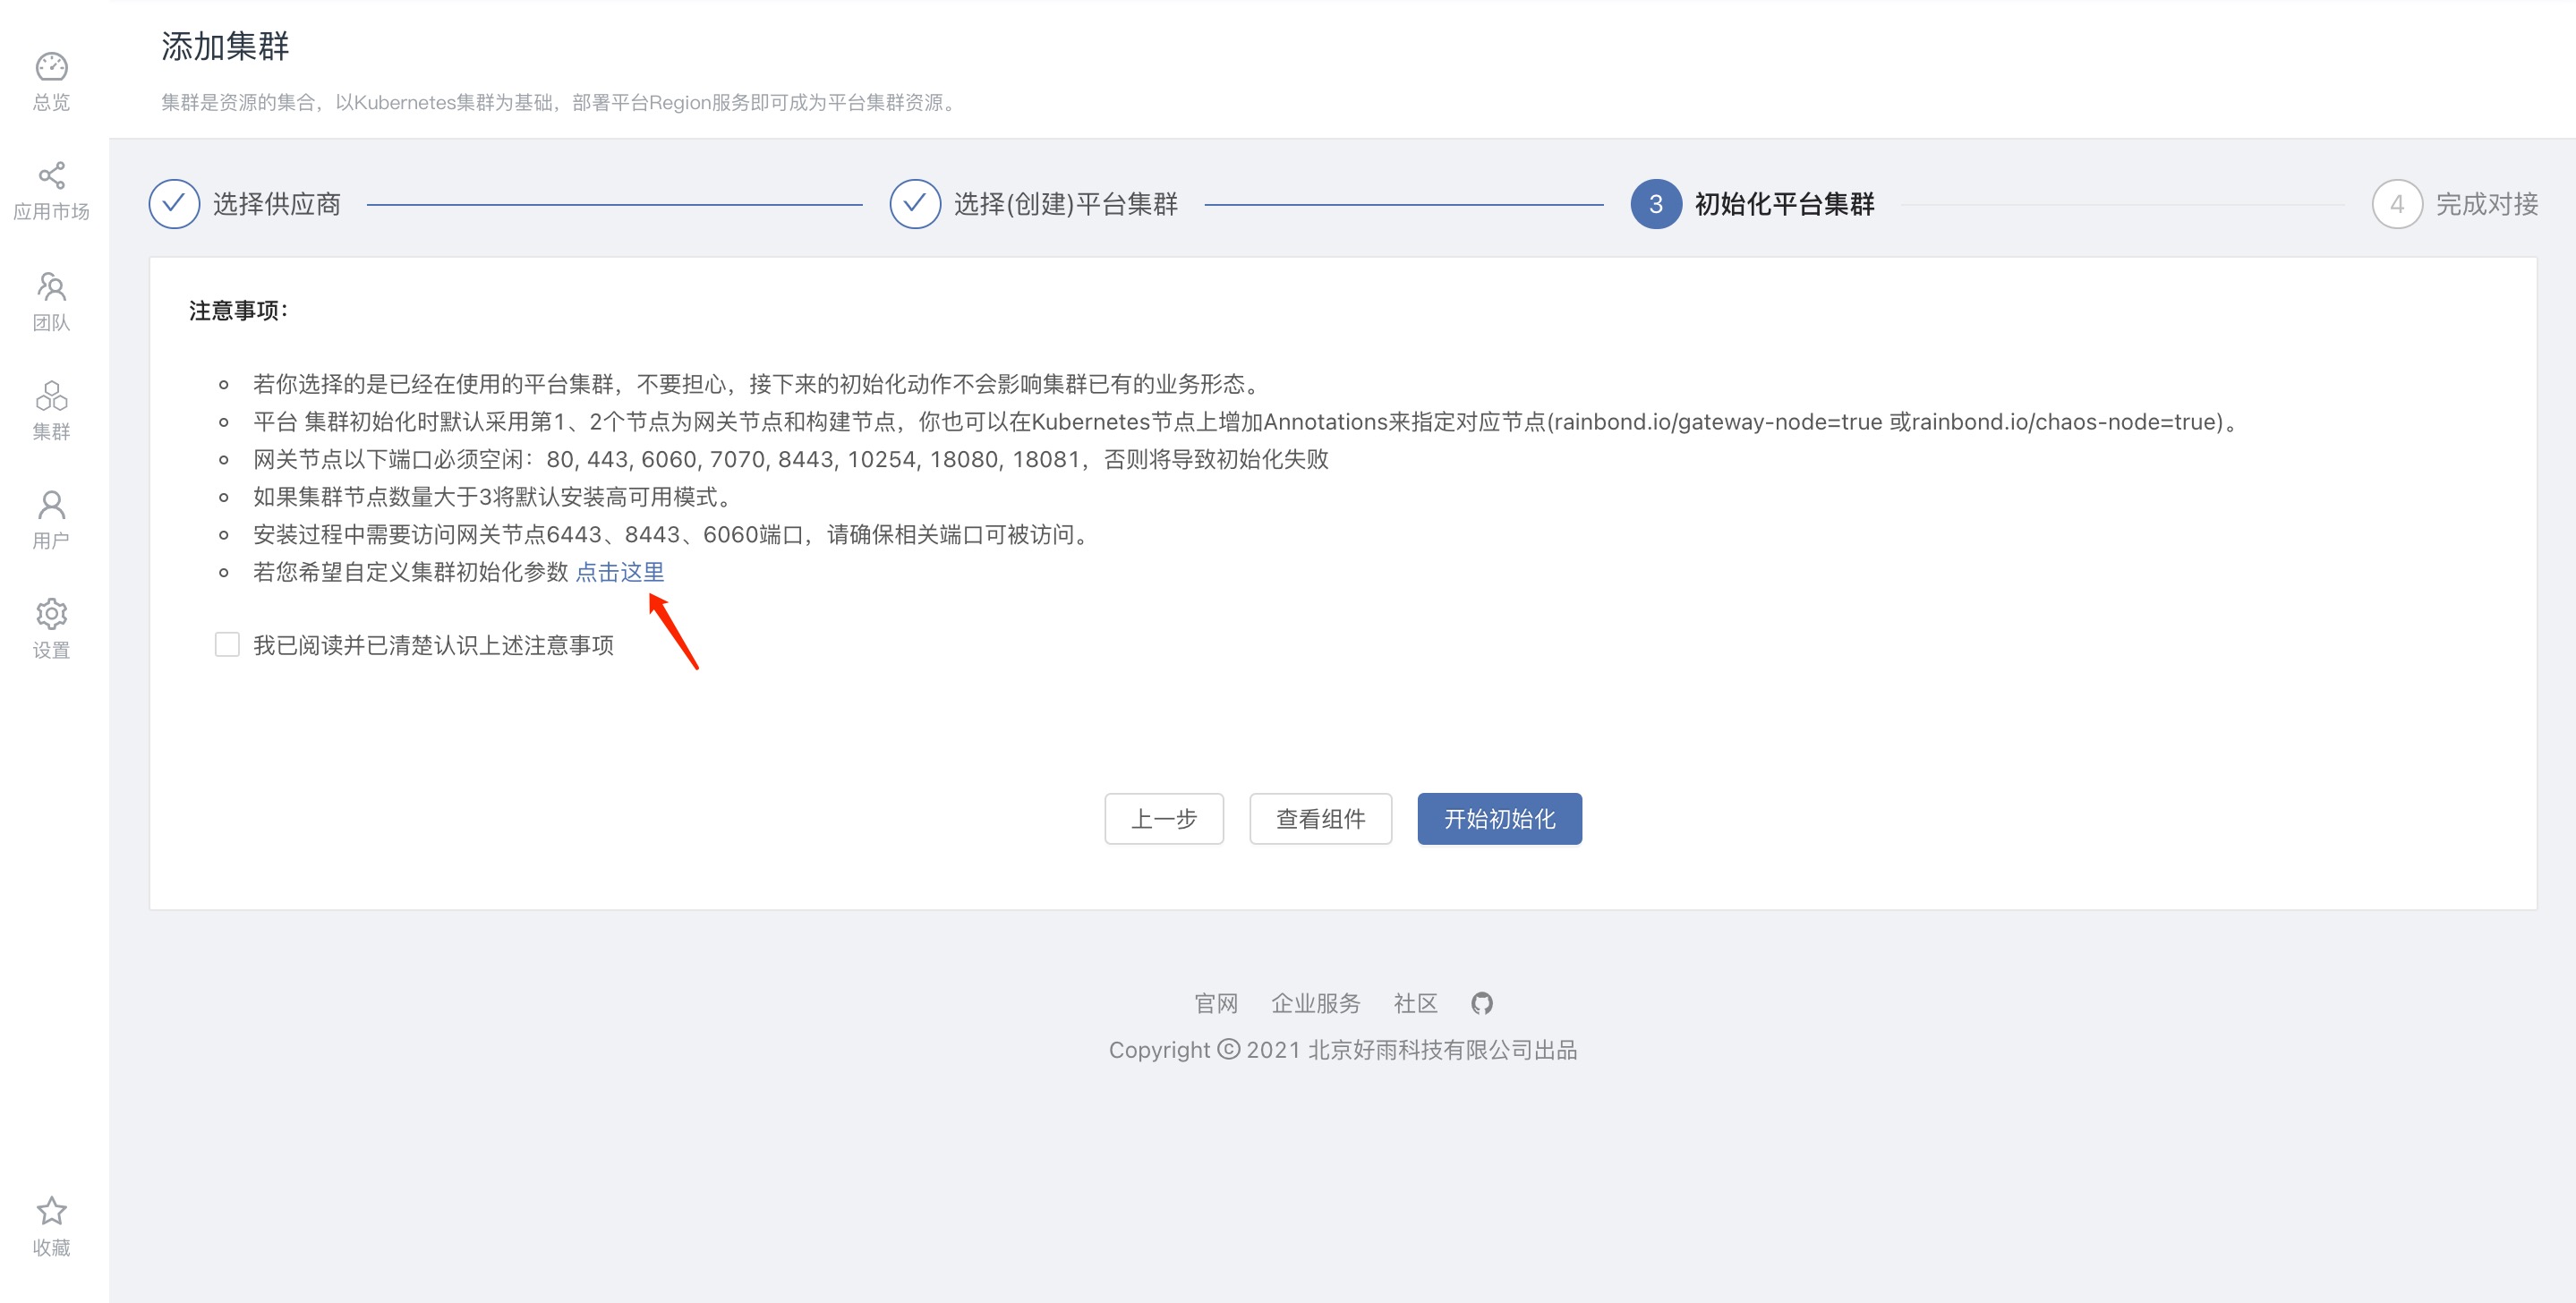
Check I have read and have a clear understanding of the above precautions , click to start initialization , and wait for the installation to complete.
console migration
The console deployed in All-In-One mode does not have production availability. If you want to continue to use the console after the experience is completed, it is recommended to migrate the console to Rainbond Management Reference Document.
common problem
If you encounter any problems during the process of installing Rainbond based on the host through the graphical interface, you can refer to Document Web Interface Installation Troubleshooting Guide for troubleshooting.
Next step
Refer toQuick Startto deploy your first application.