Istio Network Governance Model
In Rainbond, users can set different governance modes for different applications, that is, users can manage applications on demand by switching the governance mode of the application. The advantage of this is that users can not be bound by a certain ServiceMesh framework. , and can quickly trial and error, can quickly find the most suitable ServiceMesh framework for the current business.
In the current version of Rainbond, Istio exists in the "plug-in" mode. When the user needs to use the Istio governance mode, if the Istio control plane is not installed, a prompt will be prompted to install the corresponding control plane.Therefore, the Istio control plane needs to be deployed before use. The control plane only needs to be installed once in a cluster. It provides a unified upper-level operation and maintenance entry, which will be used to manage services working in the Istio governance mode, complete configuration distribution, etc. Function.Combined with Rainbond's existing helm installation method, we can easily install the corresponding components.
Deploy the Istio control plane
Preparation
- Create a team
In Rainbond v5.5.0, we support users to specify a namespace when creating a team. Since the default helm installation namespace is istio-system, in order to reduce user configuration, we first need to create a corresponding team.As shown in the figure below, the English name of the team corresponds to the namespace of the team in the cluster.Fill in istio-system here.

- Docking store
Rainbond supports direct deployment of applications based on helm, so the next step is to connect to the official Rainbond helm warehouse, and then deploy Istio based on the Helm store. On the application market page, click Add store, select the helm store, and enter the relevant information to complete the connection.
Store Address:https://openchart.goodrain.com/goodrain/rainbond

Install the Istio control plane
Currently, the Istio version provided by Rainbond's official Helm store is1.11.4According to Istio official documentation, the required Kubernetes cluster version for this version is:1.19, 1.20, 1.21, 1.22. If your cluster is based on Rainbond official documentation Deployments already meet the version requirements.
- Install the base app
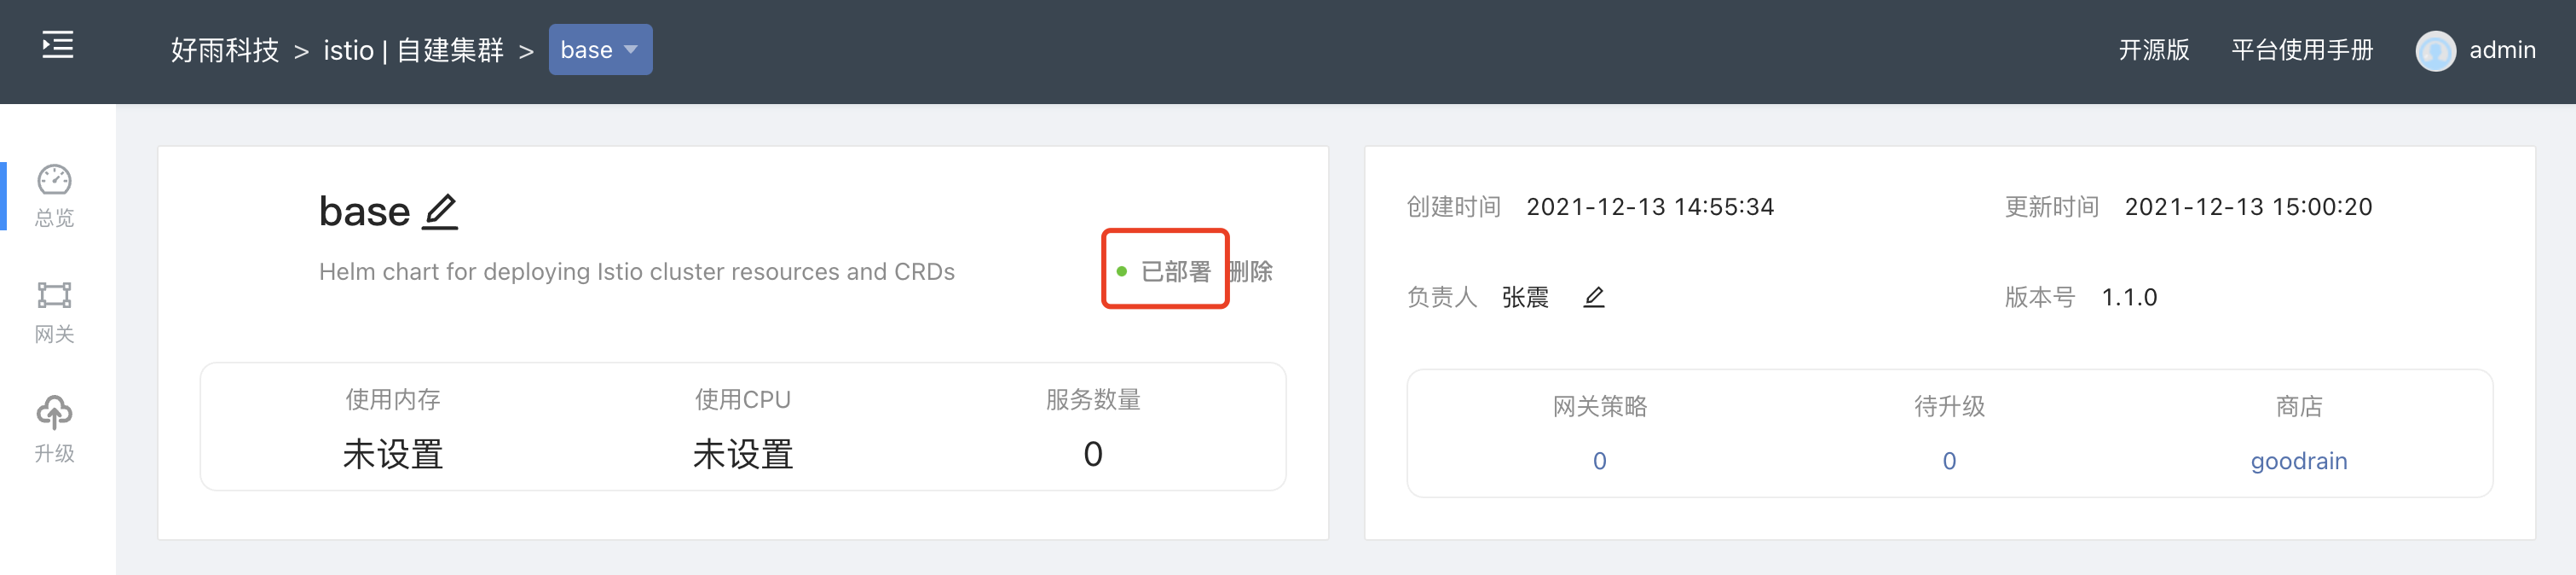
Select thebaseapplication in the helm store to deploy, and select the previously created team. This application mainly deploys Istio-related cluster resources and CRD resources.

Clickto confirmand then enter the base application interface. There is no need to modify the configuration. Just click theInstallbutton at the bottom of the page. When theDeployedbutton appears at the top of the page, the installation is complete.
- Install istio-discovery
Like the above base applications, choose the right team and install the istio-discoveryapplication. With these two applications, you can have the basic governance capabilities of Istio.
- install prometheus
In Istio, each component allows Prometheus to periodically capture data by exposing the HTTP interface (using the way of Exporters).Therefore, after the Istio control plane is installed, Prometheus needs to be deployed in the istio-system namespace, and the data source of each relevant indicator of the Istio component is configured in Prometheus by default.
As with the base app above, select the correct team and install the Prometheusapp.
- install kiali
Istio provides a unified visual interface Kiali for us to view related services and configurations, which can display service topology relationships and configure services in the visual interface.
As with the base application above, select the correct team and install the kiali-operator application.
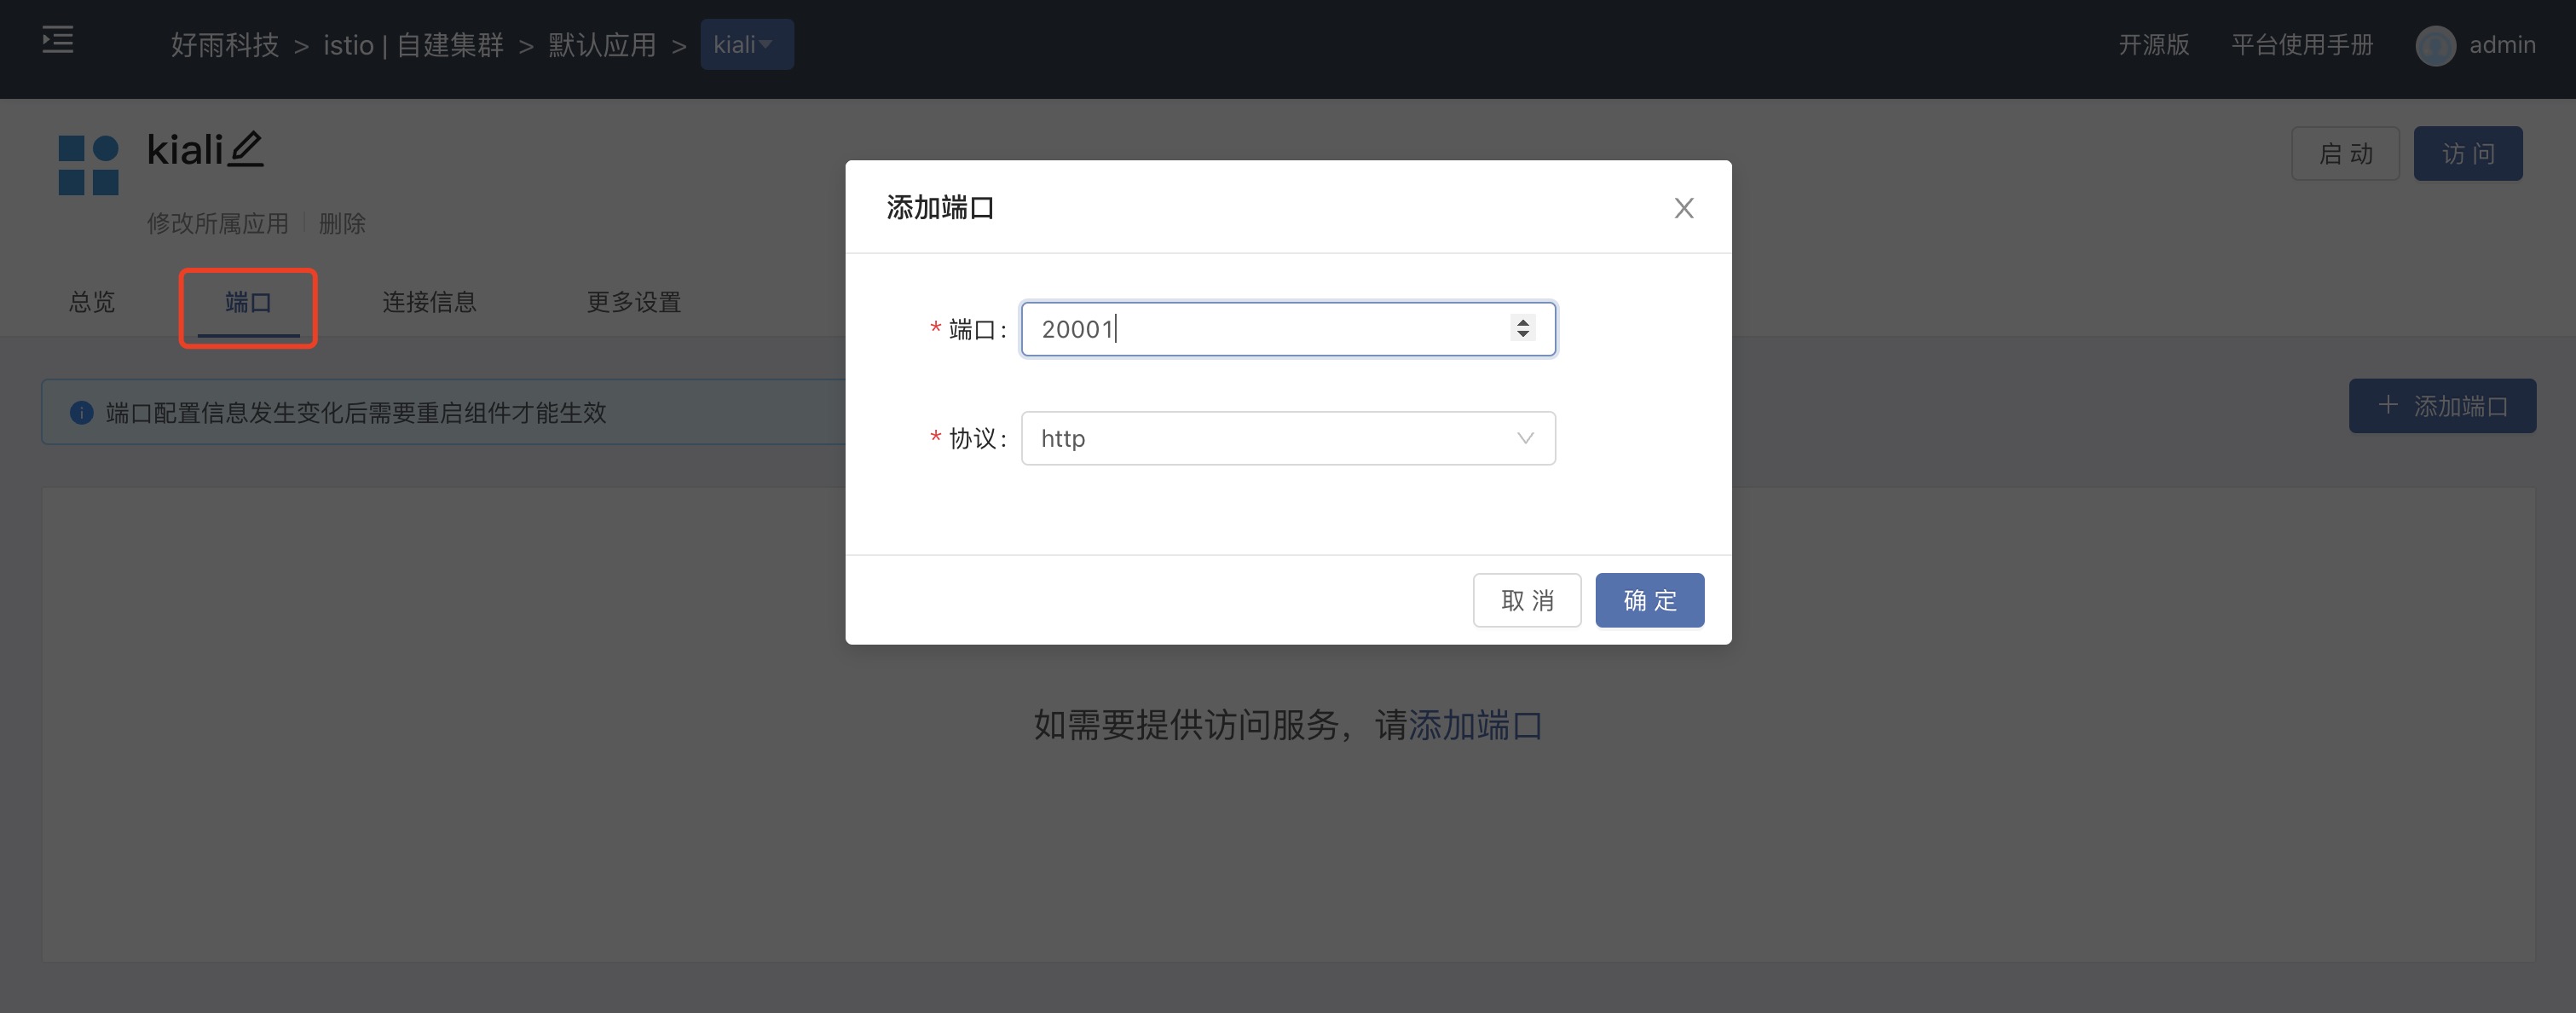
The installation process will automatically create a Service, and the access port of kiali can be exposed in the form of a third-party component of the Rainbond platform.as shown below:

| configuration item | value |
|---|---|
| component name | customize |
| Component English name | customize |
| Component registration method | Kubernetes |
| Namespace | istio-system |
| Service | kiali |
Add an access port in the port interface, after adding, openexternal serviceand use the generated gateway policy to access
kiali requires an authentication token when logging in, use the following command to get token:
kubectl describe secret $(kubectl get secret -n istio-system | grep kiali-token | awk '{print $1}') -n istio-system
If there is no kubectl command, please refer toCommand Line Toolsdocument to install.
Obtain the token and log in to the kiali visualization interface. At this point, the deployment of the Istio control plane is completed.

Using the Istio network governance model
1. Switch governance mode
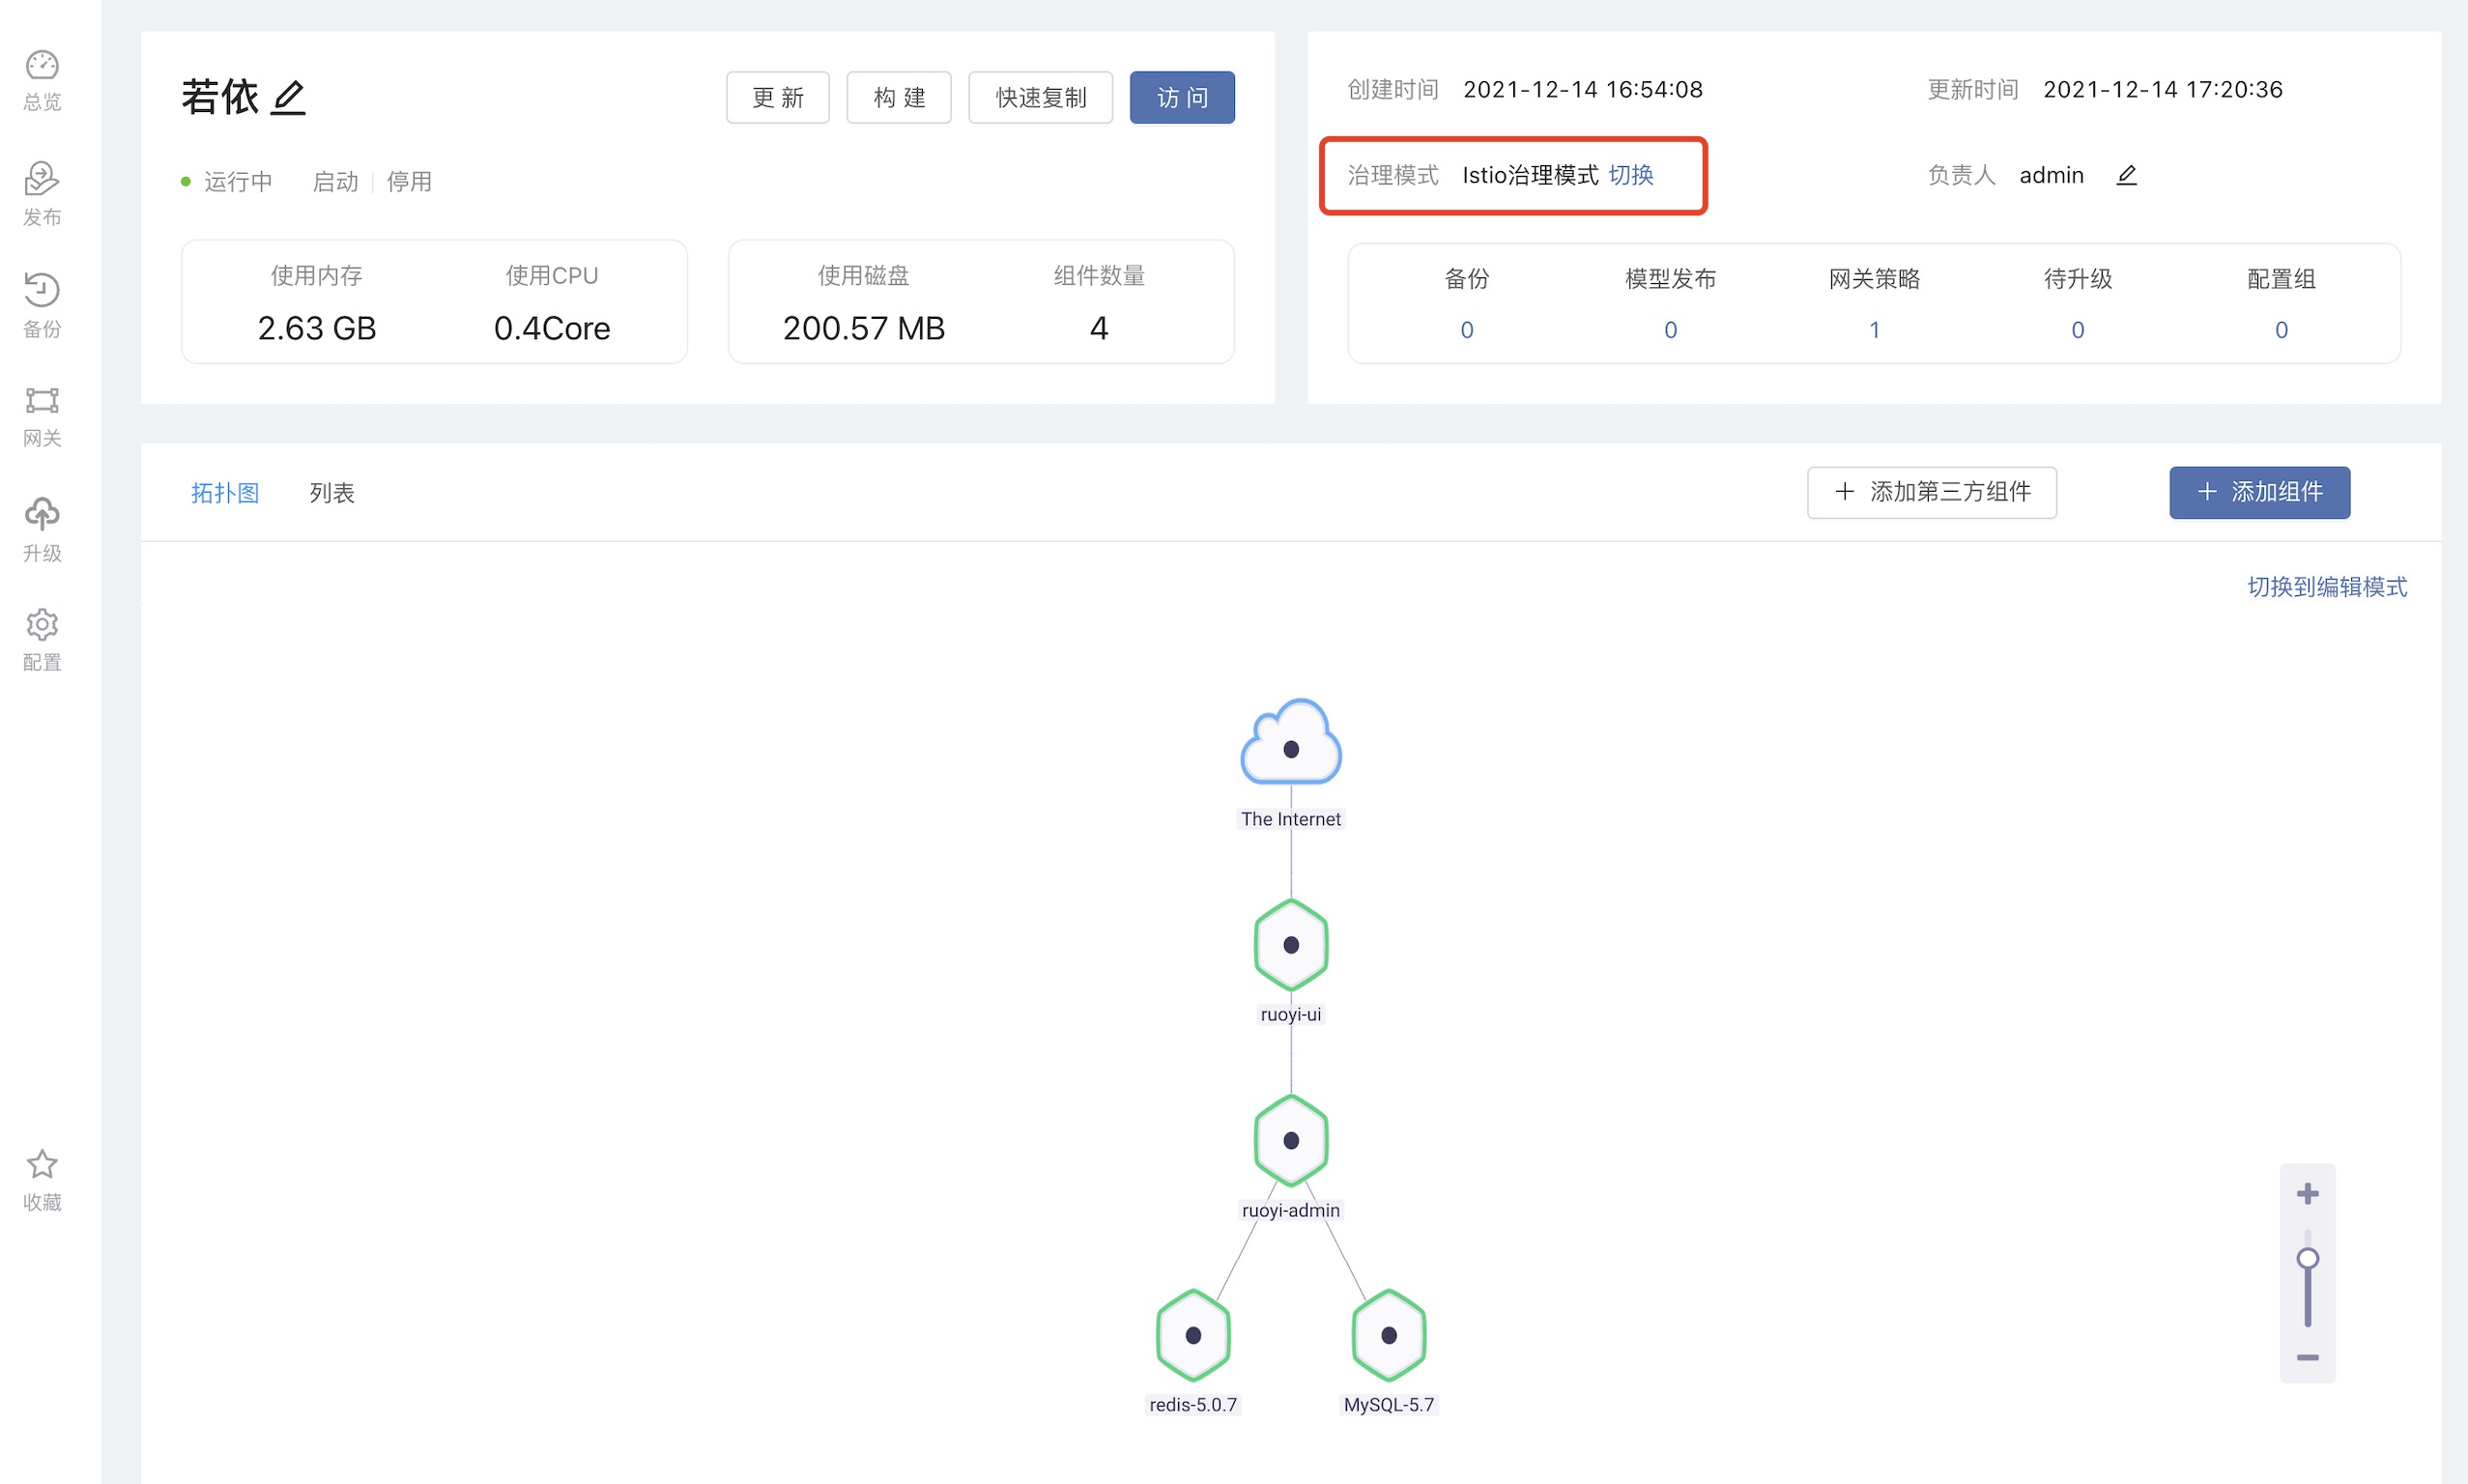
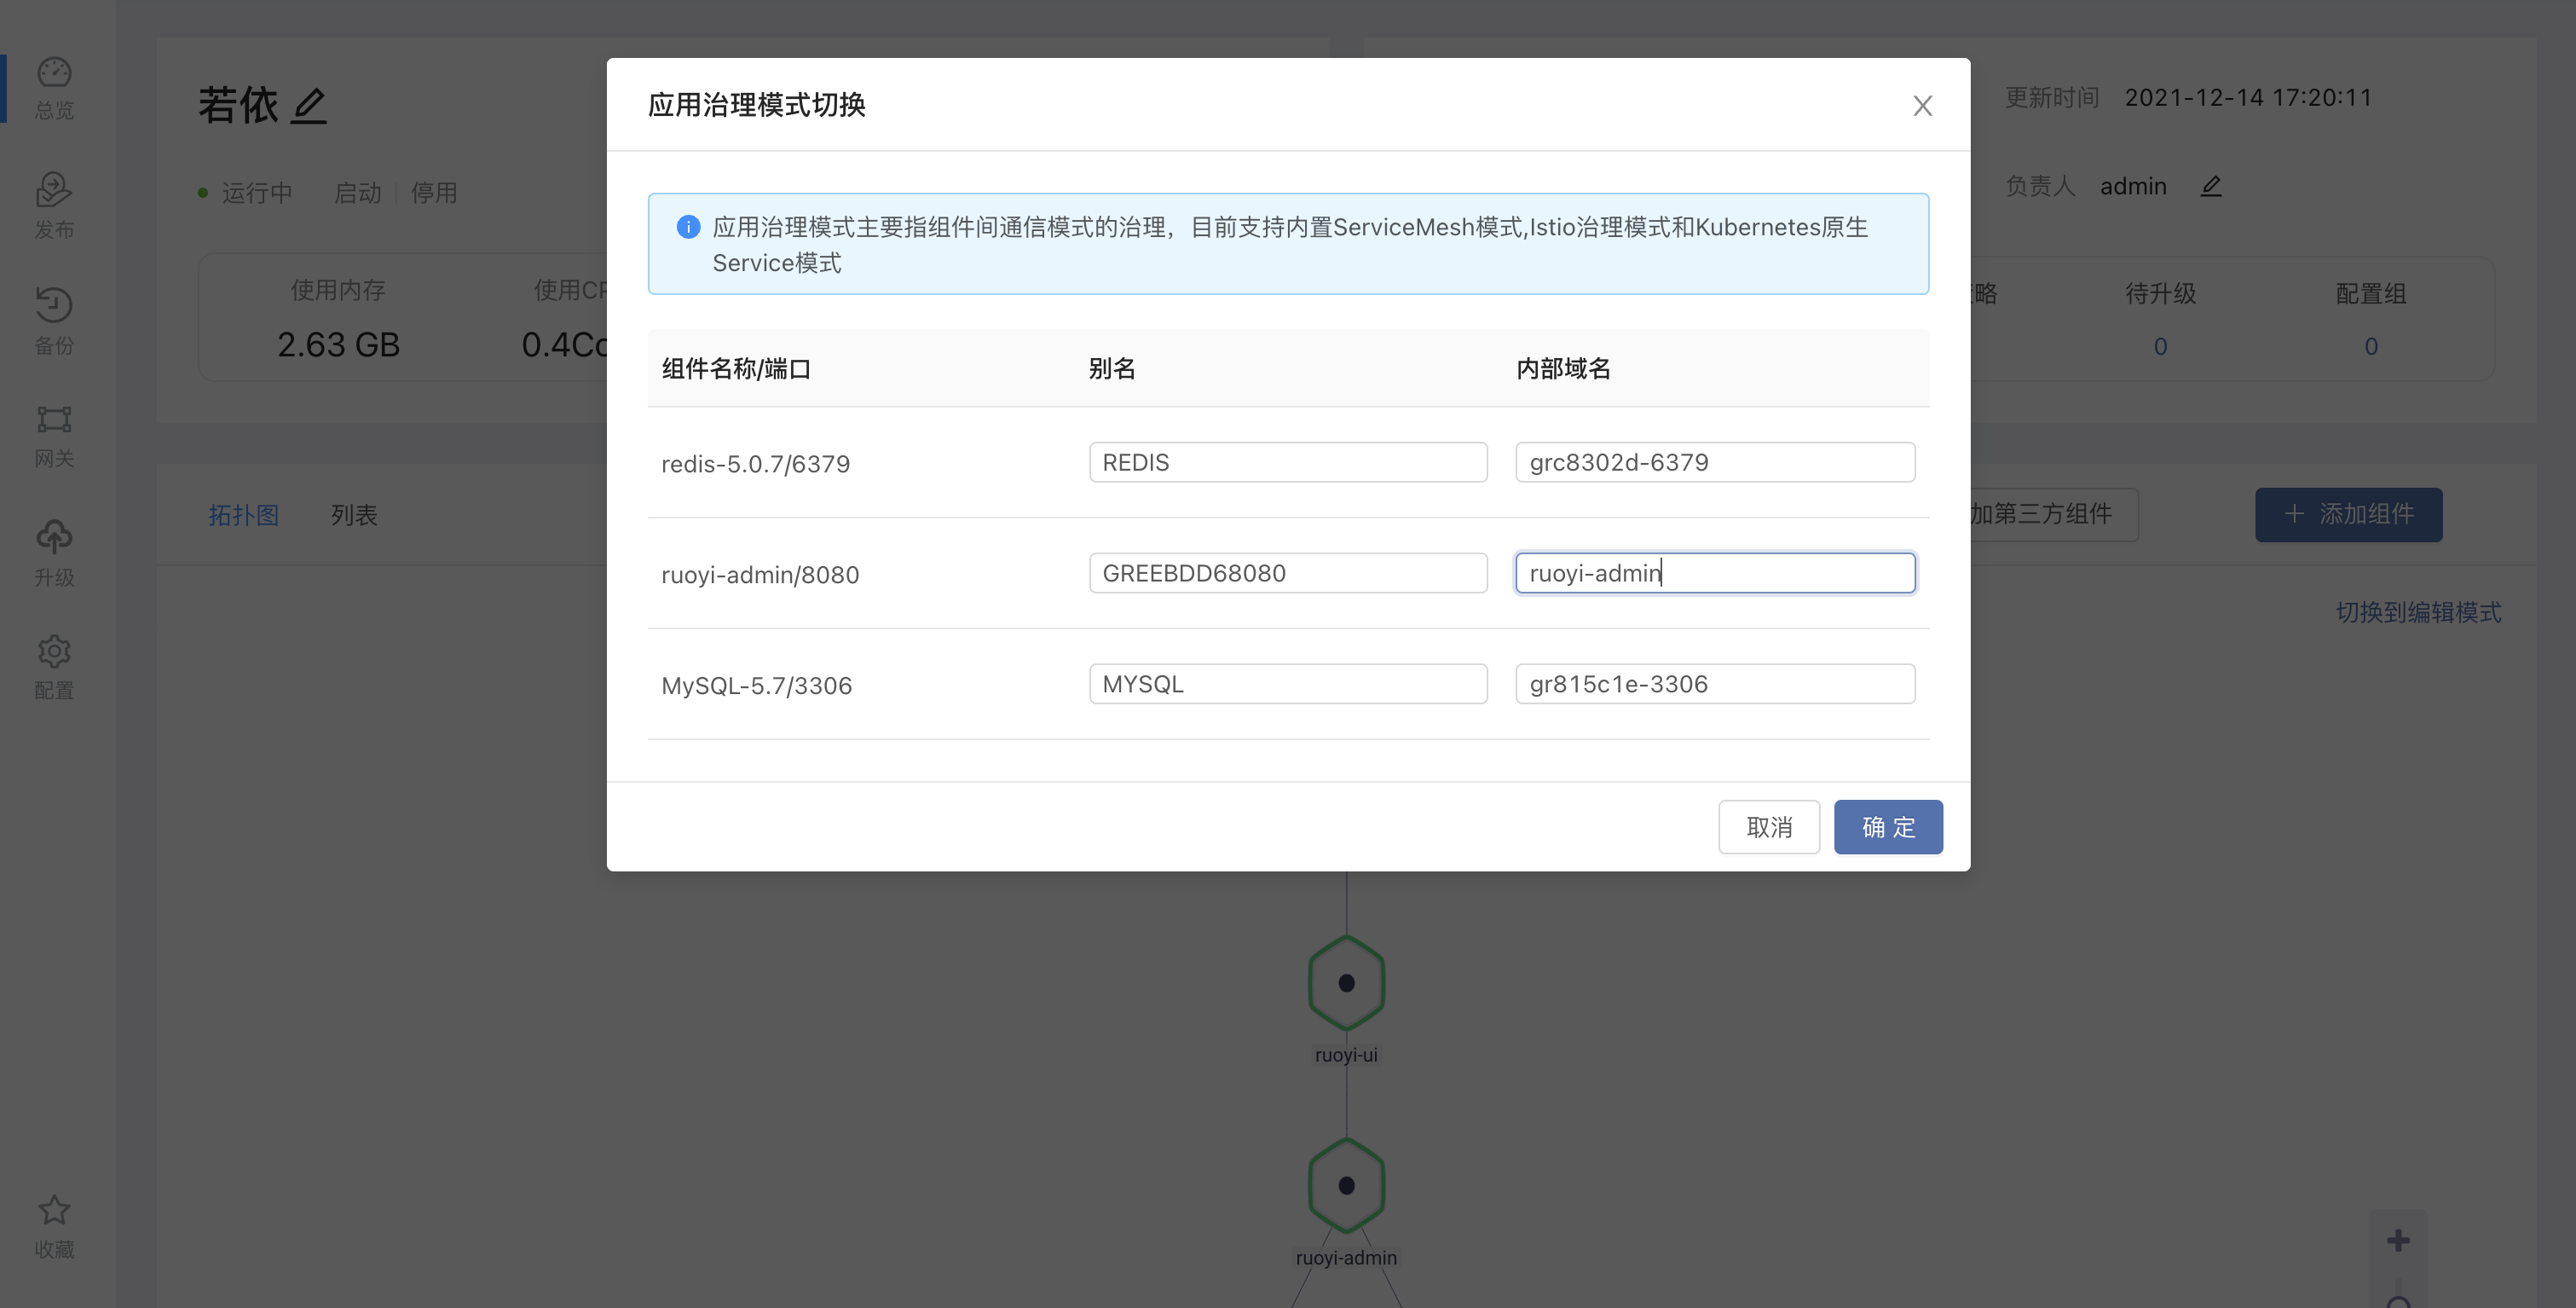
Let's take the SpringBoot background management systemRuoyias an example, as shown in the figure below, users can first install aRuoyi SpringBootapplication from the open source application store, select the version 3.6.0, click the governance mode switch, and select the Istio governance mode.
After clicking to switch to the Istio governance mode, the user needs to manually set the internal domain name. The internal domain name here will be the service name of the component in the Kubernetes cluster, which is unique under the same team.Here we modify it to a more readable internal domain name.
2. Modify the configuration file
After this step is completed, we also need to go to ruoyi-ui to mount a new configuration file.This is mainly because by default, the backend service address in the nginx configuration file web.conf ofruoyi-ui is 127.0.0.1, which was available when Rainbond's built-in ServiceMesh mode was used.
However, when the Istio governance mode is used, the components communicate through the internal domain name, so the corresponding proxy address needs to be modified by mounting the configuration file. The configuration file ofruoyi-ui can be accessed through the Web terminal on the upper right to access the container , copy the contents of the file /app/nginx/conf.d/web.conf.After modifying the proxy address, save it, as shown in the following figure.Earlier we set the internal domain name of the console to ruoyi-admin, so replace it with ruoyi-adminhere.

3. Restart the app
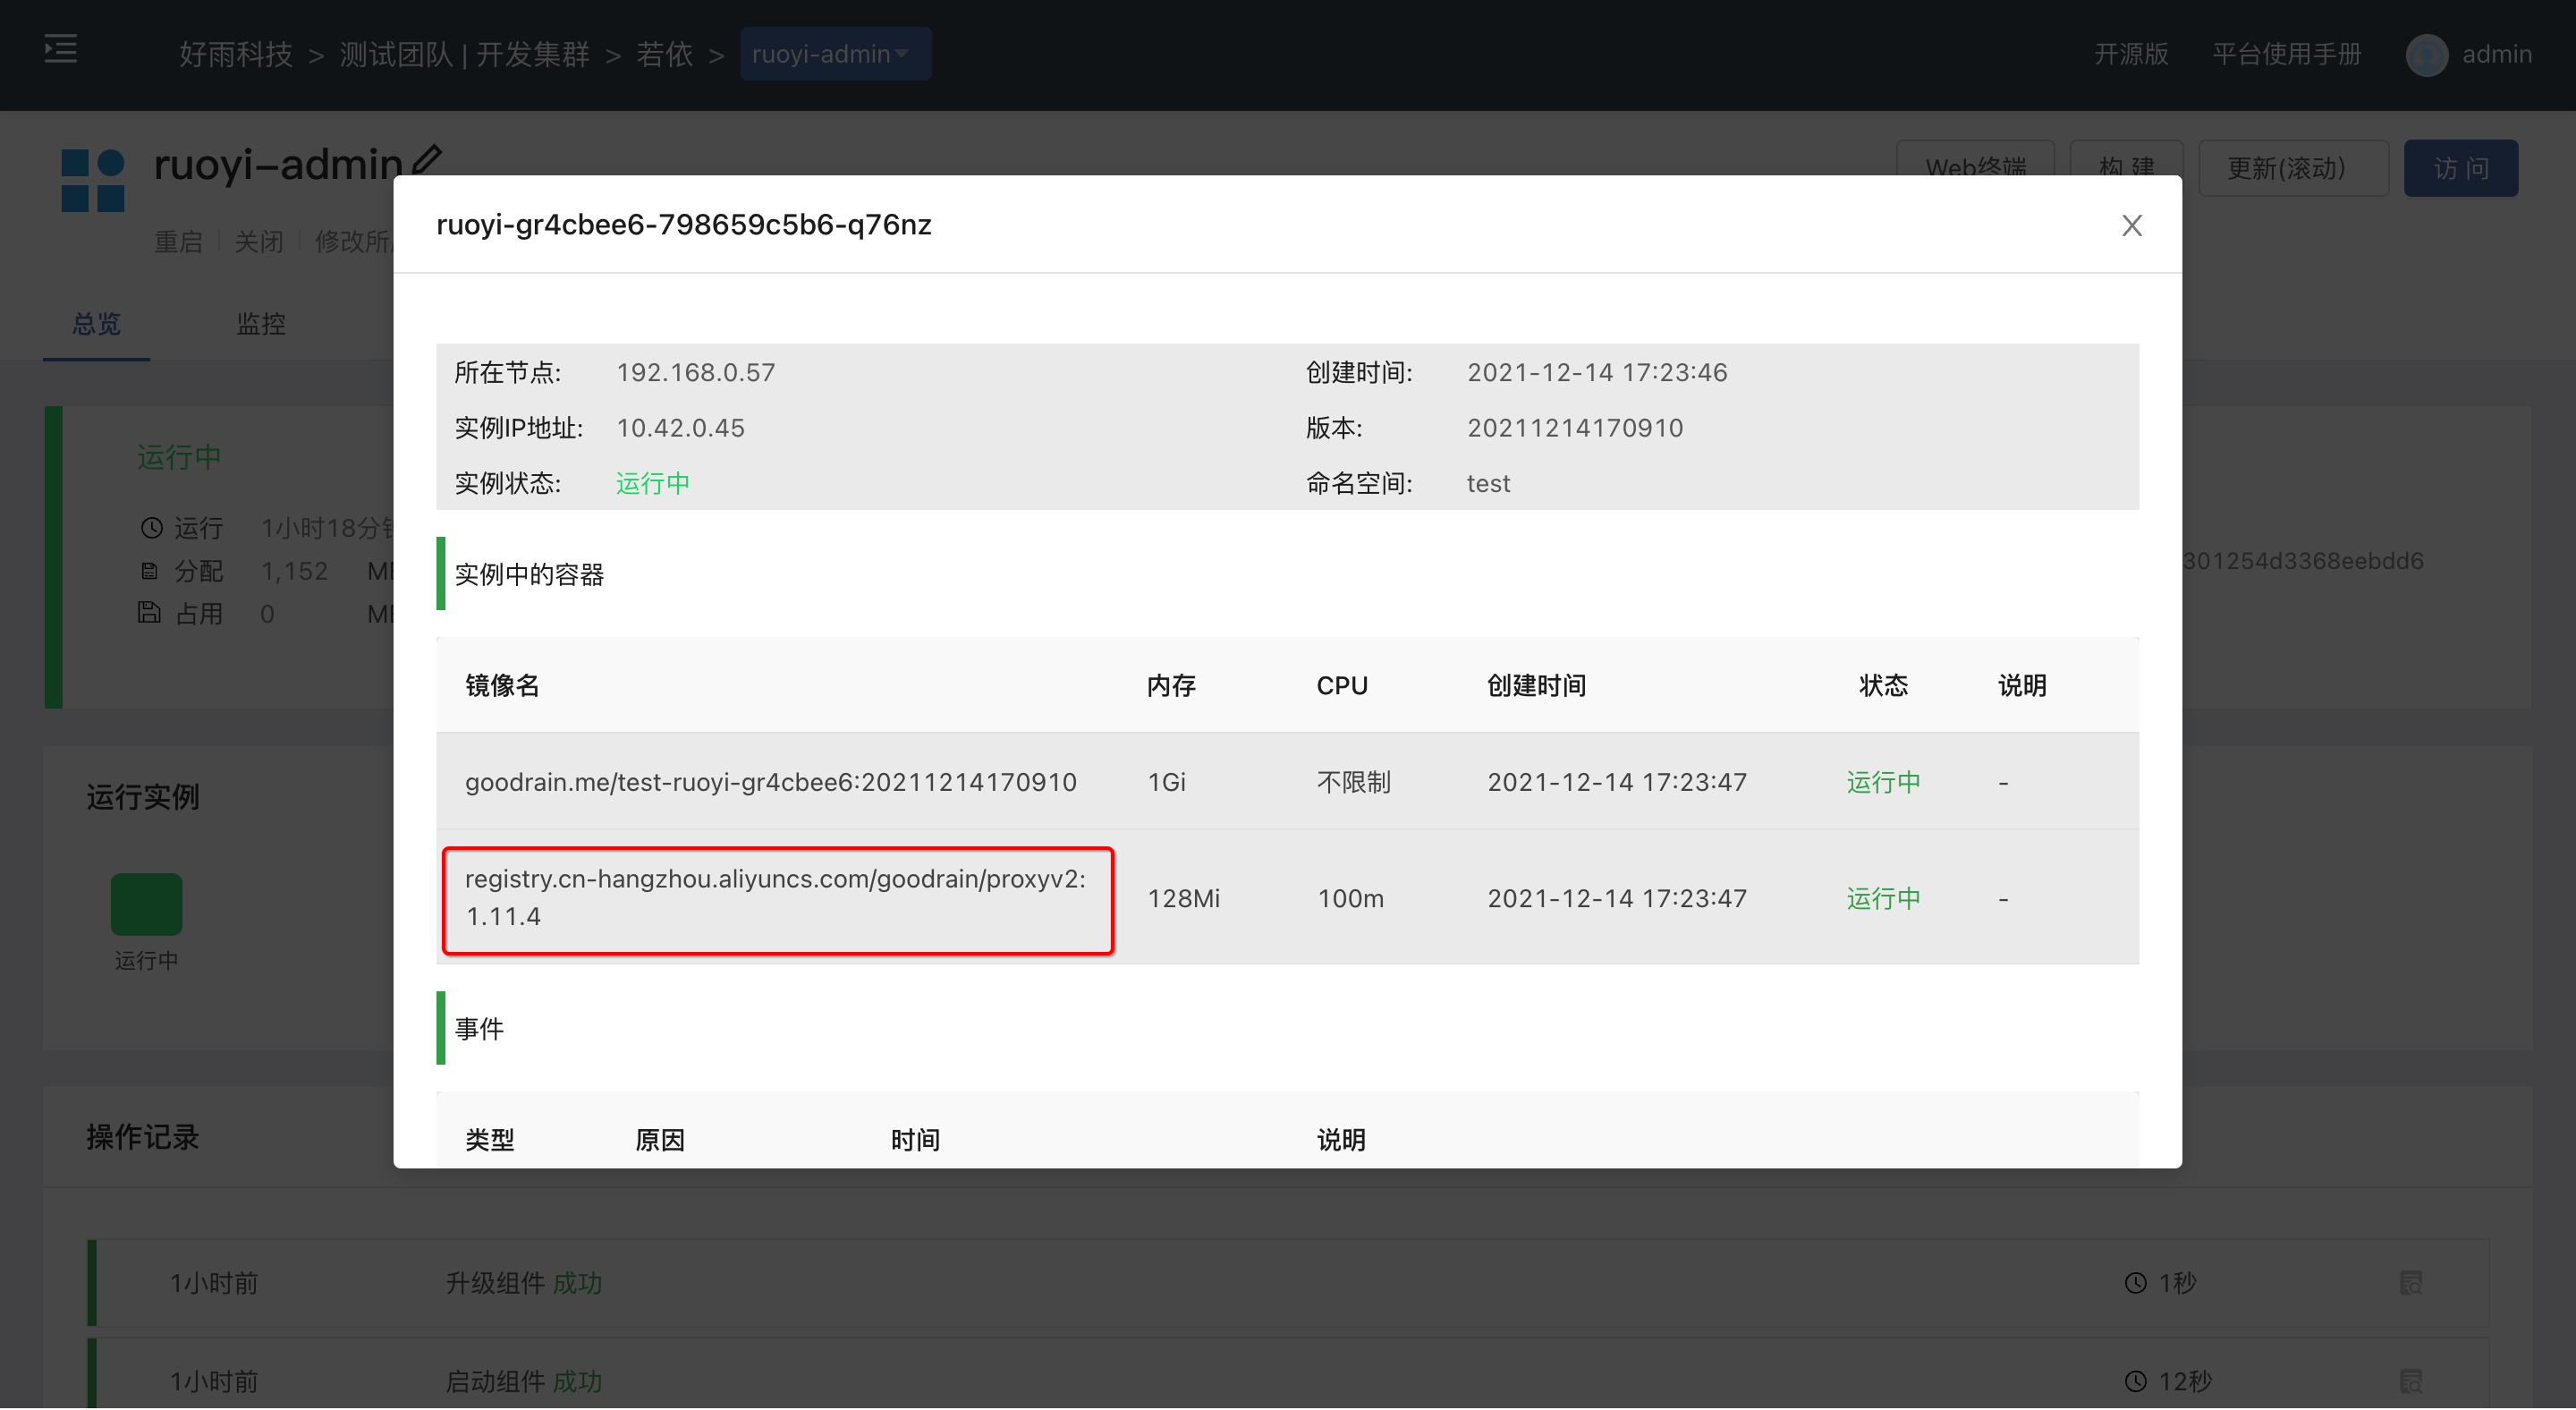
After completing the above two steps, we need to restart the entire application.After starting the application, go to the component page to view, you can see that each component has a similar sidecar container, which is the data plane of Istio. After the application is switched to the Istio governance mode, all components under the application will be automatically injected into the corresponding The Sidecar container does not require additional user setup.
So far, the application has been included in the scope of Istio governance. If users need more configuration of the application, they can refer to Istio official document for expansion.
4. Service observability expansion
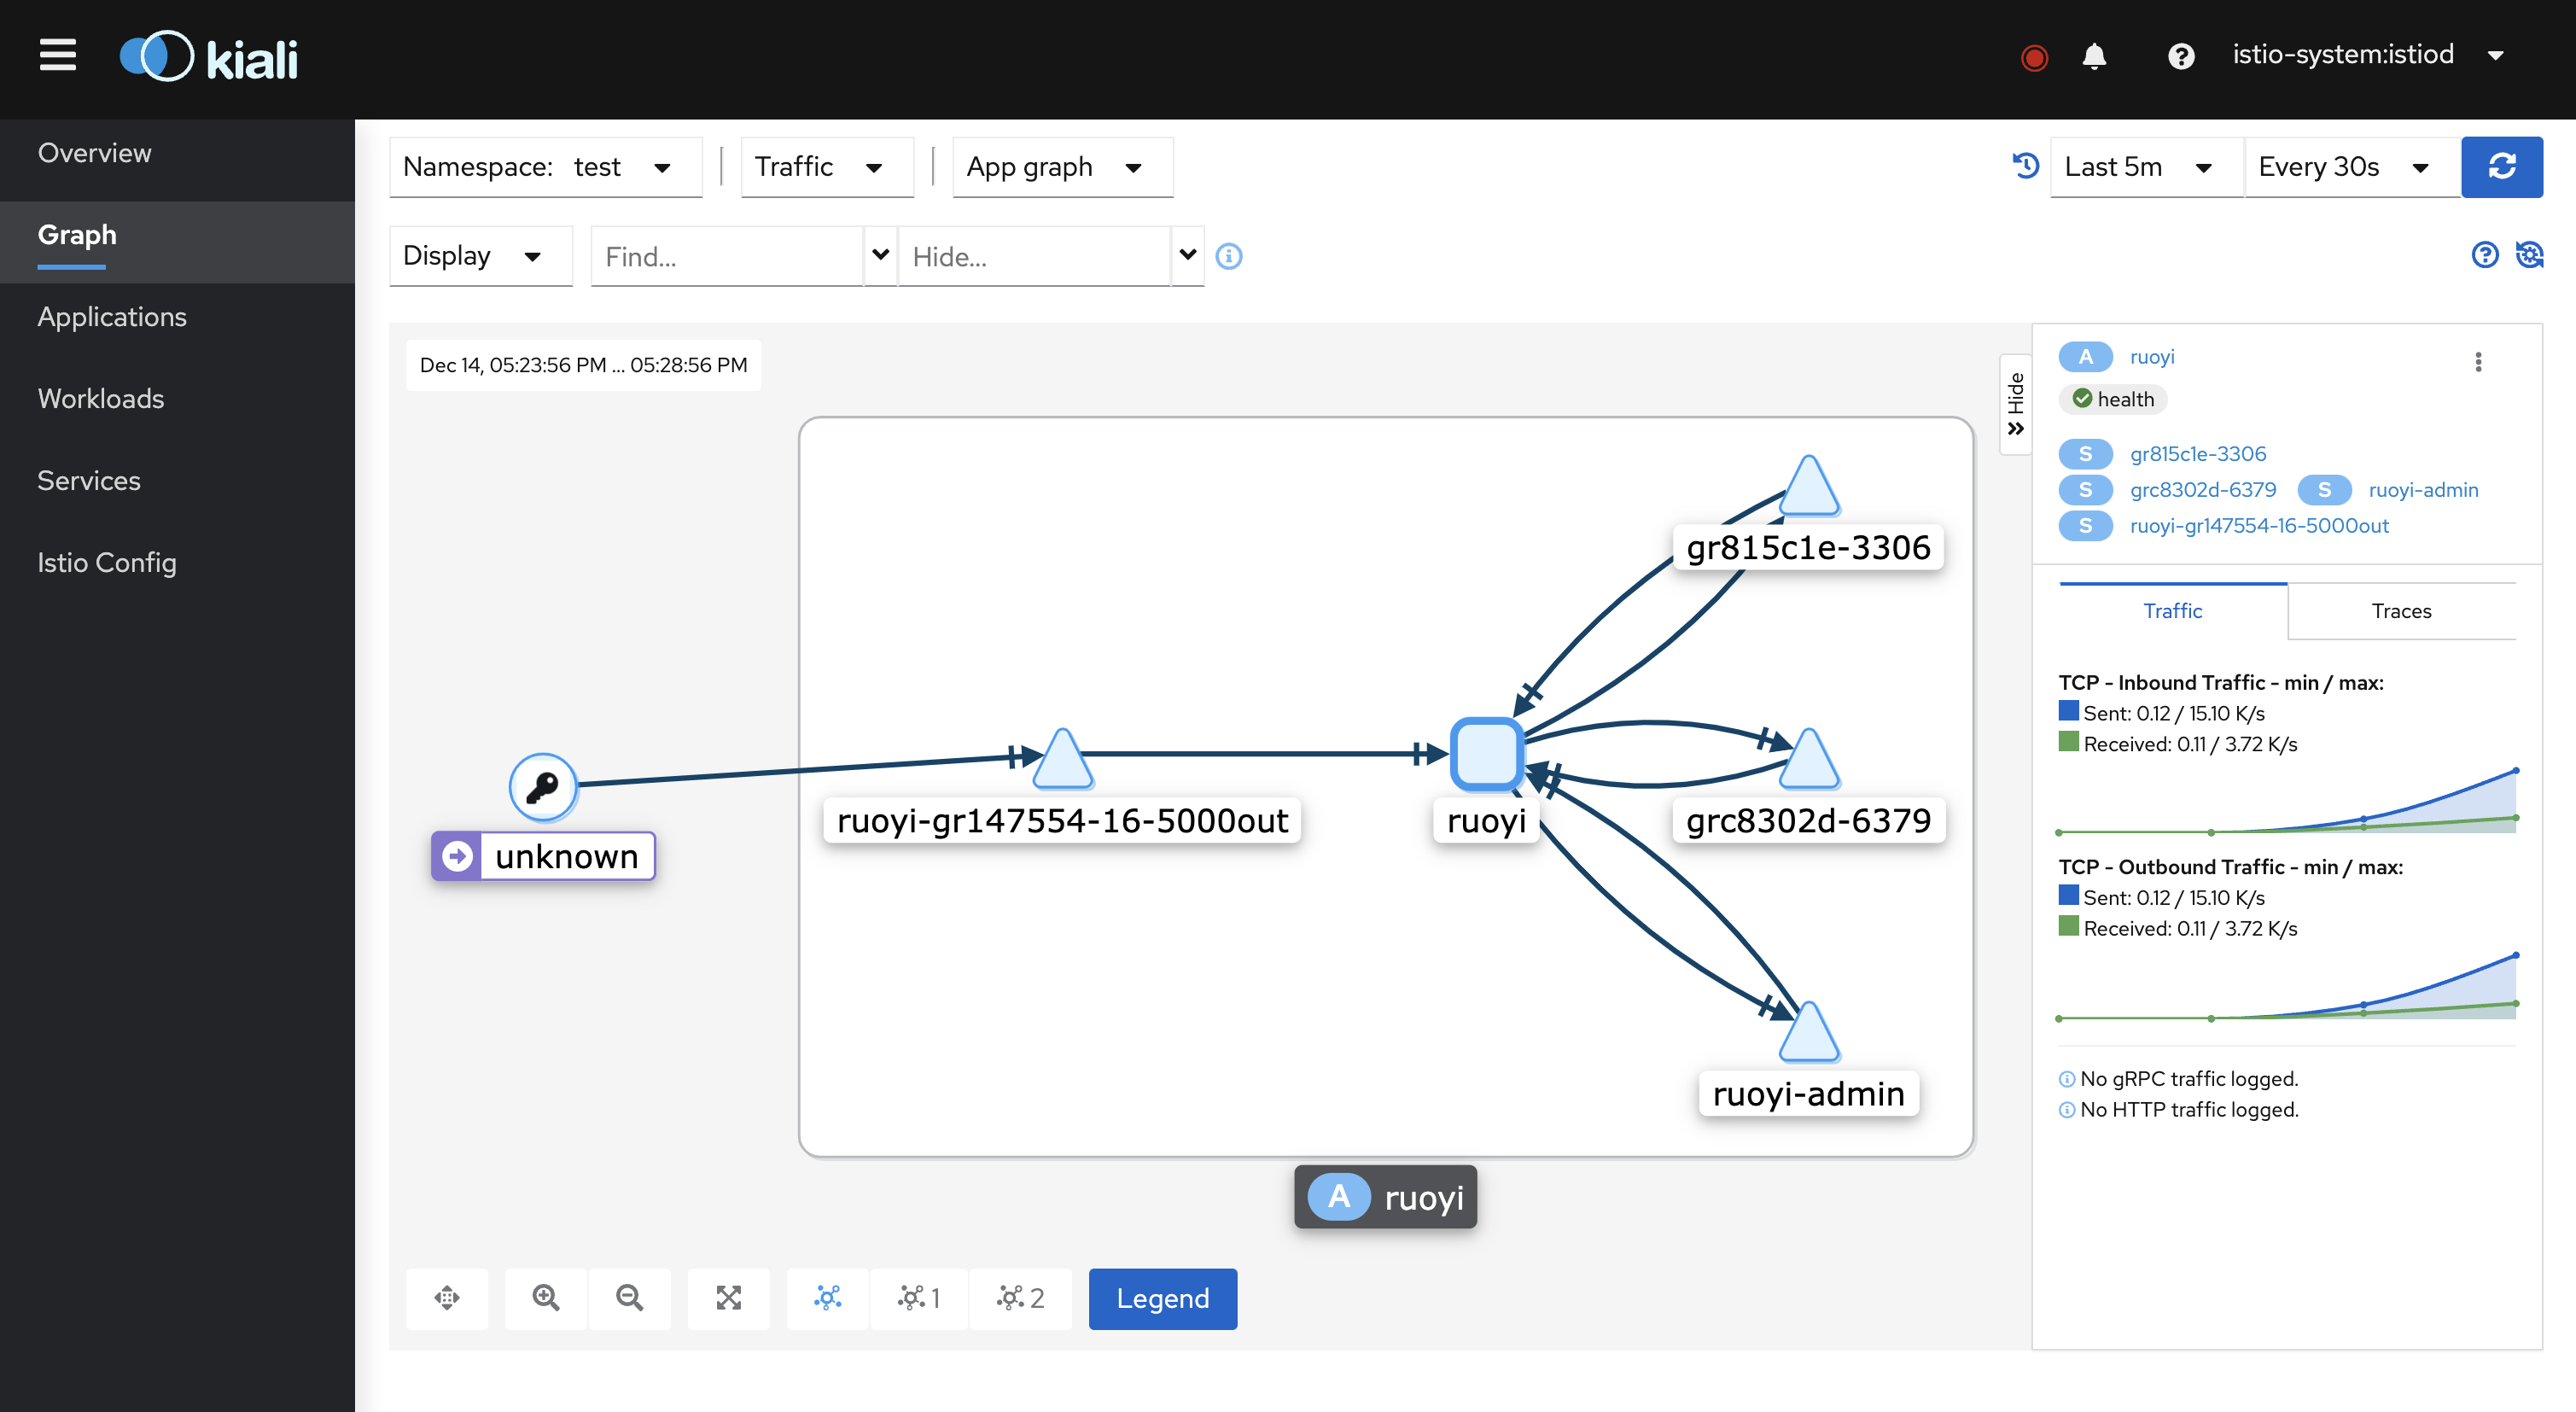
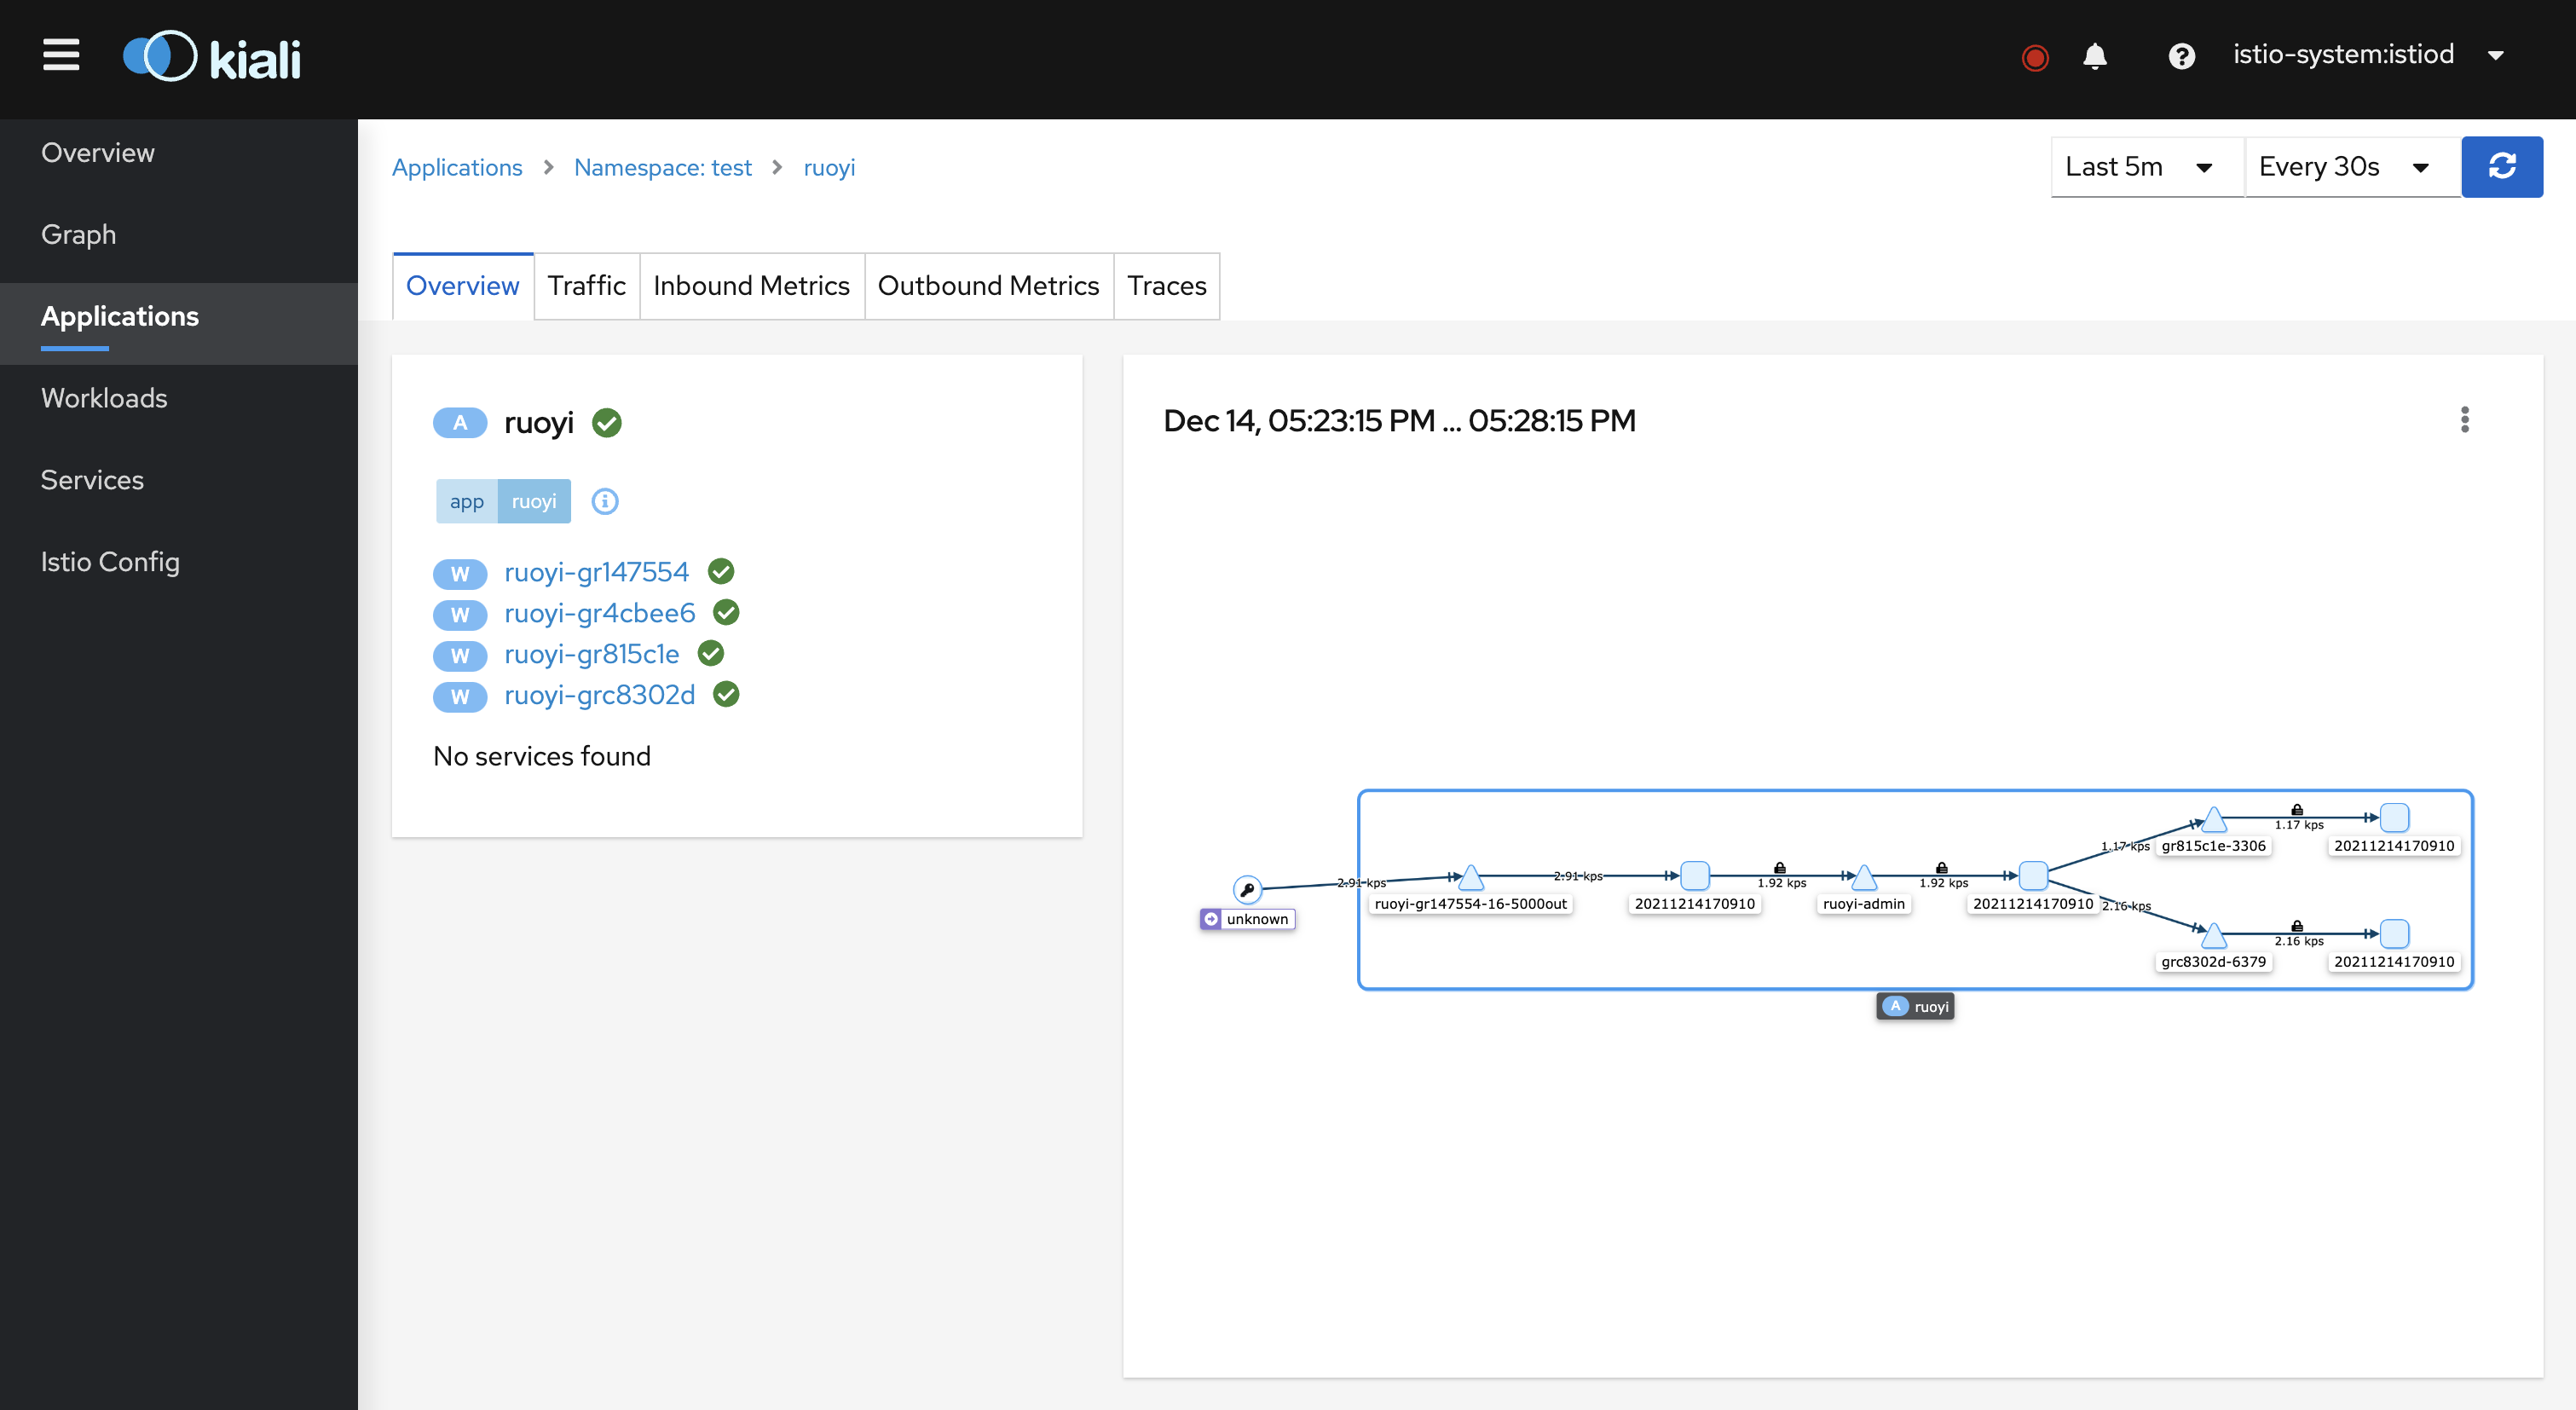
Access the kiali visualization interface, in the Applications column, select the namespace where the application is located, you can see the application we created before, click to enter, you can see the following traffic route.
In the Graph column, you can also see the corresponding in-app traffic requests.For more configuration and related functions, please refer to Kiali official documentation.