Deploy Spark Standalone cluster
Standalone is a master-slave cluster deployment mode provided by Spark itself.This article describes a conventional cluster deployment mode with one master and multiple slaves. In this mode, the master service relies on the Rainbond platform to monitor and ensure its availability, and supports rescheduling and restarting. The worker service can scale as many nodes as needed.
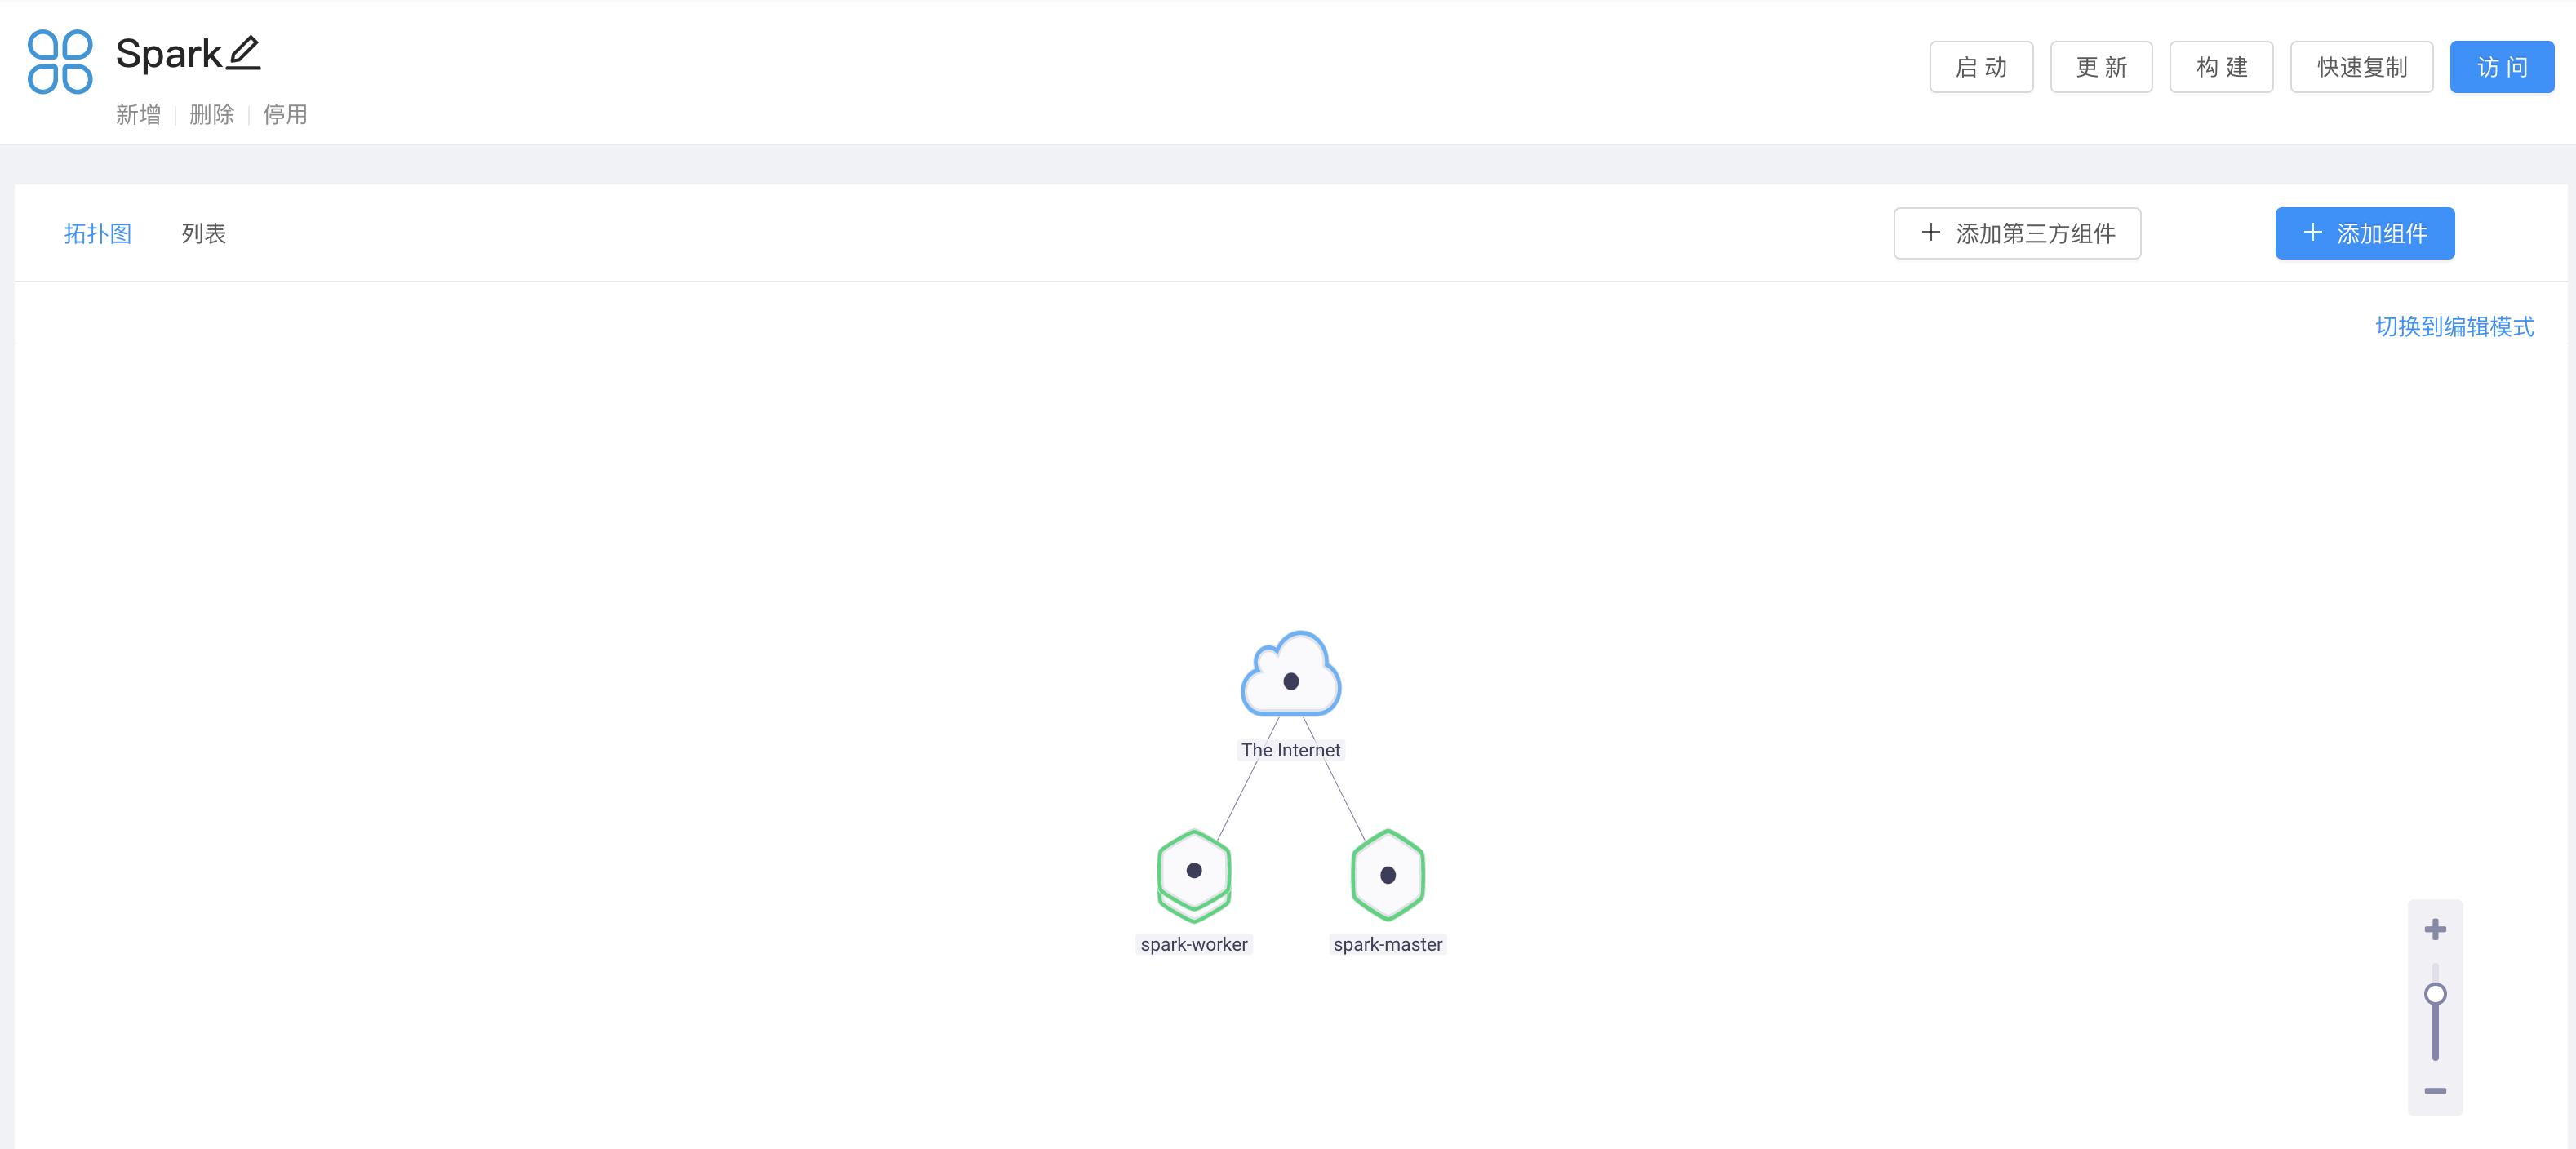
The screenshot of the deployment effect is as follows:
Deployment steps
Before starting, you need to complete the installation and construction of the Rainbond platform, refer toRainbond Installation and Deployment This reference document is suitable for students who have mastered the basic operation of Rainbond, so if you are new to the Rainbond platform, please refer to Rainbond Quick Start Guide
Deploy a single-instance master service
Deploy spark-master and use Rainbond to create component:based on Docker image
bde2020/spark-master:3.0.1-hadoop3.2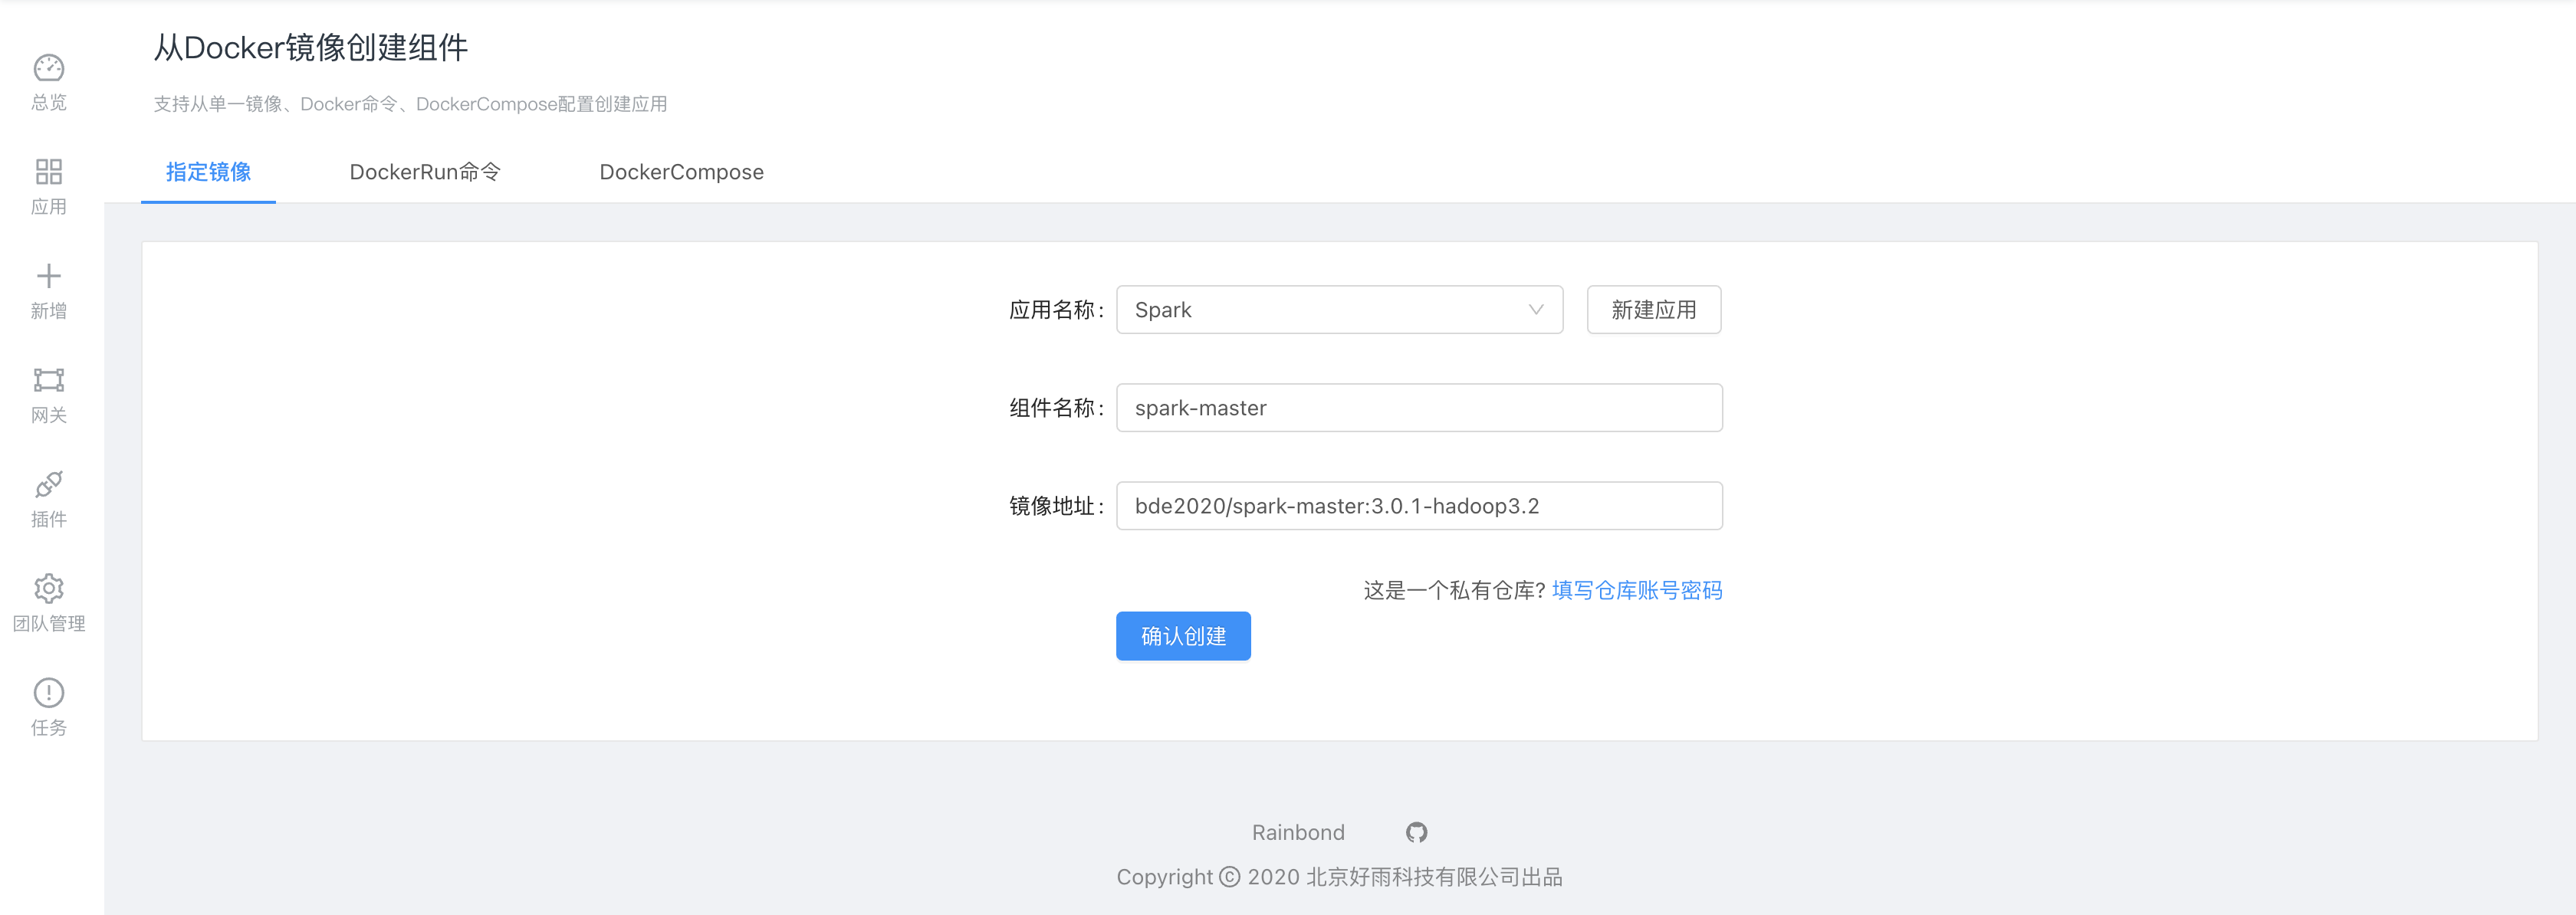
After confirming that the creation detection is successful, select
Advanced Settingsto perform three special settings.Add environment variables in the environment variables module
SPARK_DAEMON_JAVA_OPTS=-Dspark.deploy.recoveryMode=FILESYSTEM -Dspark.deploy.recoveryDirectory=/dataWe need to set spark-master to "Recovery with Local File System" mode.Data can be restored from persistent files after the master restarts to maintain the availability of the master service.
Add shared storage
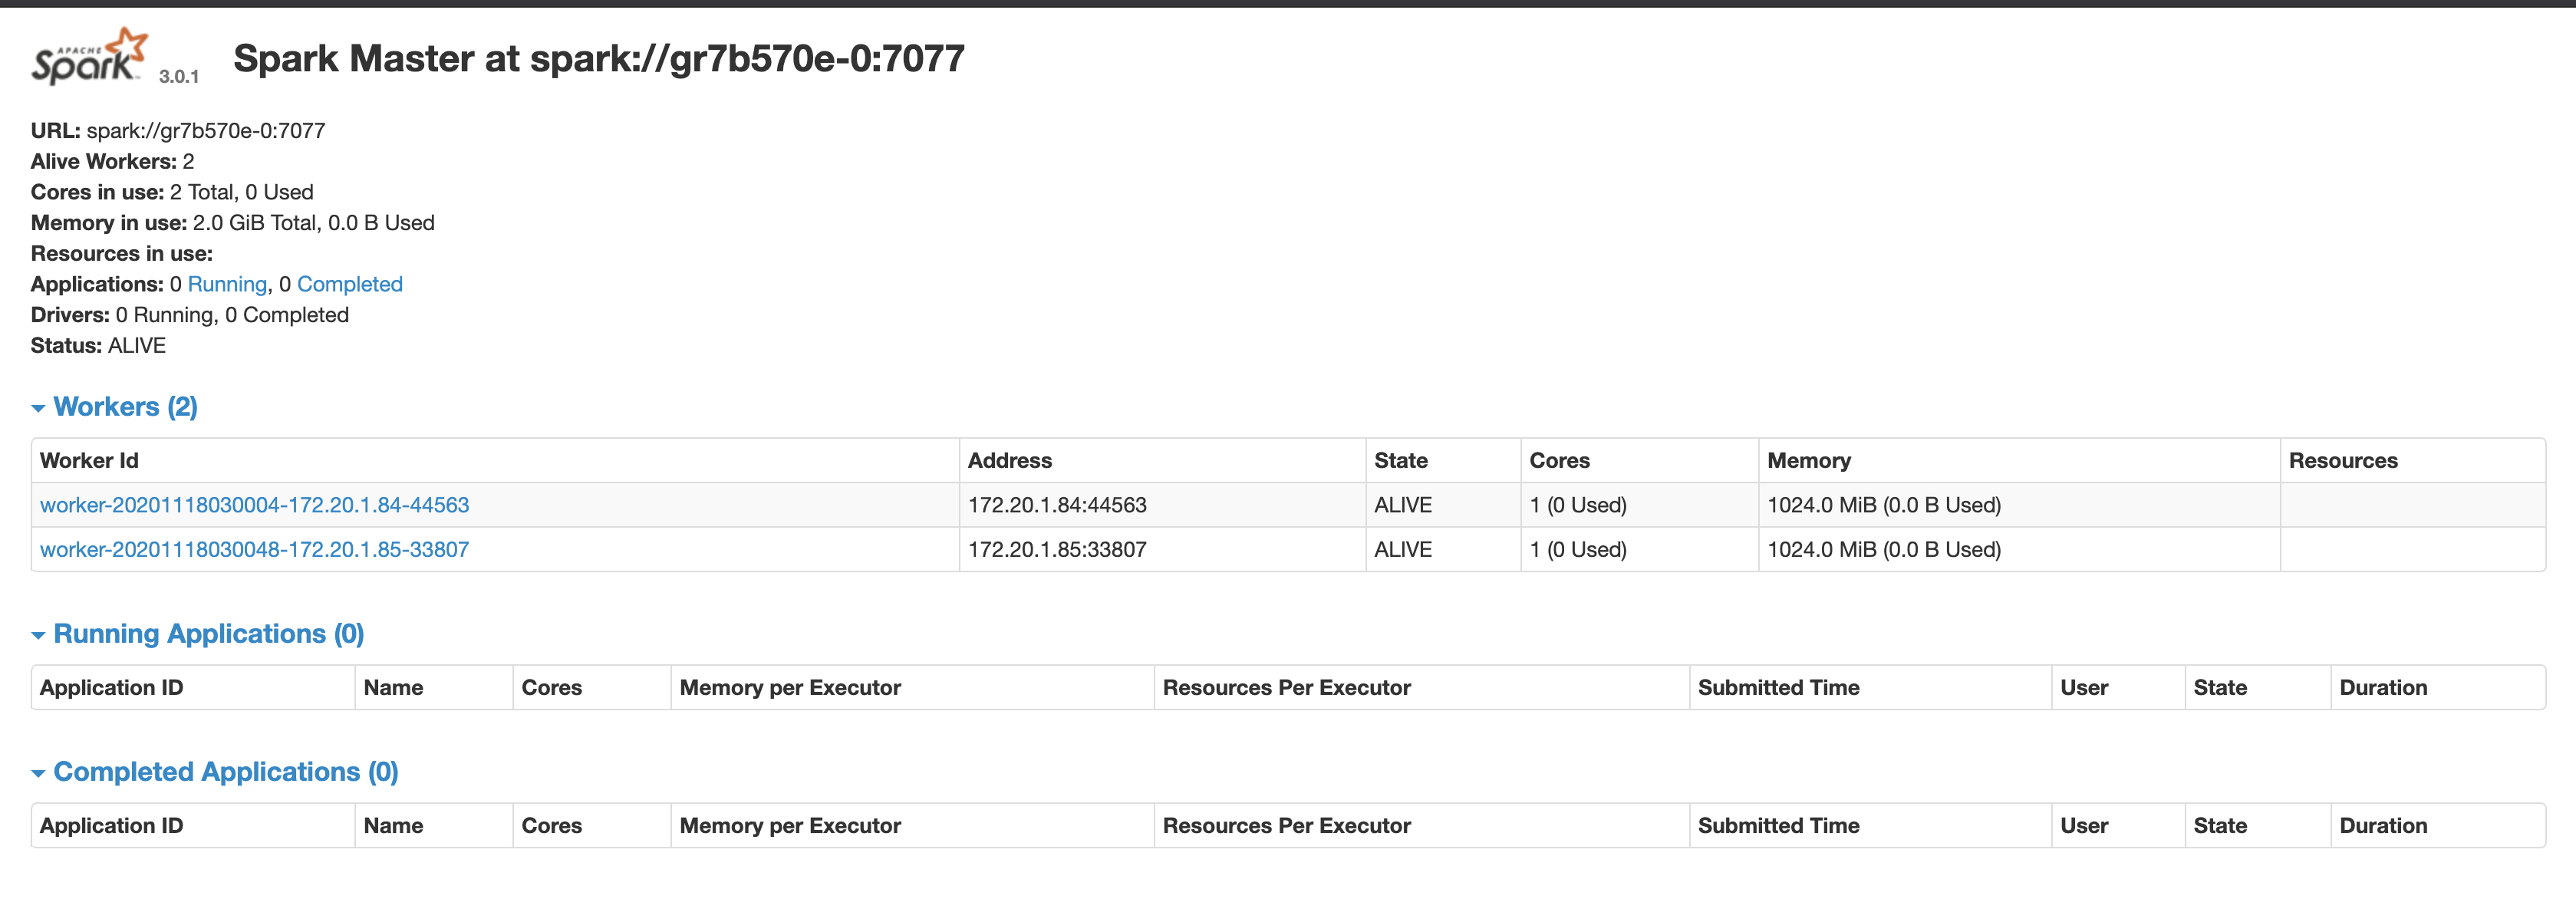
/datato the storage settings to persist the master's data so that it can be restored after restarts.In the port management, open the external service of port 8080. After the component starts successfully, you can access the UI of the master.
In the deployment properties select the component type as
stateful single instanceAfter being deployed as a stateful component, it can obtain a stable internal access domain name for worker components to connect to.Stateful service control ensures that the master node does not repeatedly start multiple instances.
After the settings are complete, select Confirm to create to start the master service.
The component can be successfully clicked to open the master UI.As shown in the figure above, we can get the access address of the master service in the UI as:spark://gr7b570e:7077 , note that the address displayed on the UI isspark://gr7b570e-0:7077 We need to use isspark://gr7b570e:7077 , copy and record this address.
Note that the actual value of the address, please check your UI display, here is just an example.
Deploy multi-instance worker instances
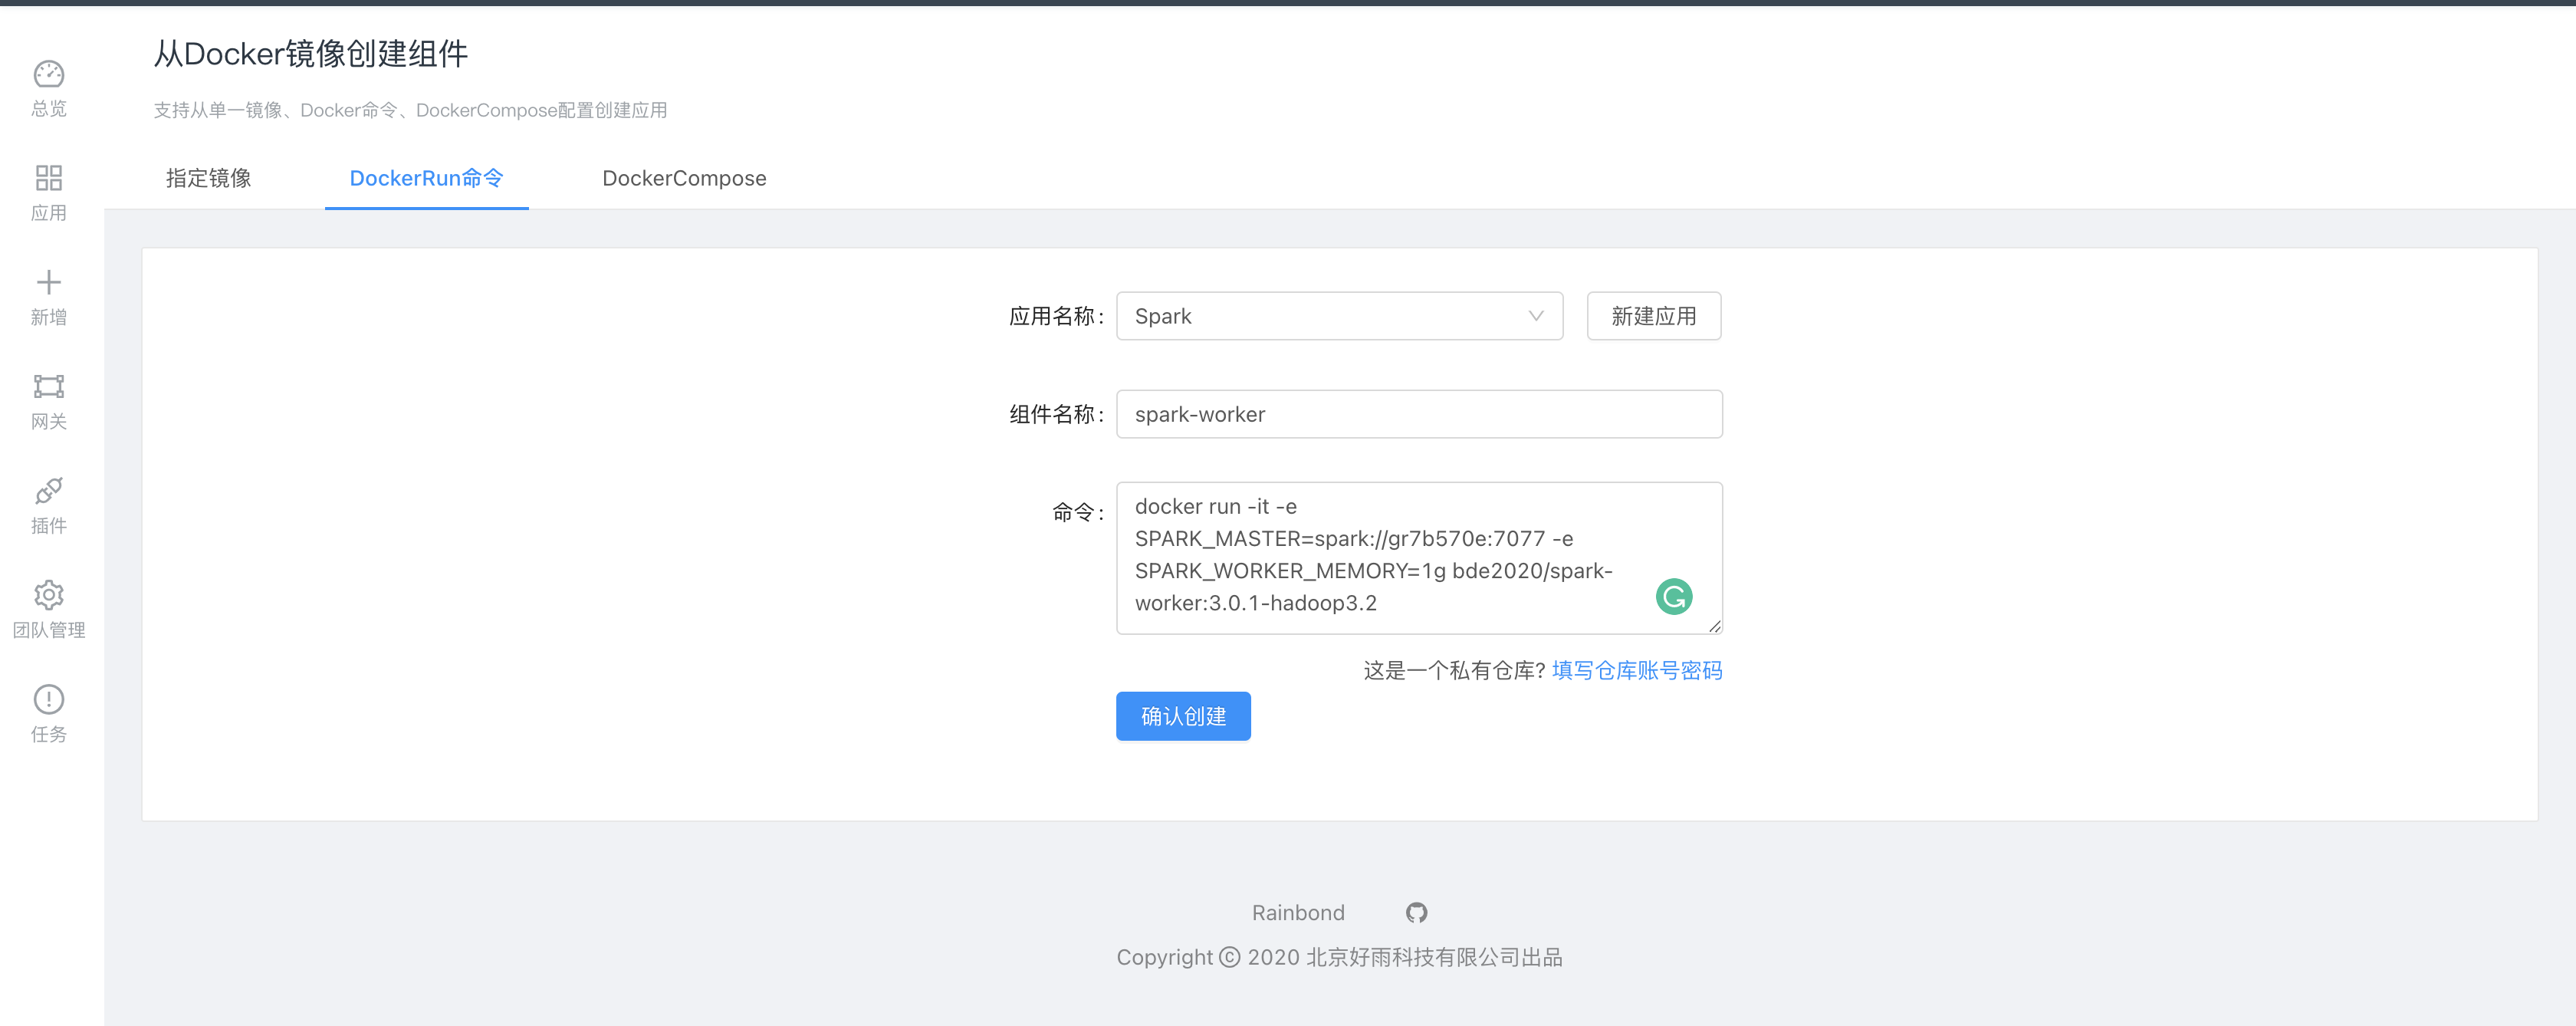
Deploy spark-worker and create components based on the Docker-run command. This method of creation can directly:some necessary properties.
docker run -it -e SPARK_MASTER=spark://gr7b570e:7077 -e SPARK_WORKER_MEMORY=1g bde2020/spark-worker:3.0.1-hadoop3.2The above creation method specifies two environment variables.
- SPARK_MASTER specifies the address of the master, which is obtained by the component created in the previous step.
- SPARK_WORKER_MEMORY Set the amount of memory for a single instance of the worker, which can be set according to the memory allocated by each instance.For example, to allocate 1GB per instance, set SPARK_WORKER_MEMORY=1g.If this variable is not set, the service automatically reads the amount of memory from the operating system.Since we are using the container deployment method, the value read will be the entire memory of the host.Will be much larger than the amount of available memory actually allocated by the worker instance.
- Also enter the advanced settings, set the component deployment mode to
, stateful multi-instance. - Confirm the creation of the component. After the component is successfully started, you can set the number of running instances of the worker on the scaling page of the component.
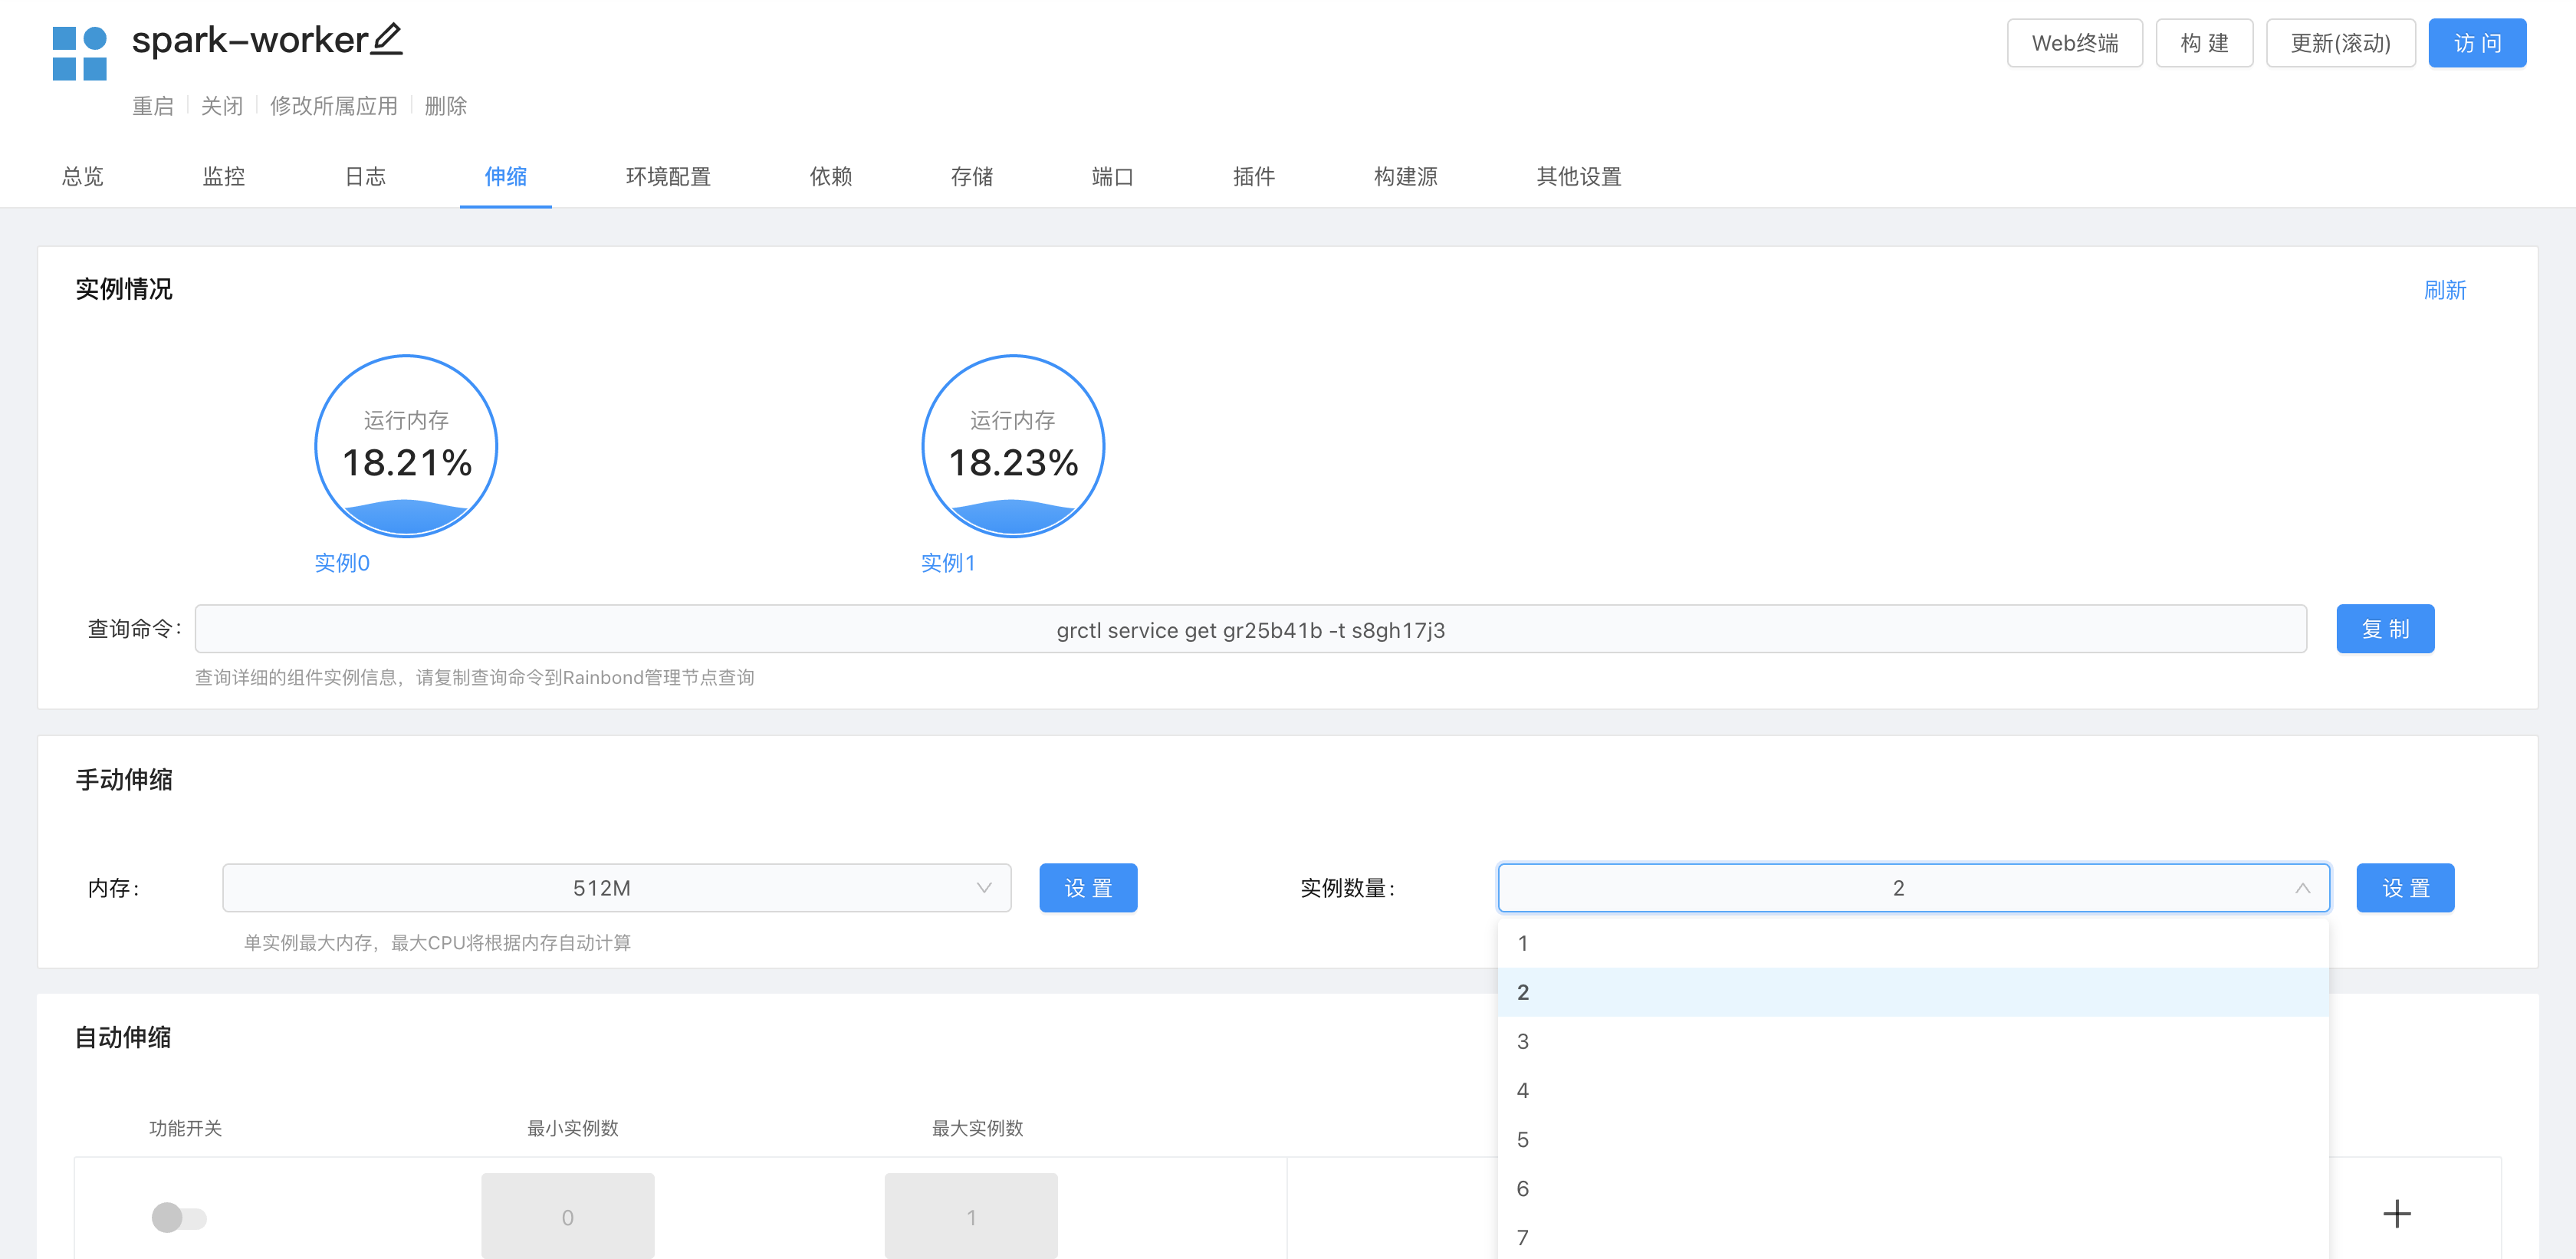
At this point, our Spark cluster has been deployed.
Spark data read
- The principle of nearest data processing is gradually broken
In the past, we prefer to deploy data processing services (hadoop, yarn, etc.) to the place closest to the data.The main reason is that the data calculation mode of hadoop consumes a lot of IO. If the data and calculation are classified, the consumption of network IO will be greater, and the network bandwidth will be required.
However, the Spark mechanism is different. The Spark computing mode is to cache data in memory as much as possible, which means that the resources consumed by Spark are mainly memory and CPU.Then the device memory and CPU allocation for storing data may not be sufficient.So separation of data from computation would be a better choice.
- More options when data and computation are separated
Separation of data and computing means that computing services are deployed separately, and storage services provide data for computing services through the network.Through the network, it means that there are various protocol modes to choose from. In addition to the traditional HDFS, the current commonly used object storage, such as various services compatible with S3, can also be a distributed file system, which can be based on the data type and actual needs. Reasonable choice.The computing service (spark worker) can flexibly allocate computing resources in the distributed cluster according to the needs of the task.
Deploying a Spark cluster in Rainbond described in this article is such a use case.
Master node active and standby high availability
Based on ZooKeeper, Spark can provide master-standby switching of the master service. The configuration method is also relatively simple, refer to official document.