The case of Spring Cloud microservices deployed in Rainbond
Example project details
This document takesPig rapid development frameworkas an example to demonstrate how to deploy a complete set of Spring Cloud projects on Rainbond.
Pig Microservice Architecture V2.1.0:
- RBAC authority management system based on Spring Cloud Finchley and Spring Security OAuth2
- Encapsulate Element-ui based on the concept of data-driven view, even without vue experience, you can get started quickly
- Provides support for common containerization Docker, Kubernetes, Rancher2
- Provide production practice of lambda, stream api, webflux
Module Description:
pig
├── pig-ui -- front-end engineering[80]
├── pig-auth -- authorization service provider[3000]
└── pig-common -- system common module
     ├── pig-common-core -- common Tool class core package
     ├── pig-common-log -- log service
     └── pig-common-security -- security tool class
├── pig-config -- configuration center[8888]
├── pig-eureka -- Service registration and discovery[8761]
├── pig-gateway -- Spring Cloud Gateway gateway[9999]
└── pig-upms -- General user rights management module
     └── pigx-upms-api -- General user rights management System public api module
     └── pigx-upms-biz -- general user rights management system business processing module[4000]
└── pigx-visual -- graphical module
     ├── pigx-monitor -- Spring Boot Admin monitoring [5001]
     └── pigx-codegen -- graphical code generation22[5003]
     pigx-[5002]-- microservice link tracking24
The above modules can be divided into two categories:class libraries and services. Readers can compare their own Spring Cloud projects.
- After construction, a jar package is generated, a collection of classes used to implement various functions, that is, a class library, such as the
pig-commonmodule in Pig - After construction, a jar package or war package is generated, which is started by
java -jaror tomcat, etc., and a port is opened to provide services, that is, a service, such as thepig-eurekamodule in Pig
Just build the service module in Rainbond.
After sorting out, the service components that the project needs to build include:
| boot sequence | service component name | run port | Component function |
|---|---|---|---|
| 1 | pig-eureka | 8761 | spring cloud service discovery registration and discovery |
| 2 | pig-config | 8888 | spring cloud configuration center |
| 3 | pig-gateway | 9999 | spring cloud microservice gateway |
| 4 | pig-auth | 3000 | Authorized service provided |
| 5 | pig-upms-biz | 4000 | General user rights management system business processing module |
| 6 | pig-monitor | 5001 | Spring Boot Admin Monitoring |
| 7 | pig-codegen | 5003 | Graphical code generation |
| 8 | pig-zipkin | 5002 | Microservice Link Tracking |
| 9 | pig-ui | 80 | Front-end project (vue project) |
Deployment Environment Description:
To deploy pig, the following environments are required to support:
| Middleware or environment requirements | Version requirements | Remark |
|---|---|---|
| JDK | 1.8 | Mandatory version |
| MySQL | 5.7+ | Mandatory version |
| Redis | 3.2+ | Mandatory version |
| node | 8.0+ | Used to run front-end projects |
| npm | 6.0+ | For building front-end projects |
project link:
module building
Create a new application and name it spring-cloud
Get project clone/download address: https://gitee.com/log4j/pig.git
Java multi-module deployment Pig project
ReferenceJAVA multi-module source code construction
Deploy the Pig project step by step
Takepig-eurekaas an example to demonstrate the construction process:from source code
- Add service components for
spring-cloud- start from source - custom repository:
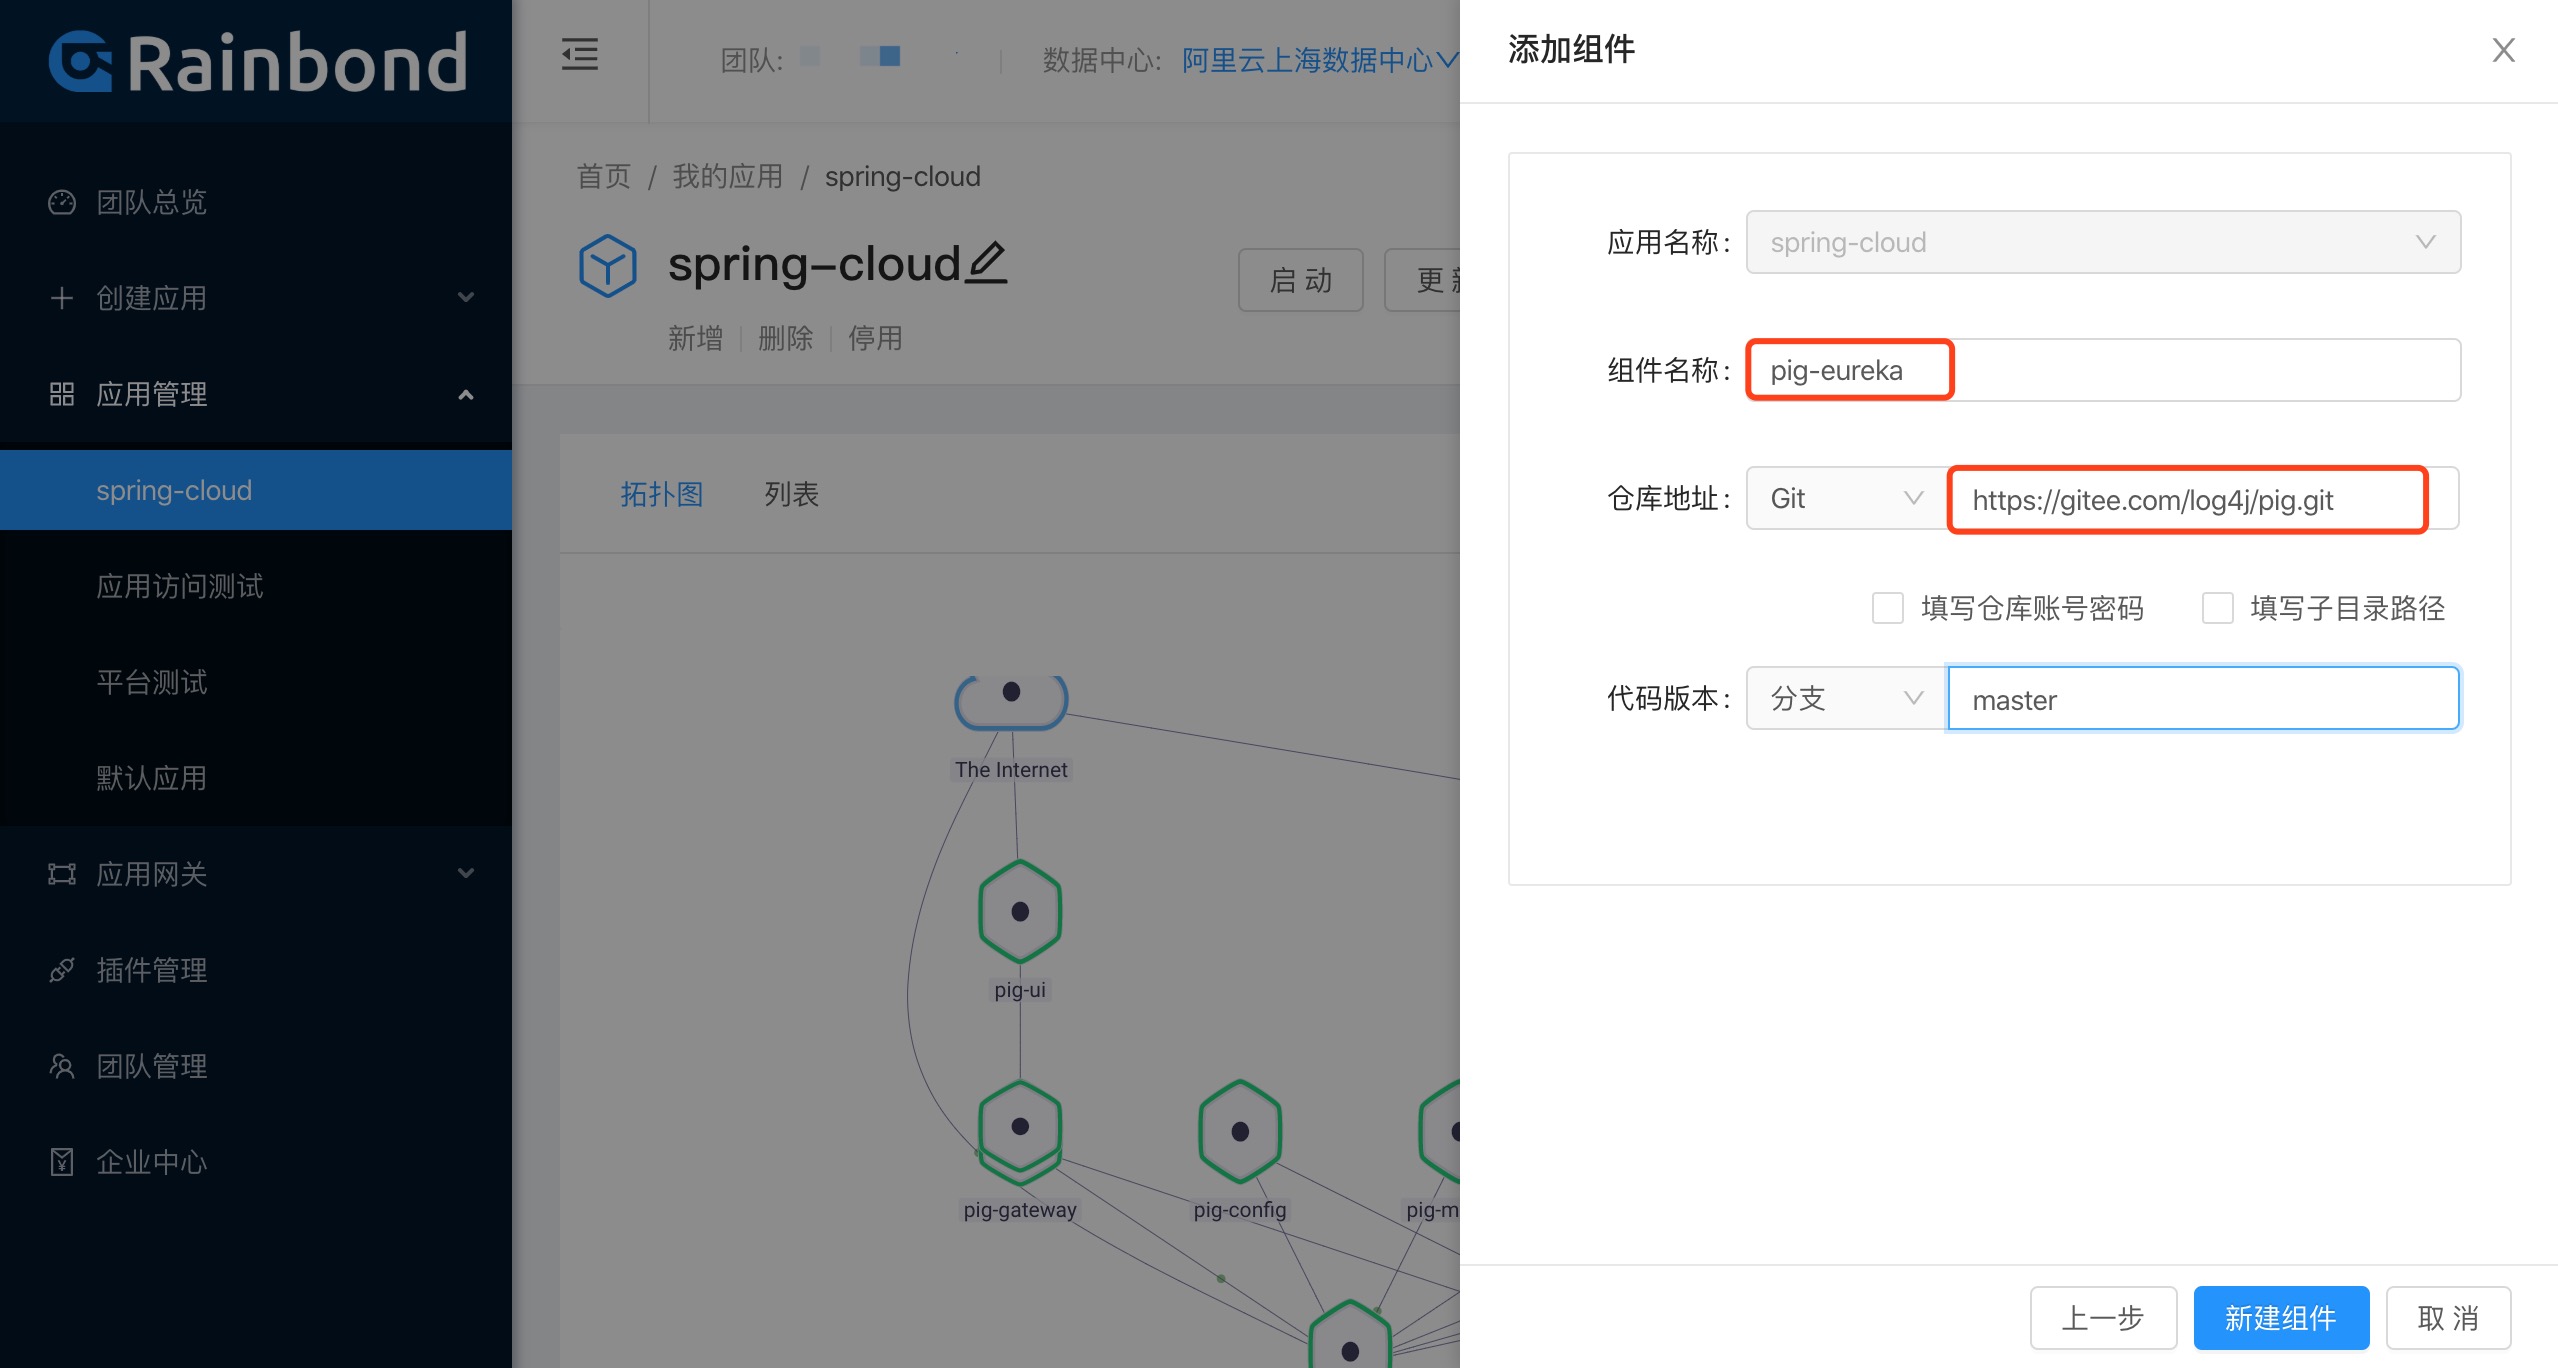
Click New Service, Rainbond will automatically pull the code, and automatically recognize the code language as Java-mavenaccording to pom.xml in the code root directory.cancel and build start option:
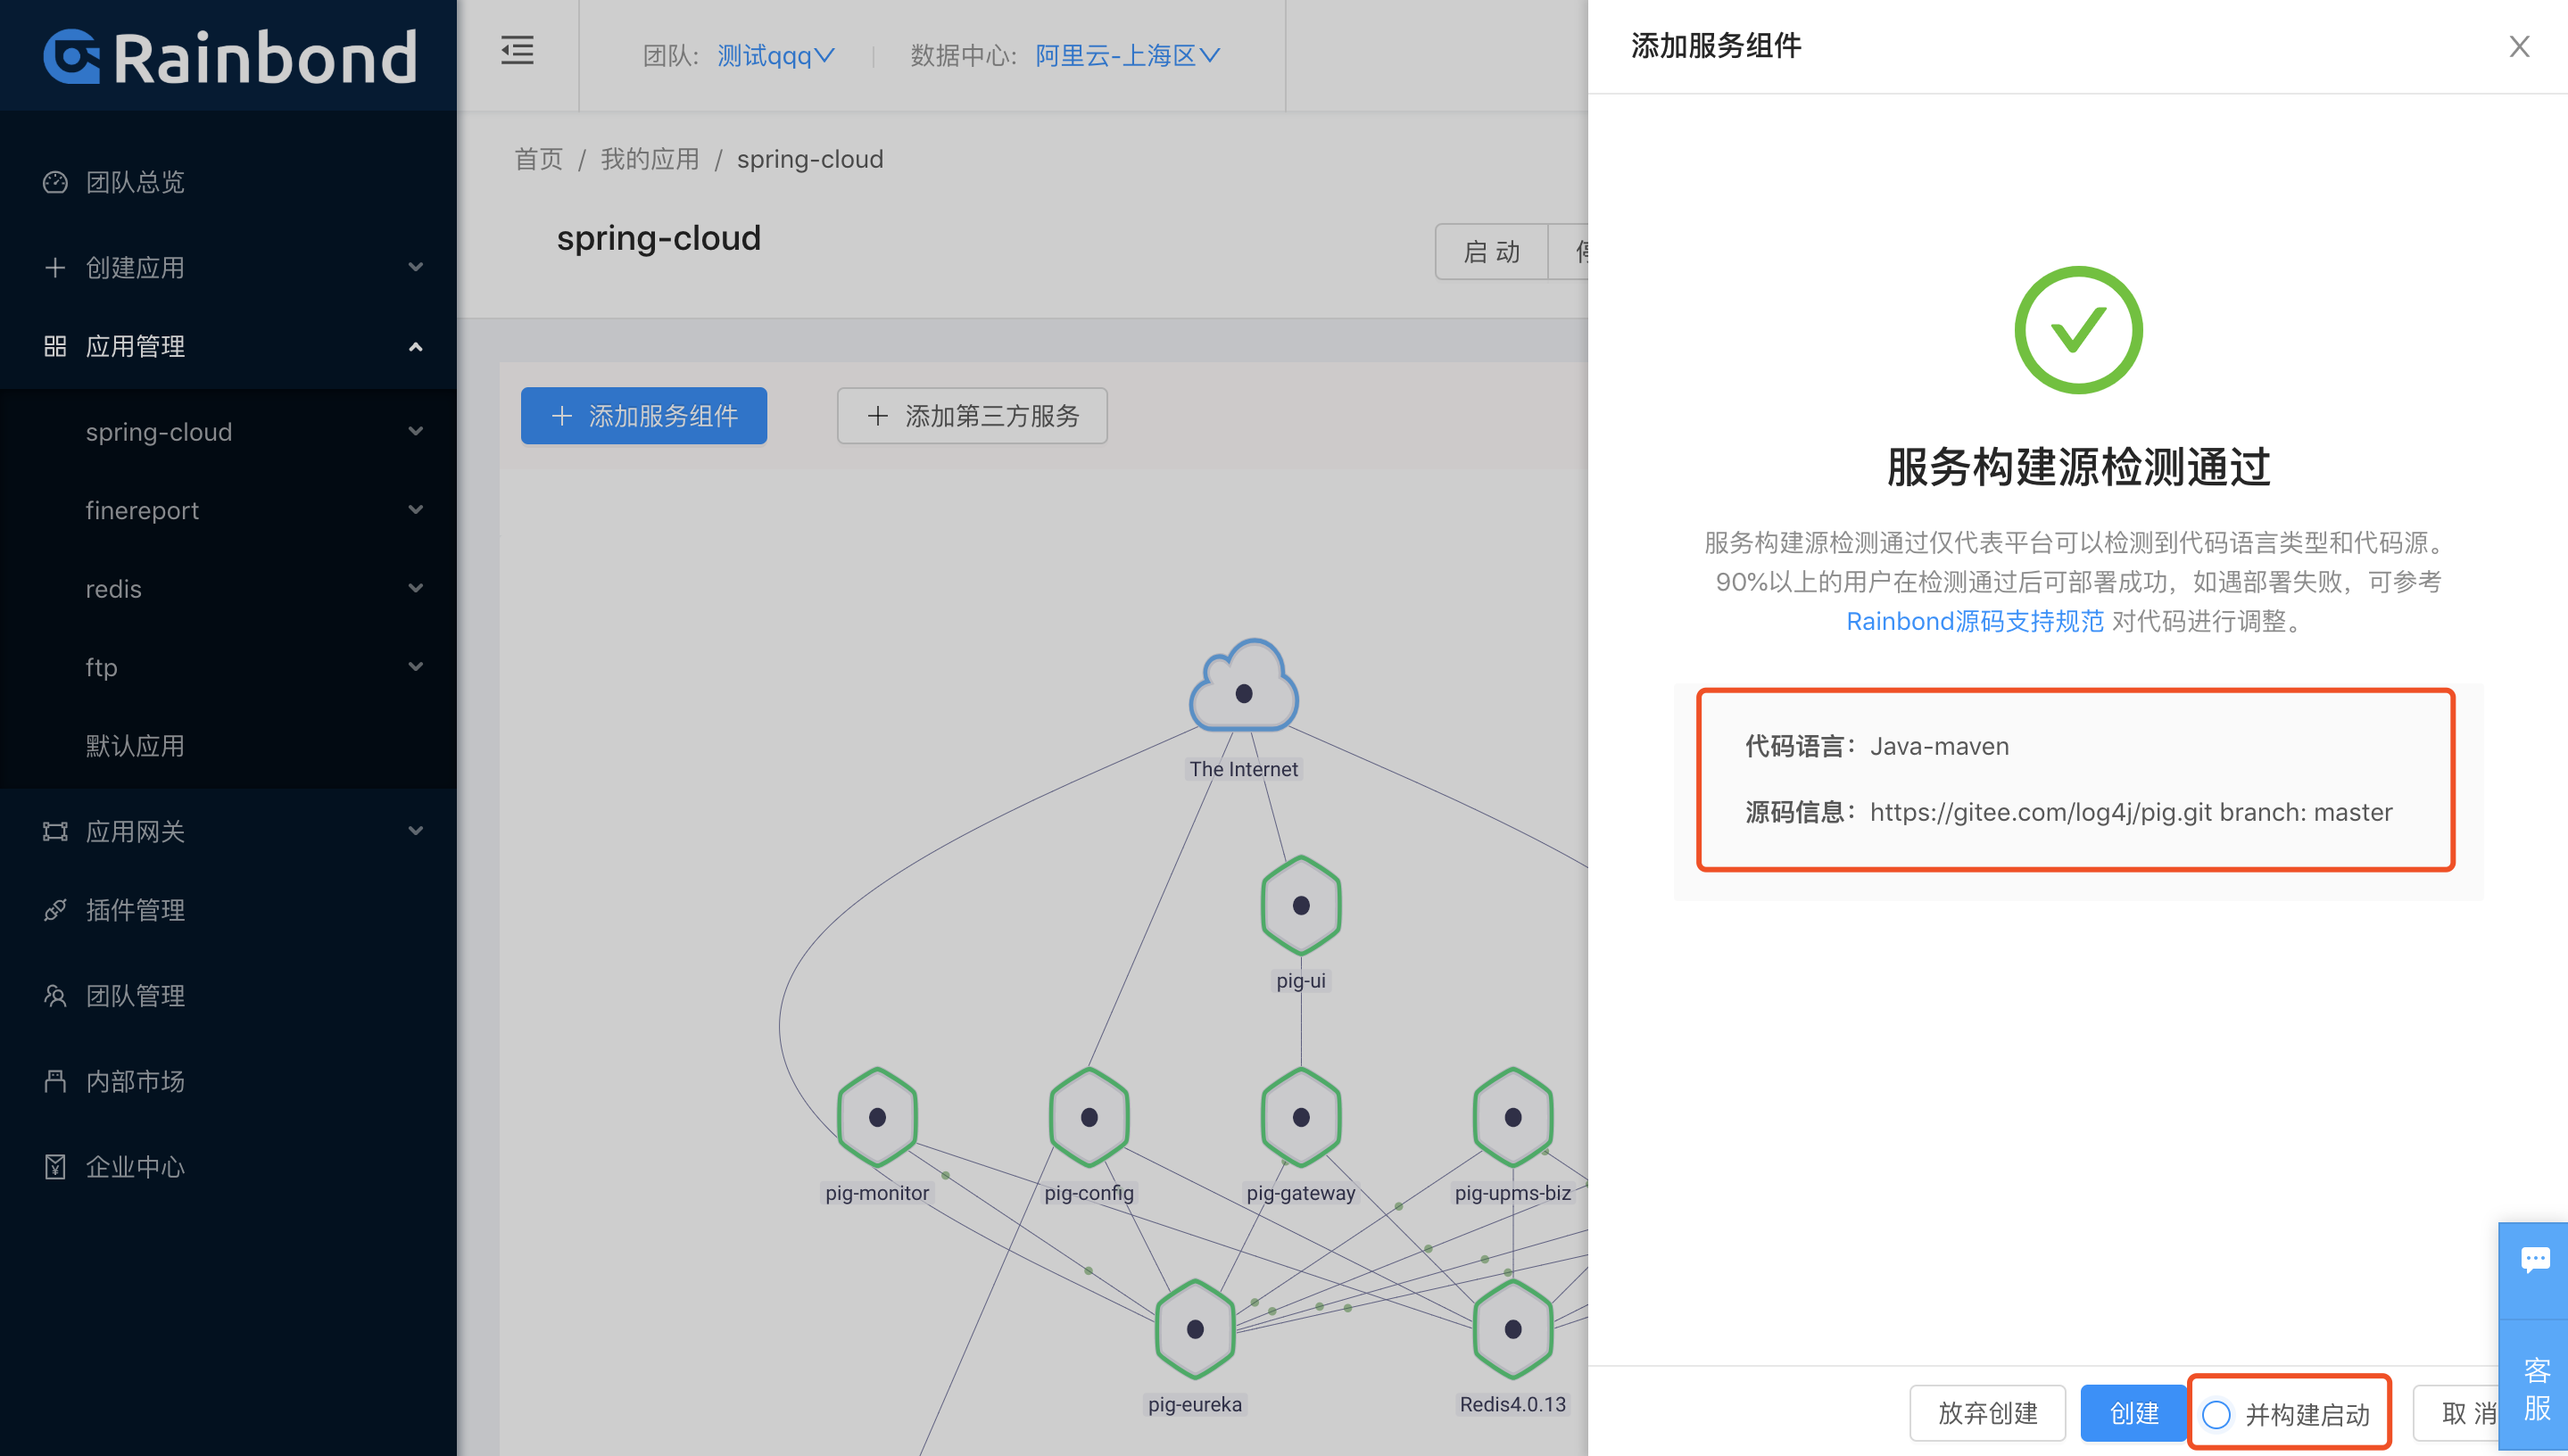
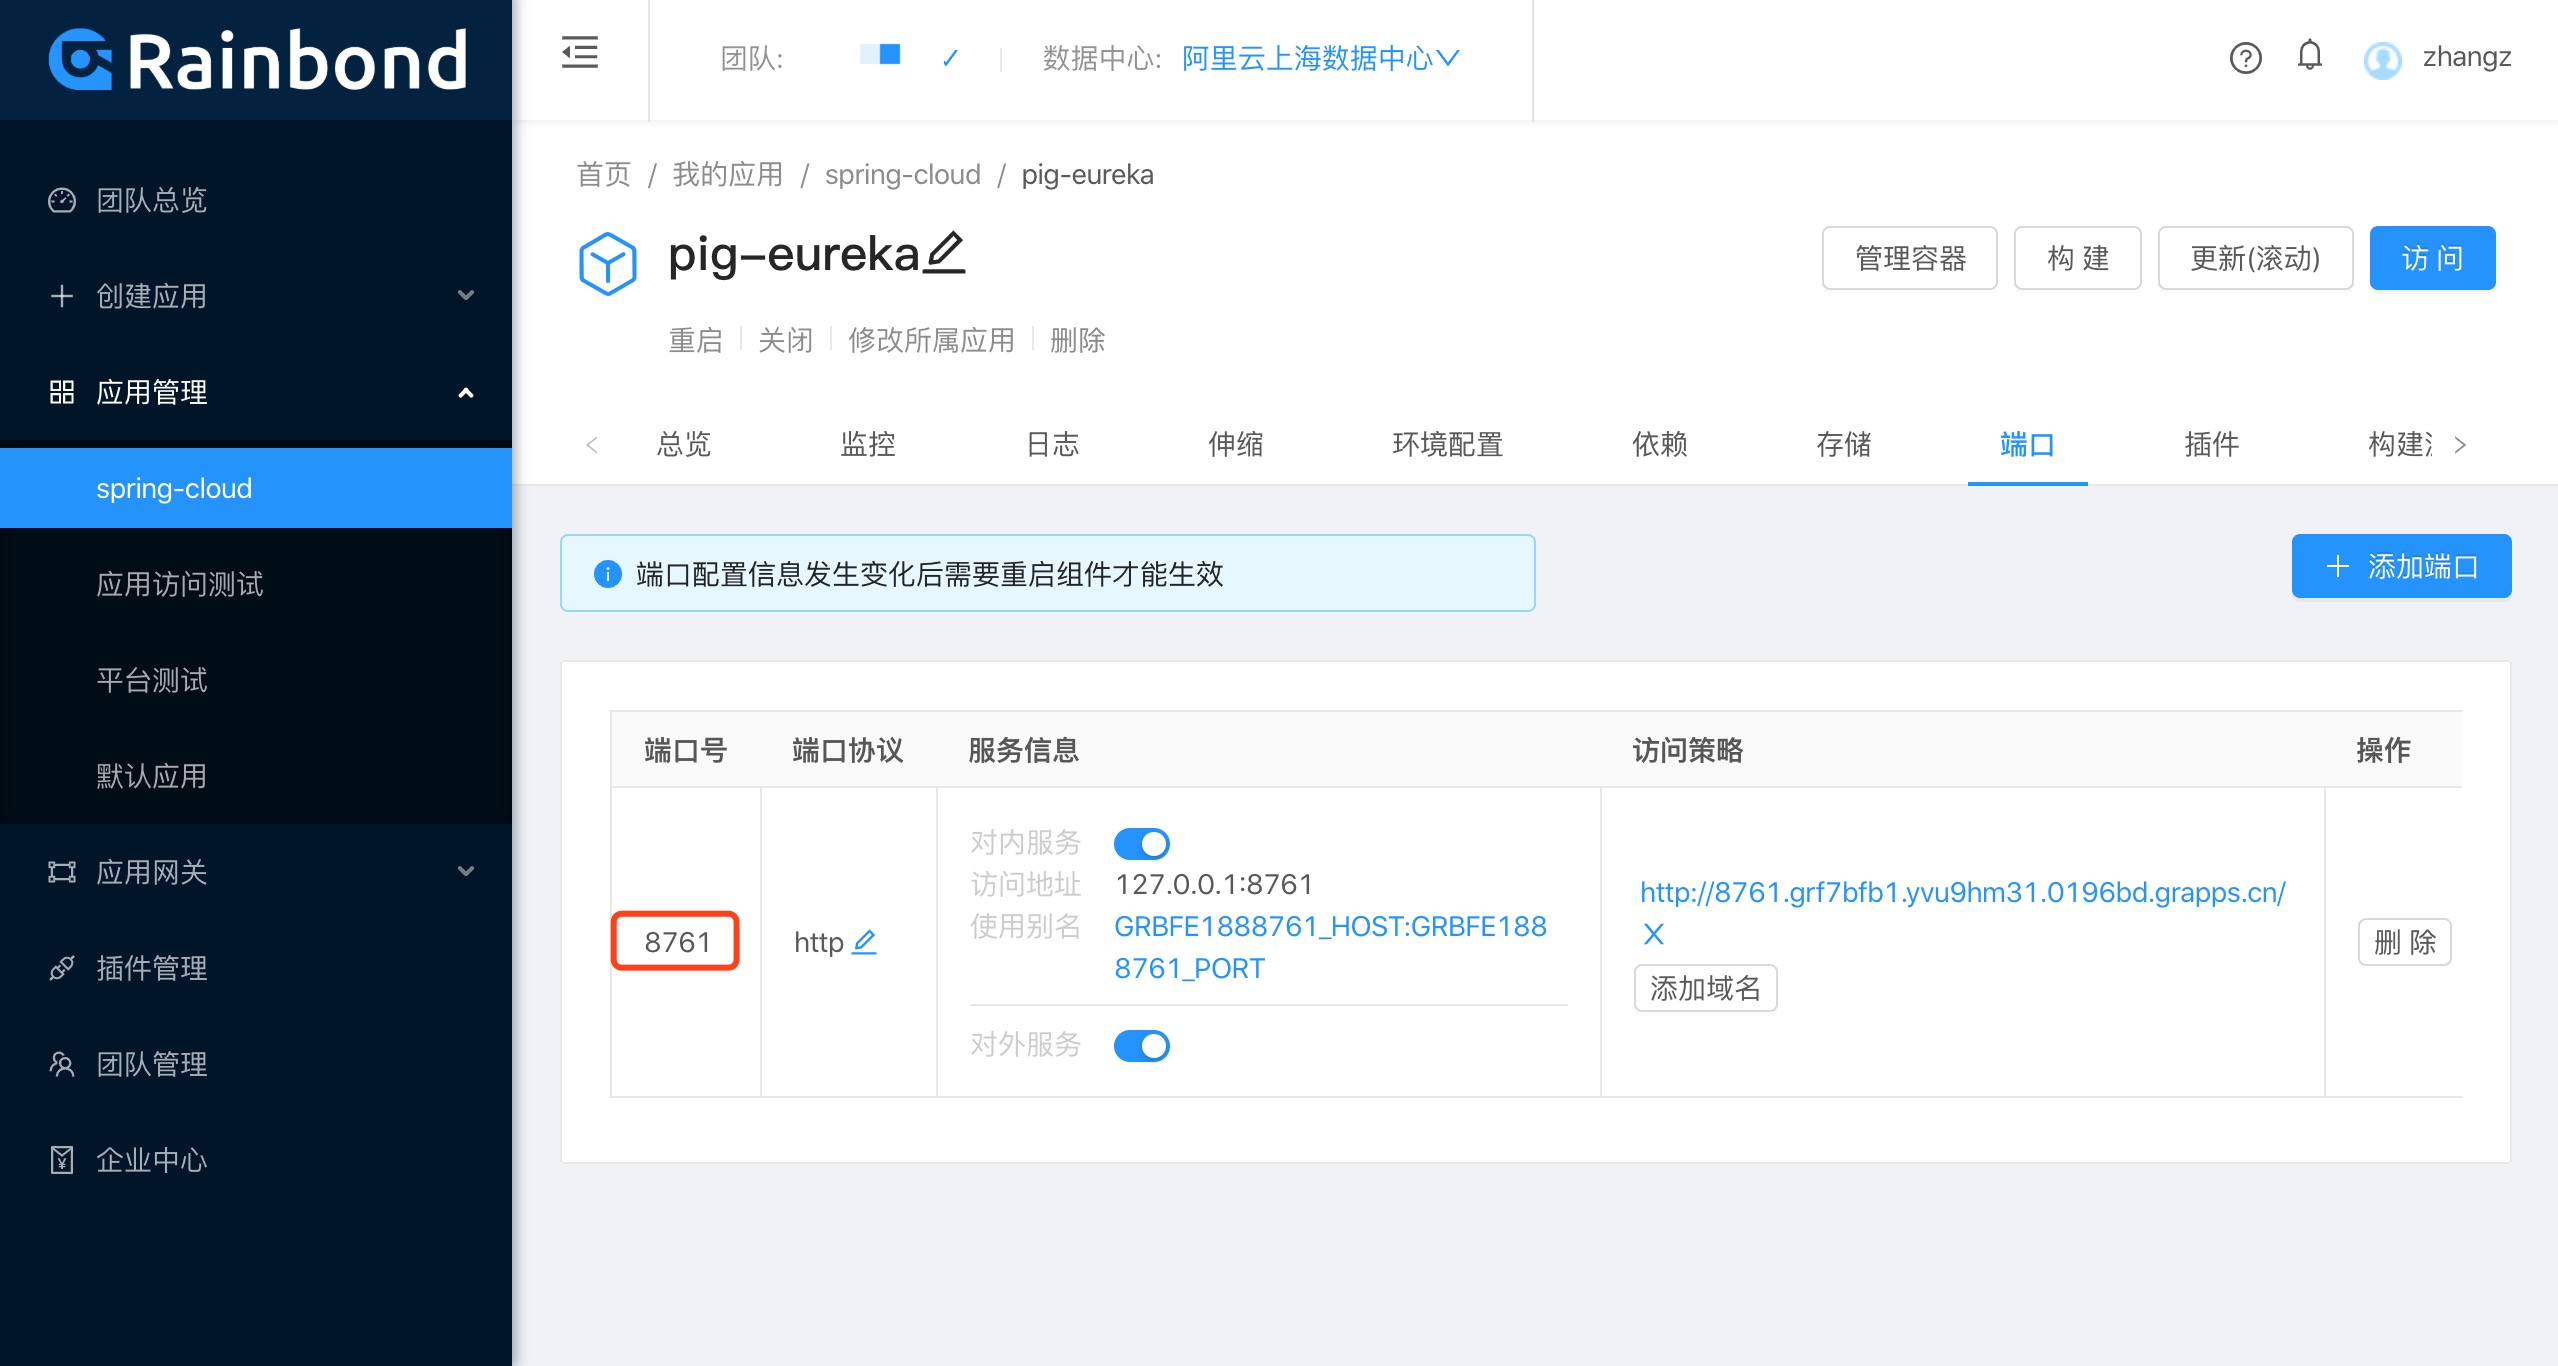
- Click Create to go to the page where the service component is not deployed.Edit the ports tab, open
pig-eurekaown port8761:
pig-eureka needs to be accessed by other microservice components for registration, so open the inbound service to create dependencies later.This component also provides a web page to display the registration status and health status of the microservice components, so open external services for external access.
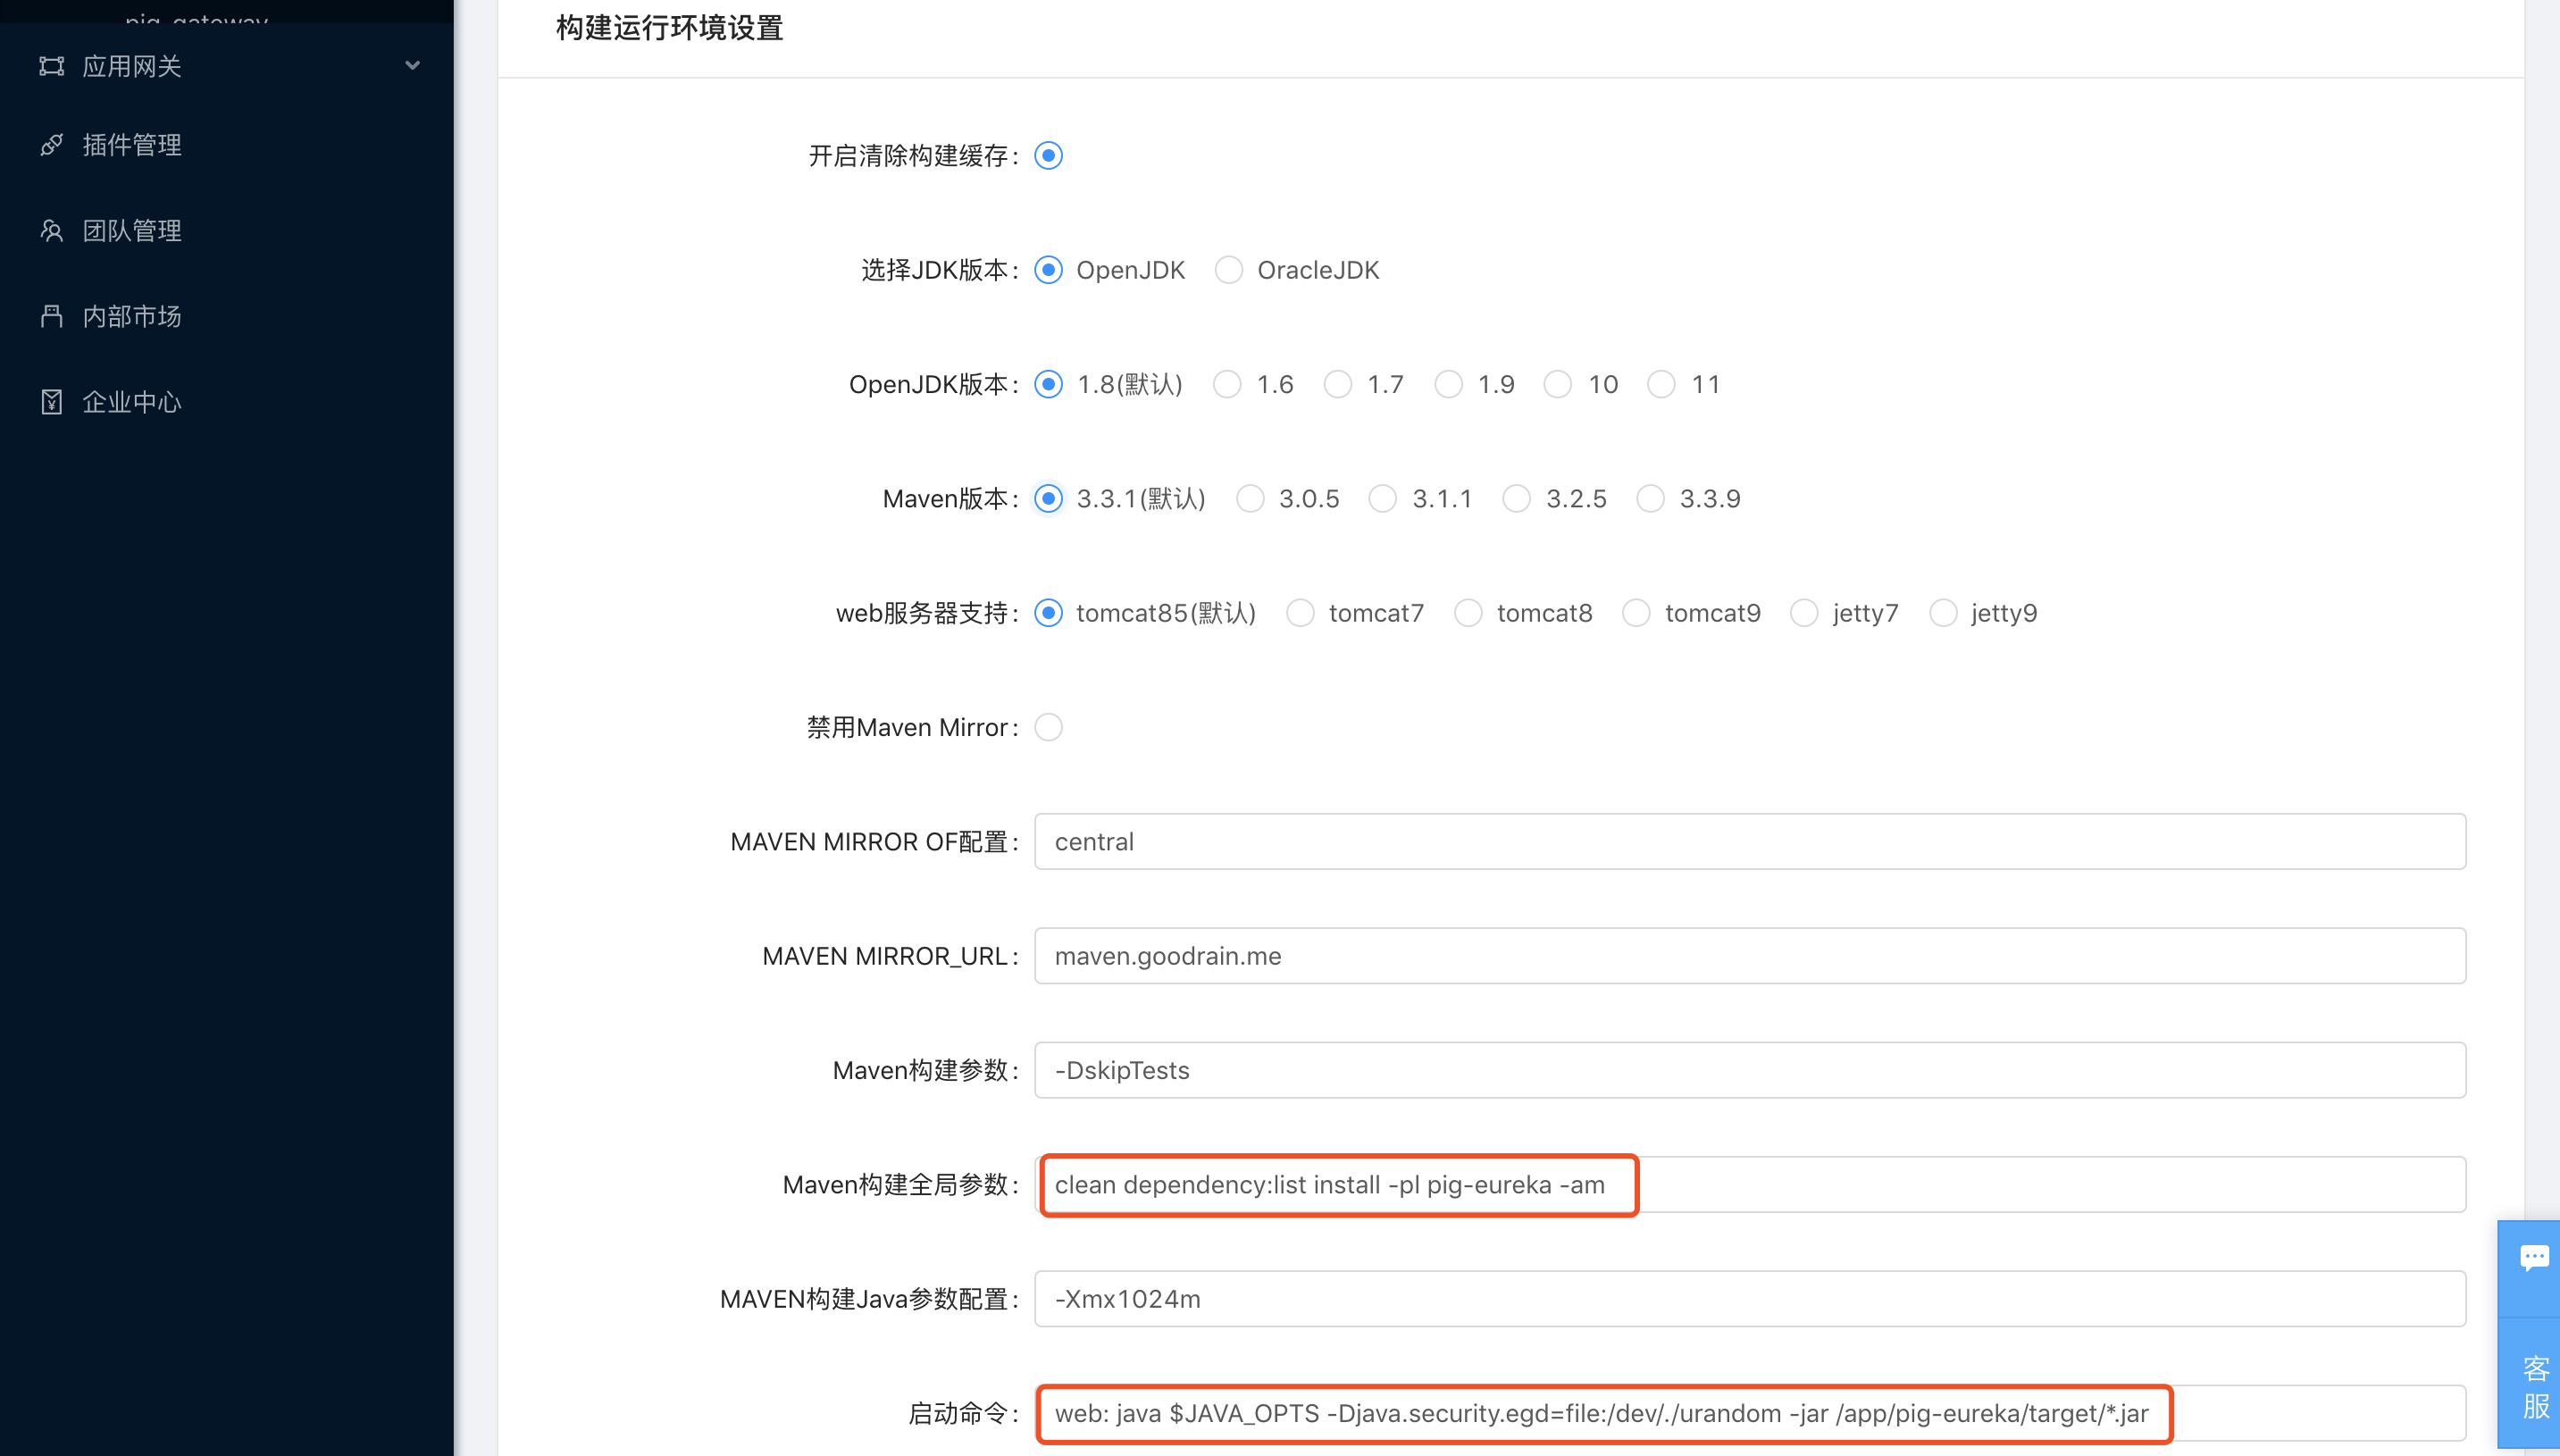
- Edit the build sources tab, specifying
pig-eurekabuild parameters:
Since Pig itself is a multi-module project, it is necessary to specify the module built by the current service component.The way to specify is Maven build global parameters in <code>build run environment settings:clean dependency:list install -pl pig-eureka -am
The above parameters specify the normal submodule construction method. For submodules in another submodule, such as the pig-codegen module, the parameter specification method is: clean dependency:list install -pl pig-visual/pig- codegen -am
In the v5.1+ version of Rainbond, the startup command of the current service component can be specified.The way specified is start command:in <code>build runtime setting web: java $JAVA_OPTS -Djava.security.egd=file:/dev/./urandom -jar /app/pig-eureka/target/*.jar, the command format is consistent with Procfile.
- Edit the dependencies tab, specify that the current service component depends on other service:
The dependencies between the various service components can be specified at creation time.All spring cloud microservice components need to depend on pig-eureka, taking pig-gatewayas an example, the dependencies should be added as follows:
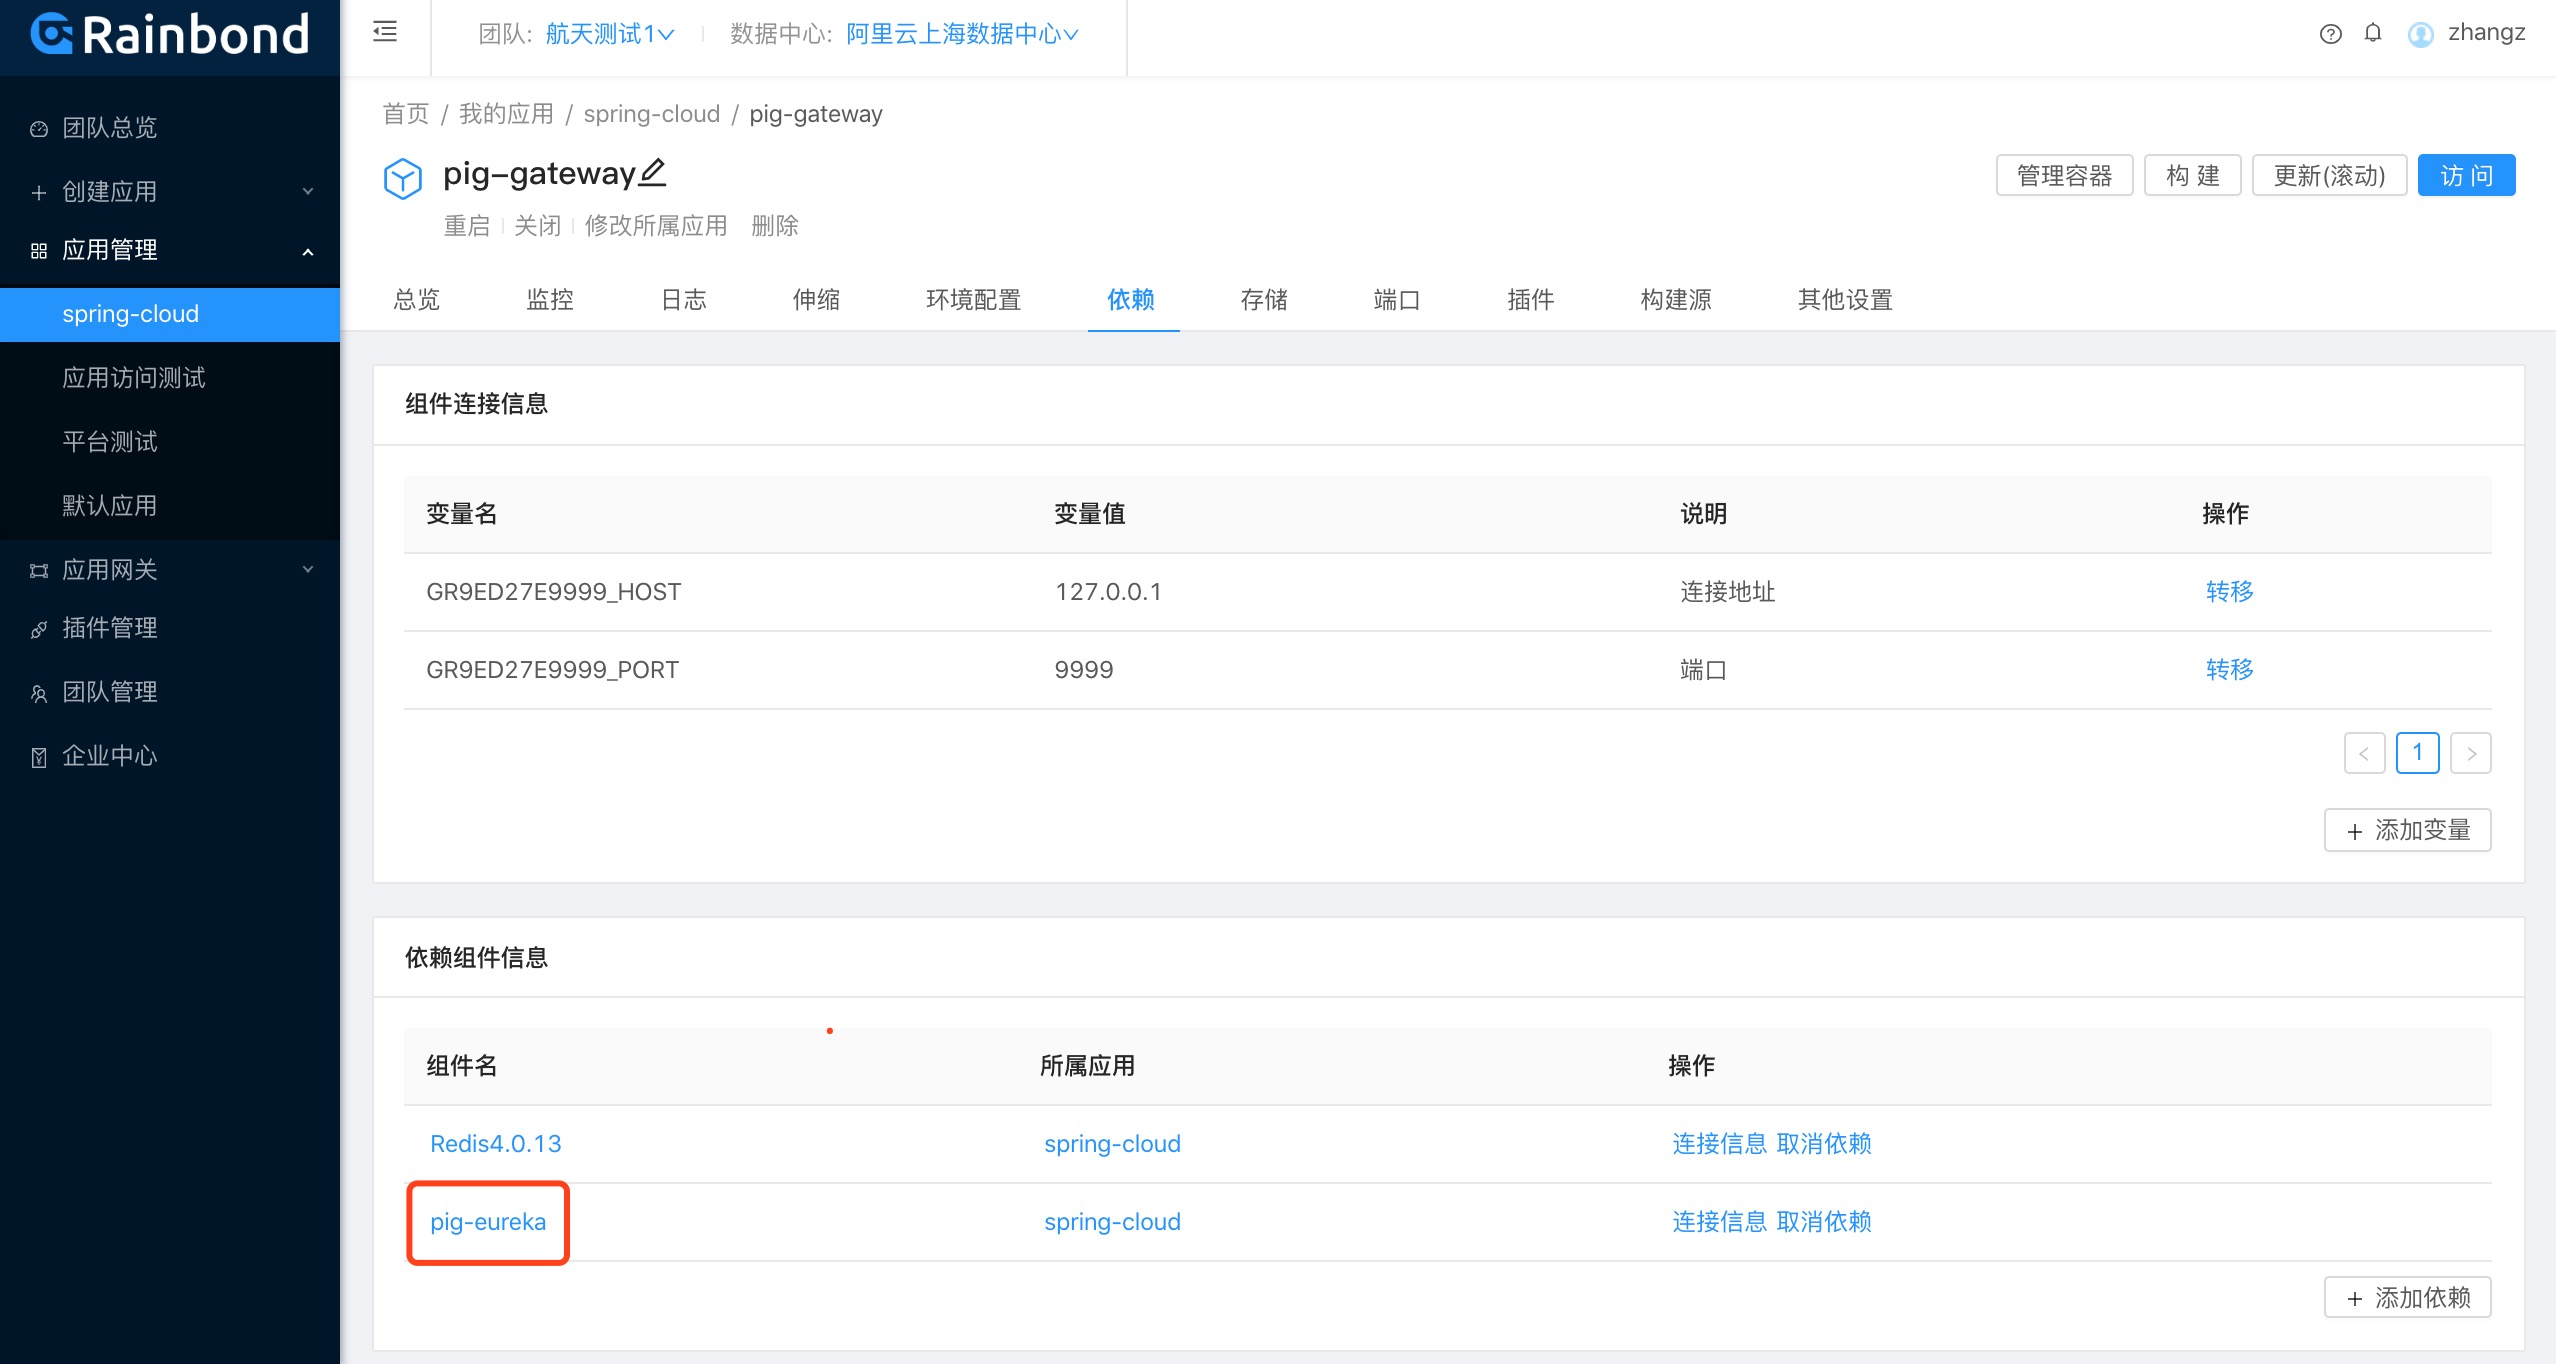
After all the settings are completed, you can click Build. After the build is complete, the service component will automatically run.
All service components are deployed in sequence.
Deploy Mysql
The Pig microservice project needs to deploy Mysql 5.7+ as a data source.And the database initialization script: is provided in the code repository https://gitee.com/log4j/pig/blob/master/db/pig.sql
In order to be able to load the initialization script when the database starts, a Dockerfileis made:
https://github.com/dazuimao1990/pri-percona-mysql.git
FROM percona:5.7.23-stretch
LABEL creater="barnett"
ENV MYSQL_VERSION=5.7.23
ENV TZ=Asia/Shanghai
ADD docker-entrypoint.sh /run/docker-entrypoint.sh
ADD ./run/ docker-entrypoint.sh /usr/local/bin/docker-entrypoint.sh
ADD ./run/mysqld.cnf /etc/mysql/percona-server.conf.d/mysqld.cnf
RUN fetchDeps=' \
        ca -certificates \
        wget \
    ';\
    sed -i 's/
    /mirrors.ustc.edu.cn/g' /etc/apt/sources.list;\11 apt-get update;\
    apt-get install -y --no-install-recommends $fetchDeps; \
    rm -rf /var/lib/apt/lists/*; \
    wget -O /usr/local/bin/env2file -q https:/
    chmod +x /run/docker-entrypoint.sh && chmod +x /usr/local/bin/env2file;\
    apt-get purge -y --auto-remove $fetchDeps
EXPOSE 3306
VOLUME ["/var/lib/mysql", "/var/log/mysql"]
# Put the scripts in the sql directory in the code repository to the corresponding
COPY sql/*.sql /docker-entrypoint-initdb.d/
# change ENTRYPOINT exec some custom command
ENTRYPOINT [ "/run/docker-entrypoint.sh" ]
cmd [ "mysqld" ]
- Add service components for
spring-cloud- start from source - custom repository:
Name the service component pig-dband specify the code branch pig.
Adding ?dir=5.7 to the end of the code repository address url allows Rainbond to specify the build directory as the 5.7 folder in the code repository root.
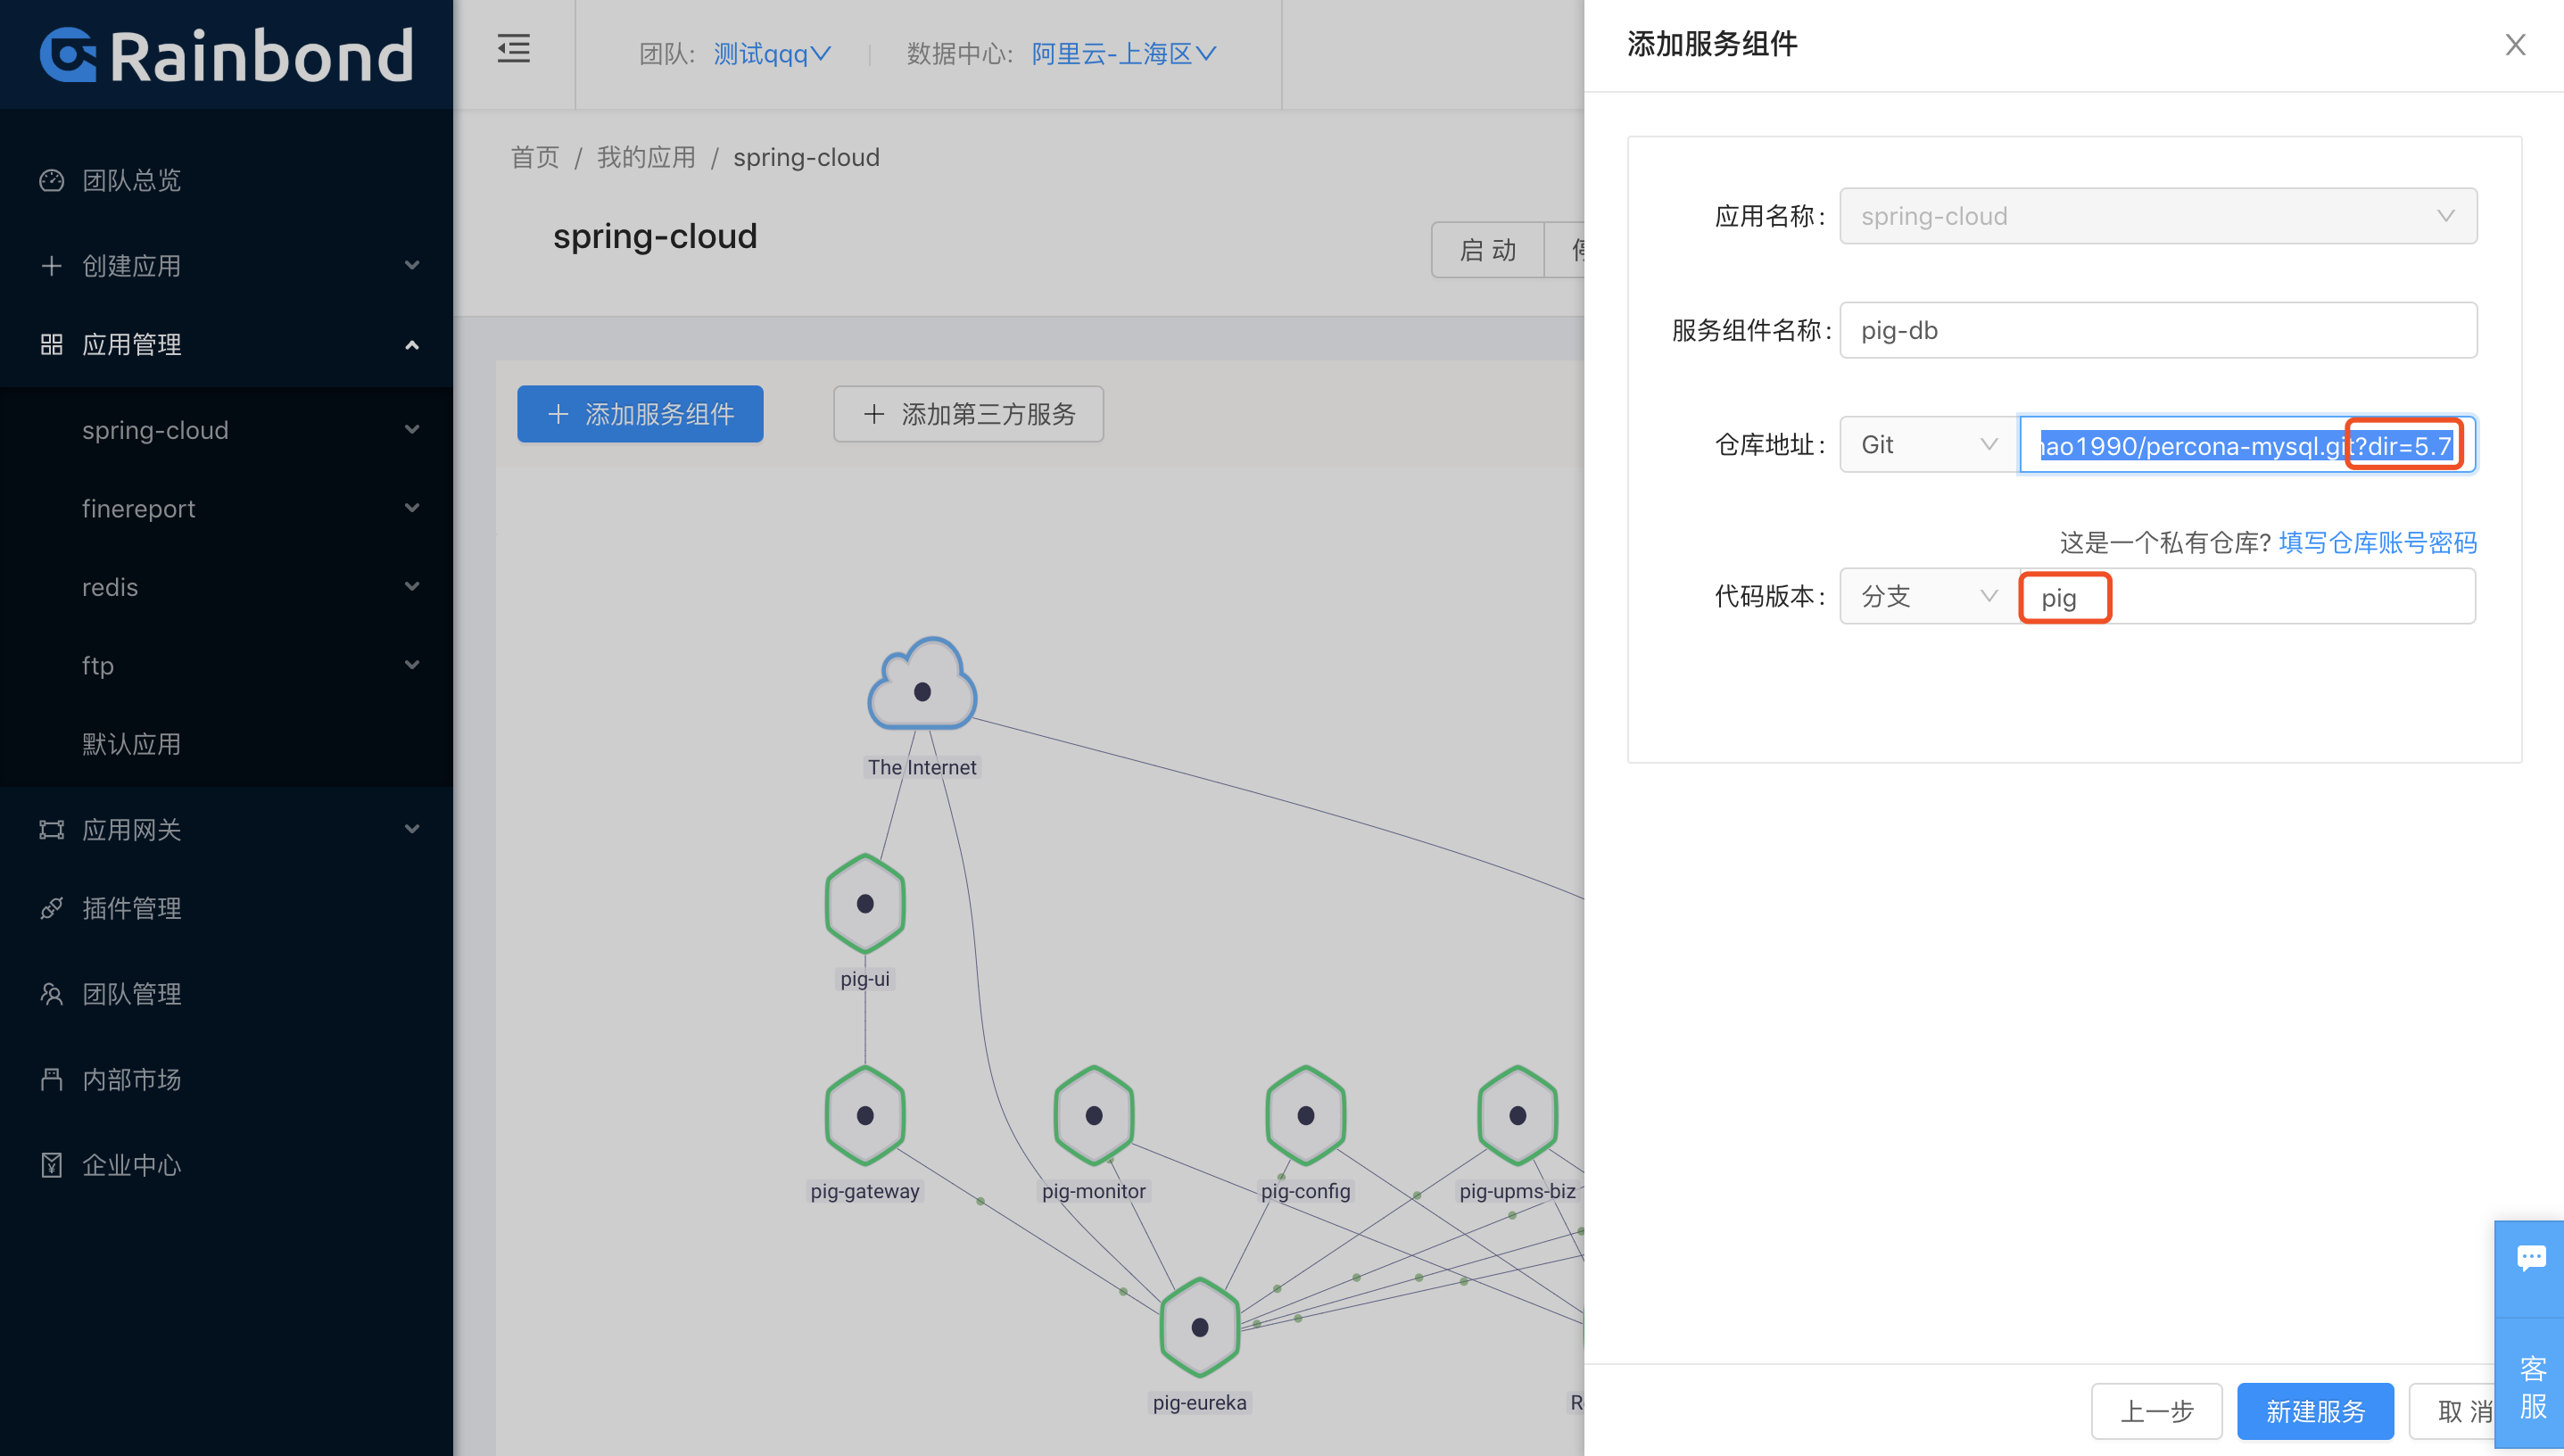
In order for the database to work properly and to be able to obtain connection information from other applications that depend on this database, several environment variables need to be:.
| environment variable name | environment variable value | set location |
|---|---|---|
| MYSQL_USER | root | connection information |
| MYSQL_HOST | 127.0.0.1 | connection information |
| MYSQL_PORT | 3306 | connection information |
| MYSQL_ROOT_PASSWORD | mysqlpassword | connection information |
| MYSQL_DATABASE | pig | connection information |
By modifying the configuration file in pig-config , define the configuration of multiple microservice components connecting to the database:
pig/pig-config/src/main/resources/config/pigx-auth-dev.yml
pig/pig-config/src/main/resources/config/pigx-upms-dev.yml
pig/pig-config/ src/main/resources/config/pigx-codegen-dev.yml
pig/pig-config/src/main/resources/config/pigx-zipkin-dev.yml.yml
The modified example is as follows:
# Data source
spring:
  datasource:
    type: com.zaxxer.hikari.HikariDataSource
    driver-class-name: com.mysql.jdbc.Driver
    username: ${MYSQL_USER}
    password: ${MYSQL_ROOT_PASSWORD}
    url: jdbc:mysql://${MYSQL_HOST}:${MYSQL_PORT}/${MYSQL_DATABASE}?characterEncoding=utf8&zeroDateTimeBehavior=convertToNull&useSSL=false&useJDBCCompliantTimezoneShift=true&useLegacyDatetimeCode=false&serverTimezone=Asia/Shanghai
Deploy Redis
Redis 4.0.13 can be installed directly through the Rainbond application market.
This version of Redis provides connection information:by default

Define the configuration for all service components to connect to Redis by modifying pig-config in pig/pig-config/src/main/resources/config/application-dev.yml:
The modified example is as follows:
# Spring related
spring:
  redis:
    password: ${REDIS_PASS}
    host: ${REDIS_HOST}
Deploy pig-ui
pig-ui is a vue project written in nodejs language as a front-end static page for the whole system.Rainbond currently supports source code construction nodejs front-end project, reference document:NodeJS front-end language
In order to facilitate the transformation of the project, a fork of the project was made for modification, code address:https://gitee.com/dazuimao1990/pig-ui
Referring to the Rainbond code support specification, the identification file: nodestatic.jsonhas been added to the code root directory
{"path":"dist"}
And added the nginx configuration file in the code repository: www/web.conf for handling proxy forwarding:
server {
    listen 80;
    root /app/www;

    location ~* ^/(code|auth|admin|gen) {
        proxy_pass http://127.0.0.1:9999;
        proxy_connect_timeout 15s;
        proxy_send_timeout 15s;
        proxy_read_timeout 15s;
        proxy_set_header X-Real-IP $remote_addr;
        proxy_set_header X-Forwarded-For $proxy_add_x_forwarded_for;
    }
}
Use this code to build the source code to complete the deployment of the pig-ui service component.
Dependency and port combing
| service component name | rely | Port inbound service | Port external service |
|---|---|---|---|
| pig-ui | pig-gateway | off | on |
| pig-gateway | pig-eureka Redis | on | off |
| pig-monitor | pig-eureka Redis | off | off |
| pig-config | pig-eureka | off | off |
| pig-upms-biz | pig-eureka pig-db Redis | off | off |
| pig-zipkin | pig-eureka pig-db Redis | off | on |
| pig-auth | pig-eureka Redis | off | off |
| pig-codegen | pig-eureka pig-db Redis | off | off |
final result
After the deployment is completed, the topology diagram is as follows:

Login effect:
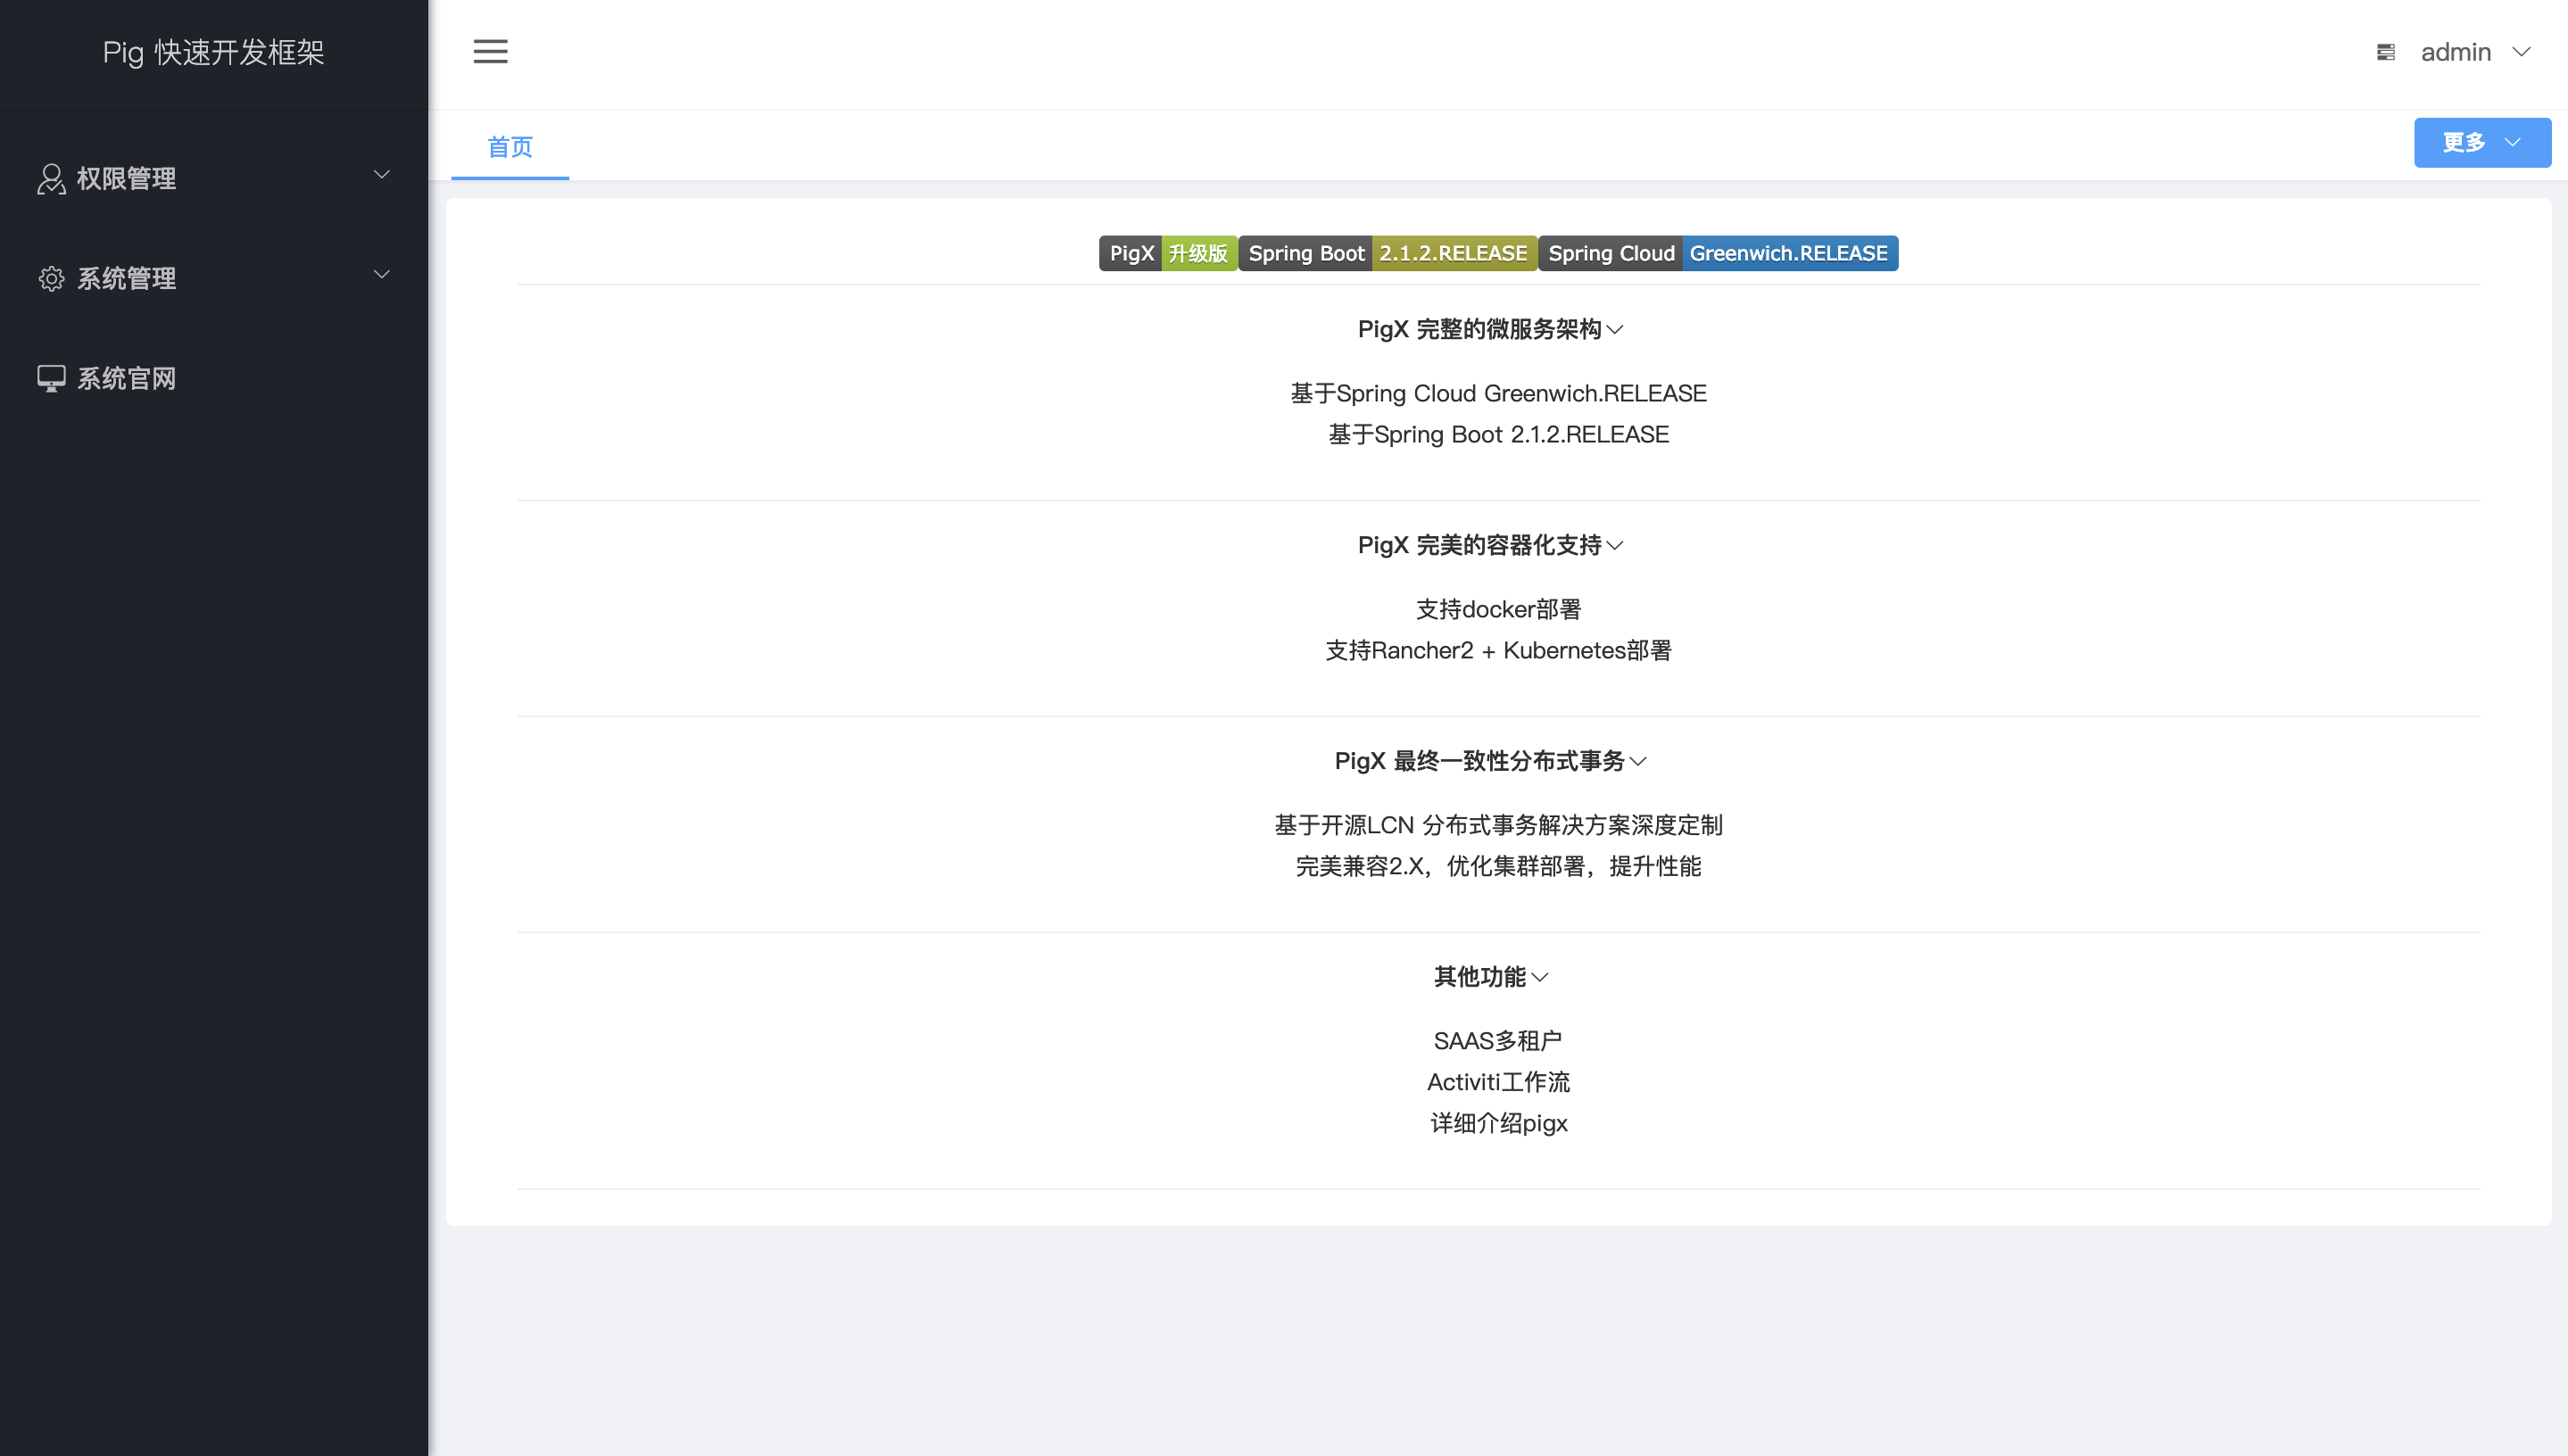
Login account password:
admin
123456